Exploring Divi 5’s New Top Bar UI
The top navigation bar sits at the center of everything you do in Divi. So even small changes to how it’s organized can shift the entire editing experience. As Divi 5 brought in more tools and shortcuts, the top bar started carrying too much at once. Finding something as simple as the preview button took more attention than it should have.
This update reorganizes the top bar to fix that. We’ll walk you through what changed, where everything lives now, and how it fits into your editing workflow.
Why The Divi 5 Top Bar Was Updated
Here’s the previous top bar alongside the updated one.
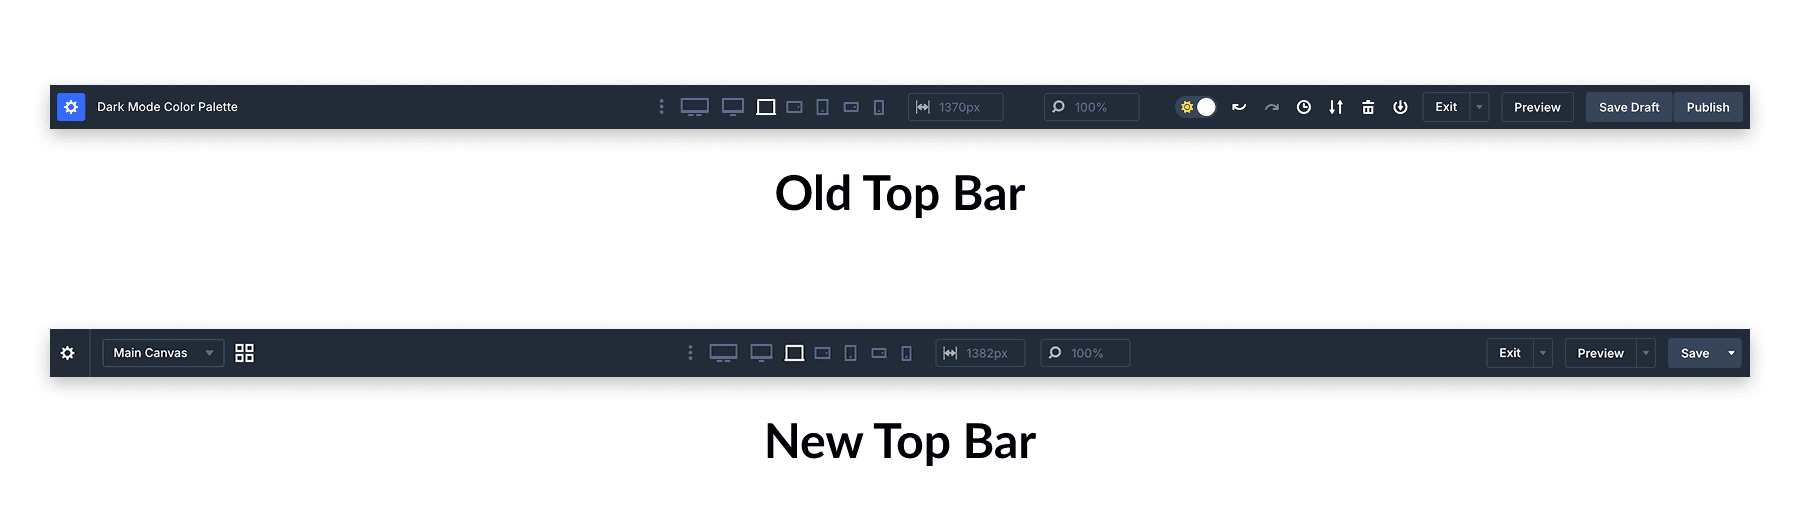
In the old layout, every action sat at the same level. Save, preview, undo, view switching, page settings, all visible at once with barely any separation between them. Nothing guided your eye to what mattered most, so finding a specific tool meant reading through everything. Controls you reach for fifty times a day sat right next to options you might open once a session.
The updated bar keeps all those tools. They’re just organized differently now. Related actions are grouped into menus, frequently used controls sit closer to the surface, and the bar has room to breathe. The idea is simple: make everyday actions feel instant and keep everything else one click away.
With that in mind, let’s walk through each area of the new top bar so you can see where things landed.
A Walkthrough Of The Updated Divi 5 Top Bar
Starting on the left and moving right, here’s what each area includes.
1. Page Menu (Page-Level Controls)
The Page Menu groups everything related to managing the page itself, not its elements. You’ll find it behind the gear icon on the far left of the top bar.
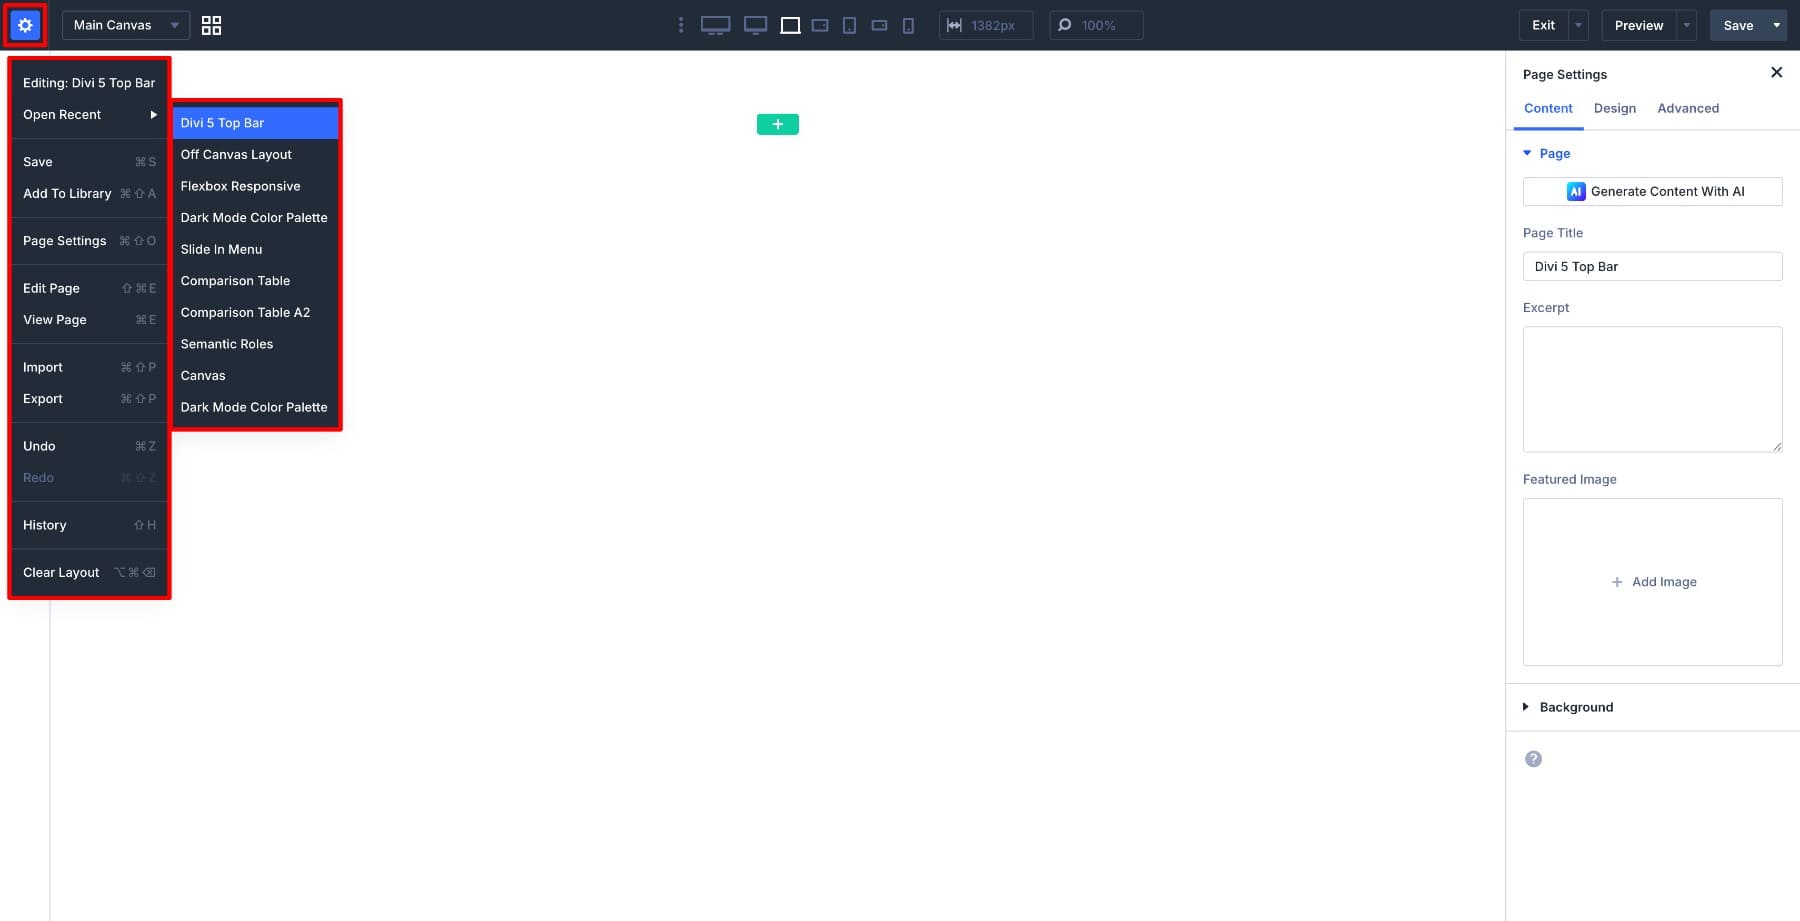
Once open, the menu is split into a few clear sections:
- Editing Context & Recent Pages: At the top, you’ll see the name of the page you’re currently editing, which is helpful when you’re jumping between multiple pages in one session. Below that, Open Recent lets you switch to other recently edited pages without leaving the builder.
- Page Actions: This is where you’ll find Save, Add To Library, Page Settings, Edit Page, and View Page. From here, you can save your work, adjust page-level settings like title, excerpt, and featured image, open the WordPress editor, or view the live page.
- Import & Export: These let you move layouts in and out of Divi. Export a layout to reuse later, or import one into the current page. Handy for sharing templates or transferring designs between sites.
- Undo, Redo & History: Step backward or forward through recent changes, or open the full History panel to jump back to a specific point in your session.
- Clear Layout: Removes all content from the current page. Because that’s a big reset, it’s placed at the bottom of the menu to reduce accidental clicks.
2. Canvases
From the top bar, you can switch between your Main Canvas and any additional canvases (like off-canvas layouts) without leaving the builder. The Canvas Grid View gives you a visual overview of all available canvases so you can open and manage them from one place.
3. Responsive View & Breakpoint Controls
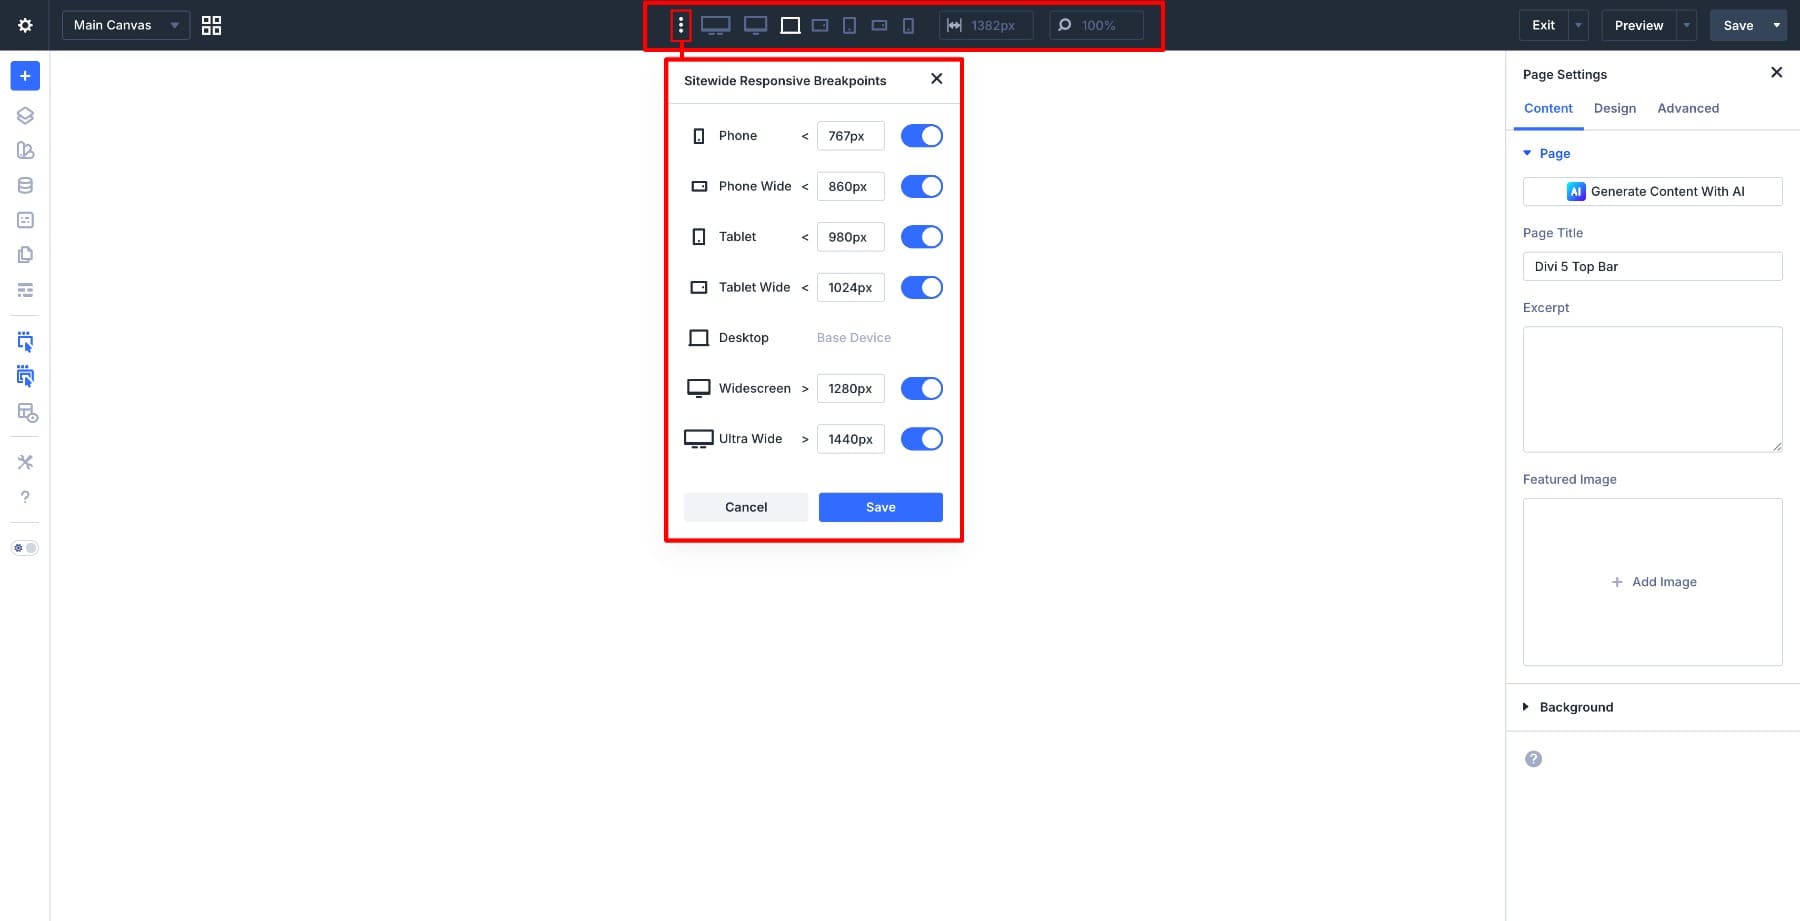
- Sitewide Responsive Breakpoints: The three-dot menu opens a modal where you can enable or disable breakpoints and set their exact pixel widths (Phone, Phone Wide, Tablet, Tablet Wide, Widescreen, Ultra-Wide). These apply across your entire site, keeping responsive behavior consistent on every page.
- Responsive View Switcher: Click a device icon to preview and edit your layout at that breakpoint. Since these views are tied to your sitewide settings, what you see here reflects the exact widths you’ve defined.
- Canvas Width Control: Shows the current canvas width in pixels and lets you adjust it manually. Useful when you want to test how your layout behaves at a specific width beyond the preset device sizes.
- Zoom Control: Adjusts the canvas size in the builder without affecting the actual layout or front-end output. It’s purely for your comfort while editing.
4. Exit Options
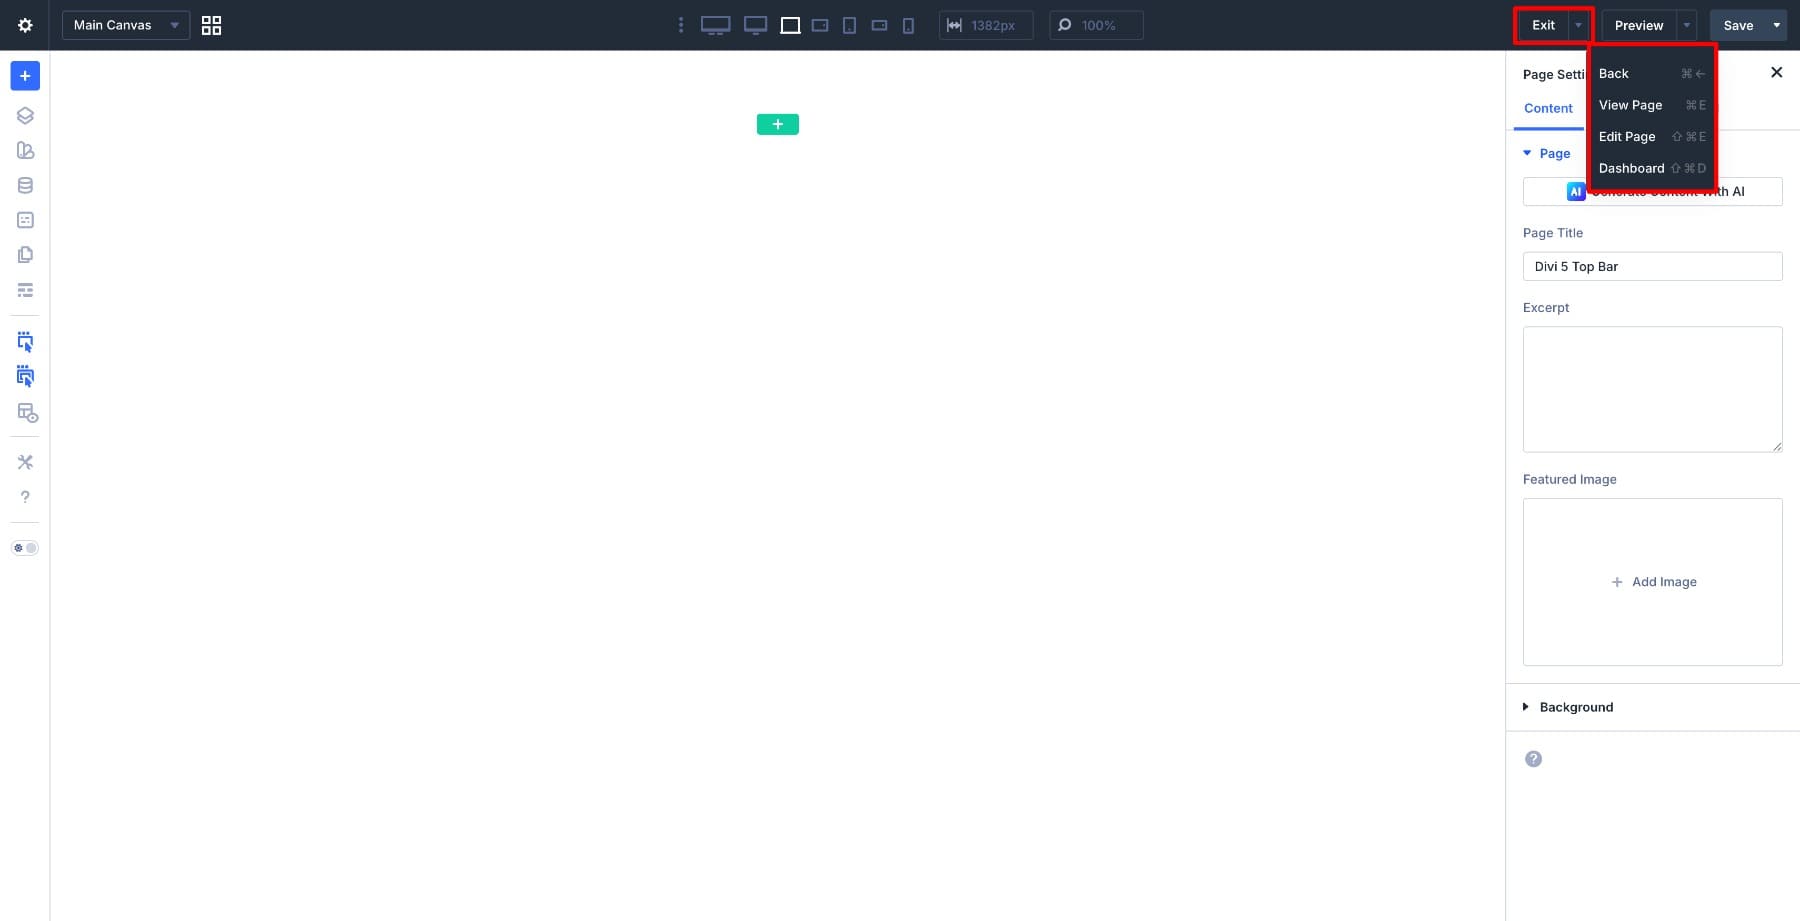
The Exit menu lets you leave the builder without having to guess where you’ll end up. You can return to the previous screen, view the page on the front end, open the WordPress editor, or head straight to the dashboard.
5. Preview Options
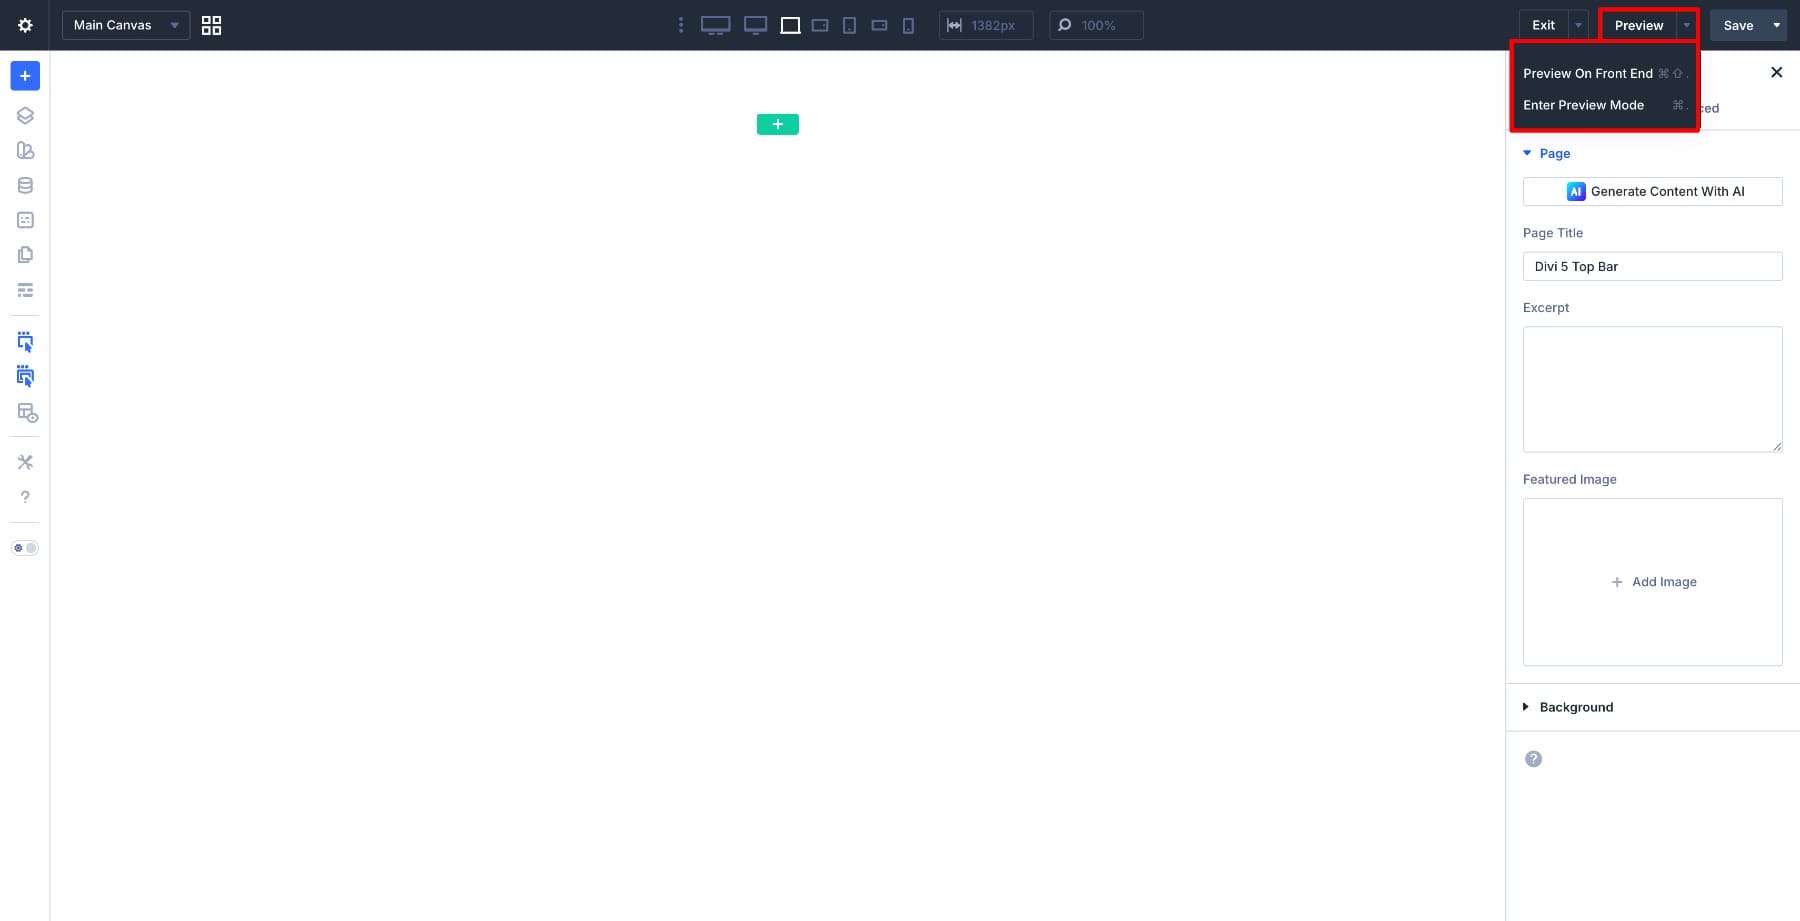
The Preview menu gives you two ways to check your work. You can open a front-end preview in a new tab, or Enter Preview Mode to see the page right inside the builder. Preview Mode is the faster option since it lets you review layout, spacing, and interactions without leaving your workspace.
6. Save Options
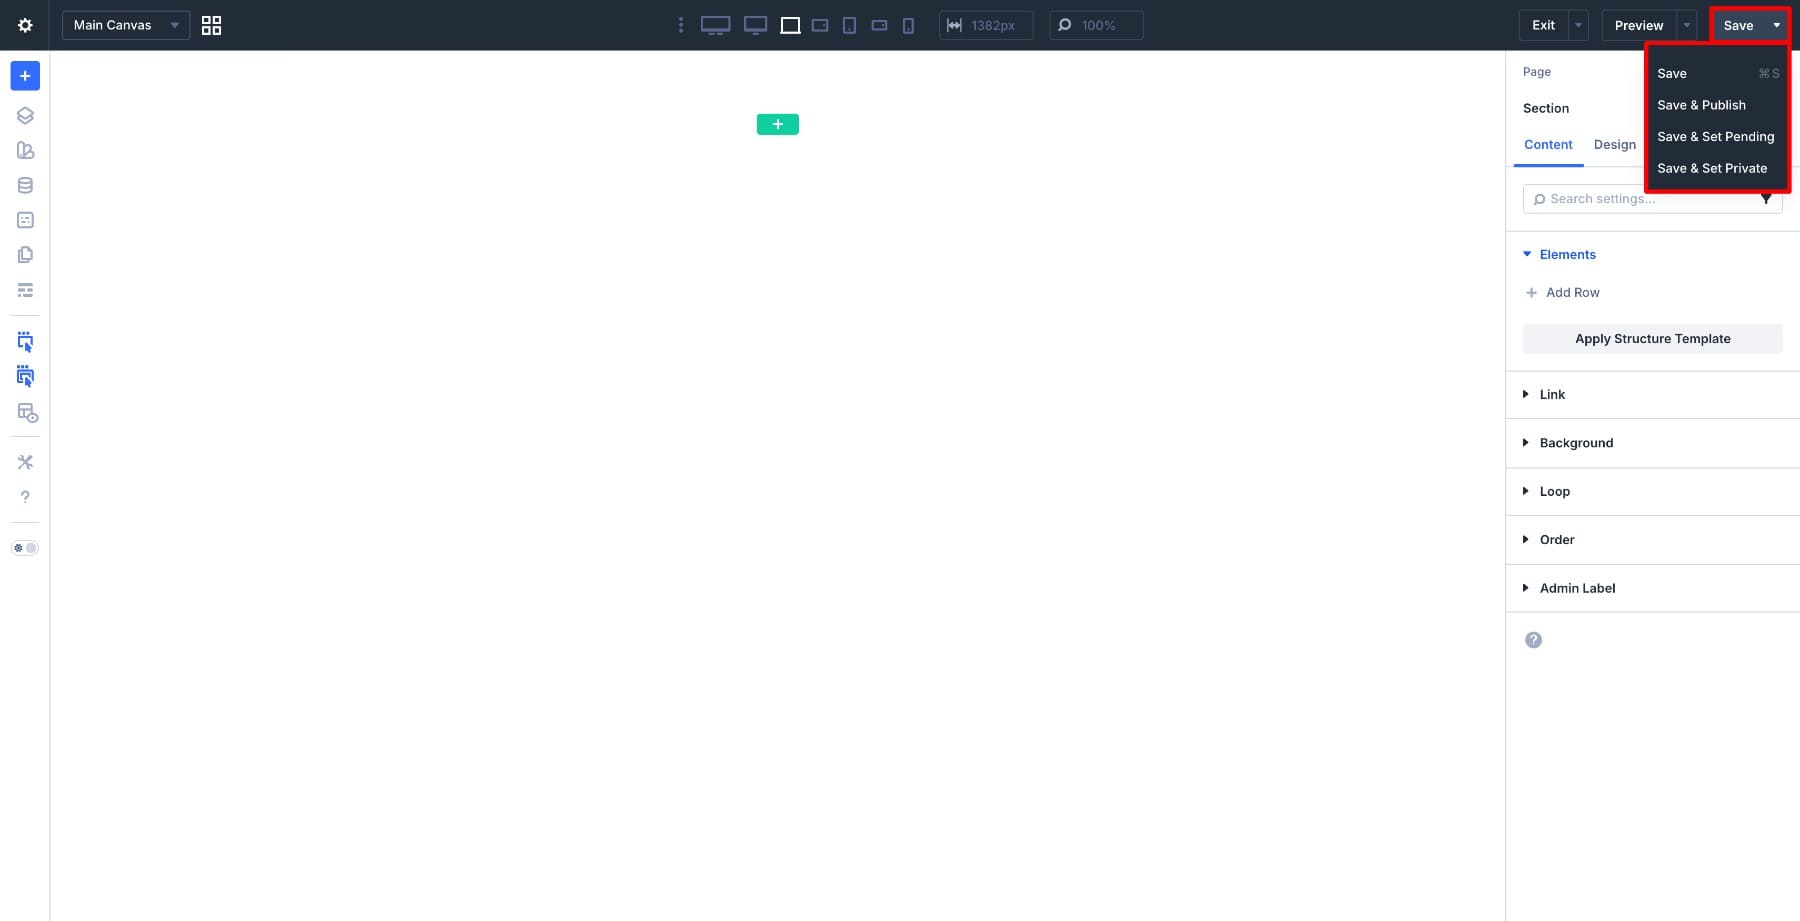
From the Save menu, you can choose which post status to save as: draft, pending review, private, or publish. Each option corresponds to a different stage in your workflow, from early drafts to final publishing.
That’s the full tour. The top bar looks different, but nothing is missing. If anything, it should feel like things are exactly where you’d expect them to be.
Prefer the Old Icon Layout? You Can Restore It
If you prefer the previous icon-based top bar, you can switch back at any time. This is worth knowing if you’re already comfortable with the older layout, follow tutorials built around it, or want to keep the interface consistent across a team. All you need to do is enable the Page Bar Icons in the builder’s settings panel.
![]()
The simplified bar is the default, but the option to restore the icon layout is always there.
A Simpler Top Bar Without Losing Control
The updated top bar doesn’t change what you can do in Divi 5. It changes how quickly you can find it. Every tool is still there, just arranged so that everyday editing feels less cluttered and more focused.
Try it out in Divi 5 today, along with all other new features that we’ve been rapidly releasing!
The post Exploring Divi 5’s New Top Bar UI appeared first on Elegant Themes Blog.
The Tech Zone


Comments
Post a Comment