How To Add Semantic Roles To Elements In Divi 5
For years, Divi gave you CSS IDs and Classes for elements. That worked fine for styling and scripting, but attributes like ARIA roles or focus attributes, such as tabindex, required third-party plugins or custom code.
Not anymore. Divi 5 introduces Custom Attributes that let you add semantic roles directly in the builder. You can now design pages that work better with assistive technology without leaving Divi or writing extra code. This tutorial guides you through the most useful semantic roles and demonstrates how to apply them in Divi 5.
What Are Semantic Roles?
Semantic roles inform browsers and assistive technology about the actual function of an element on your page. When you add role=”navigation” to a div container, you’re creating a landmark that screen readers can identify and jump to directly. Users can skip past content they don’t need and land exactly where they want to go.
Subscribe To Our Youtube Channel
That capability matters because accessibility has become a baseline requirement for modern websites. Semantic markup helps assistive technology understand your page structure, so users can jump between landmarks and sections instead of navigating everything in a single, linear pass. Search engines can use semantic HTML and structural cues to better comprehend your content, but roles are primarily intended for accessibility and do not guarantee ranking improvements.
Common Roles To Use (With Examples)
Not every role applies to every situation. The ones below cover the most practical use cases you’ll encounter when building with Divi, and choosing the right one depends on what the element actually does on your page, not how it looks or where it sits in your layout.
The table below breaks down the most useful semantic roles, what they mean, and when to use them.
| Role | Where To Use | Code Example |
|---|---|---|
| banner | Top site header | header role="banner" |
| navigation | Menus and nav bars | nav role="navigation" |
| main | Primary content container | main role="main" |
| complementary | Sidebars | aside role="complementary" |
| contentinfo | Footer or site info | footer role="contentinfo" |
| button | Clickable elements not using | div role="button" |
| link | Clickable text elements | span role="link" |
| img / presentation | Decorative icons or images | img role="presentation" |
| form, search, textbox | Forms and inputs | form role="search", input role="textbox" |
| alert | Notifications or warnings | div role="alert" |
| dialog | Popups or modals | div role="dialog" |
Tip: Roles should describe what the element does, not how it looks. A sidebar might visually appear on the side of your page, but if it contains supplementary content, role=”complementary” is what matters. Focus on function, not position or appearance.
How To Add Roles in Divi 5
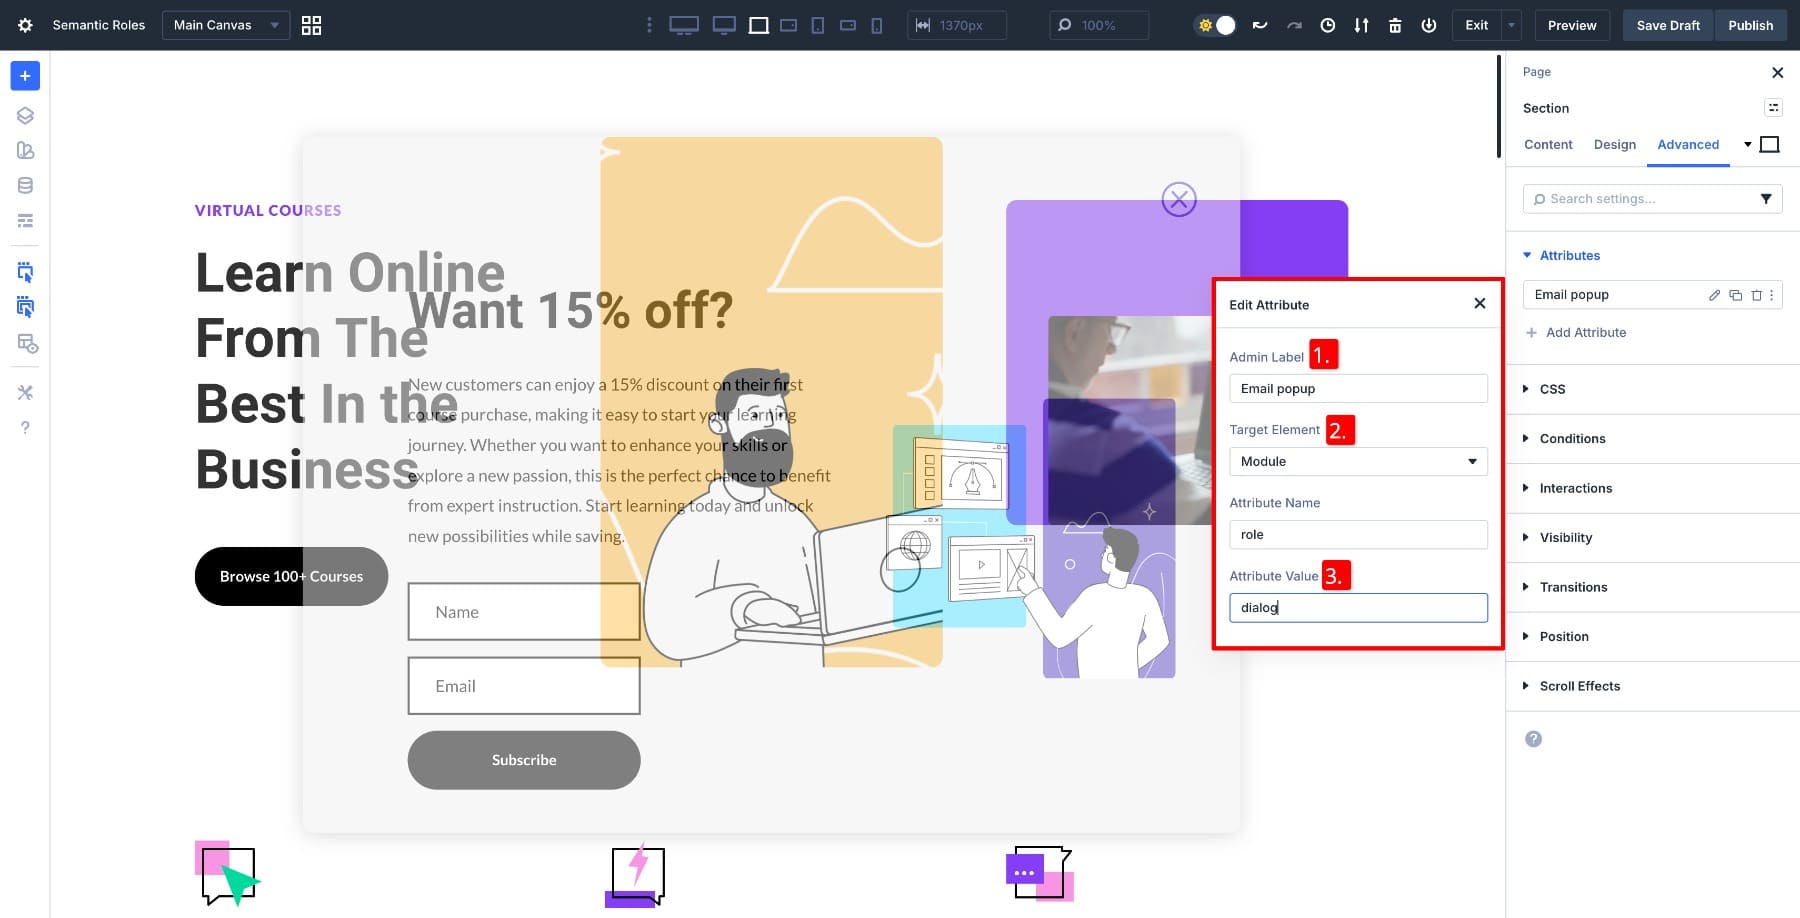
Now that you know which roles to use, let’s walk through how to add one. We’ll use a scroll-triggered email popup as an example and mark it as a dialog.
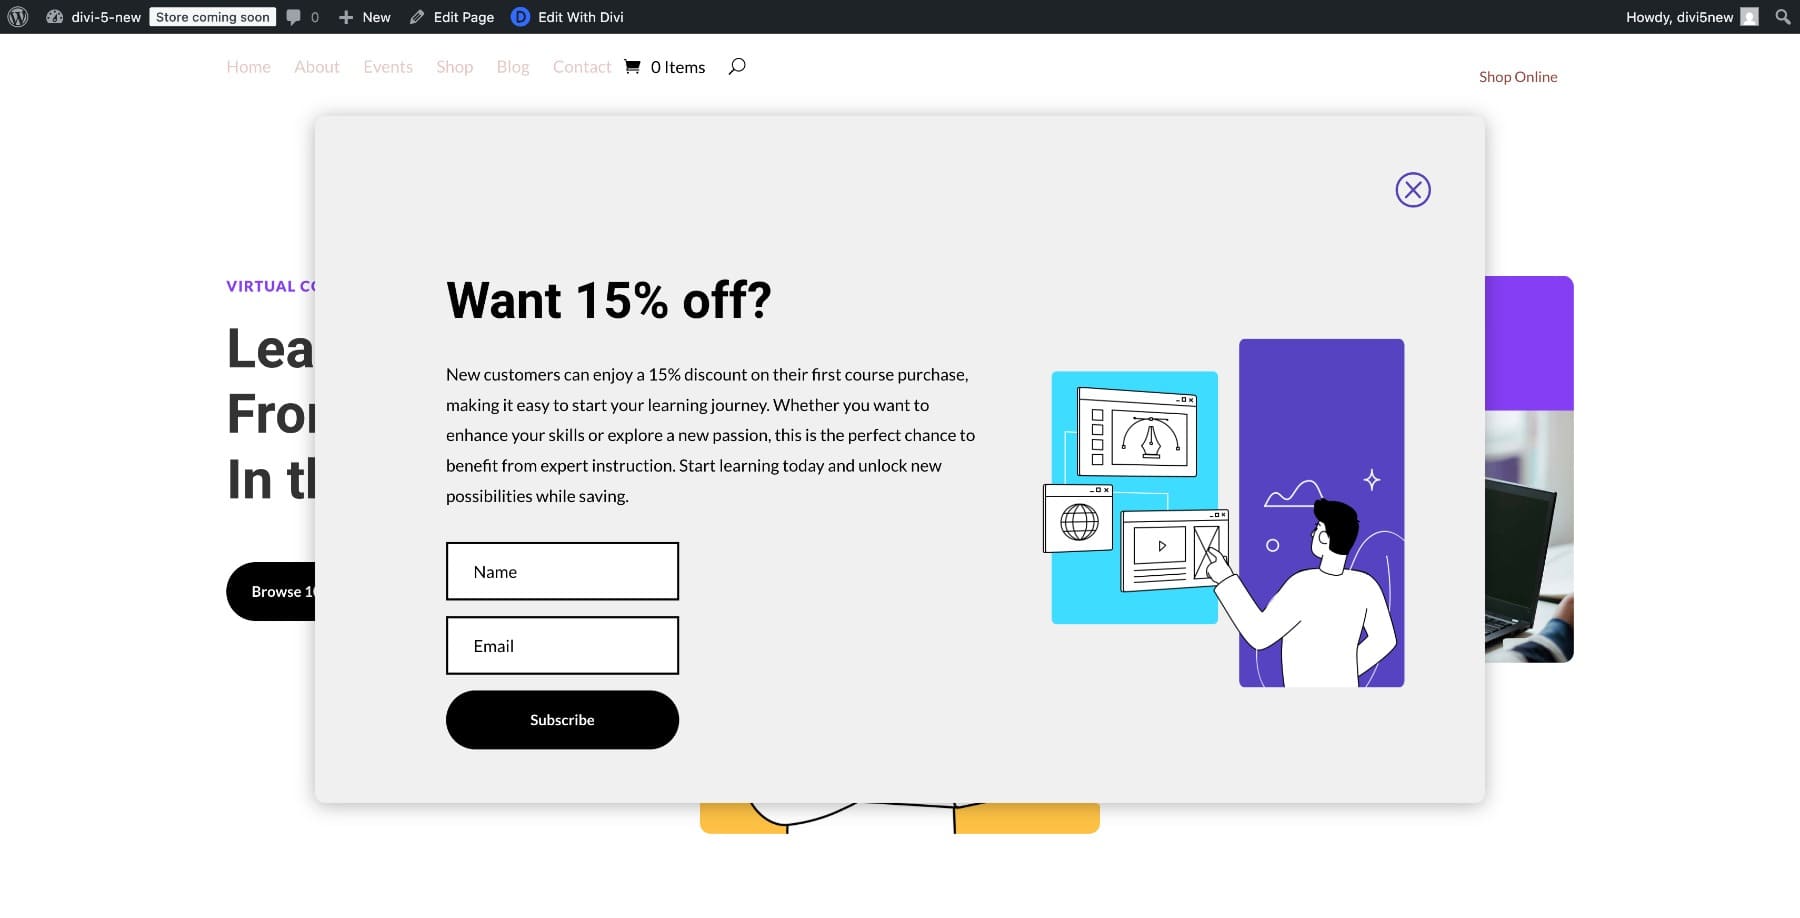
These popups usually appear as styled containers when a visitor scrolls down the page. Visually, it’s clear that a modal has opened, but without semantic context, assistive technology may treat it like a regular div. Download the design here.
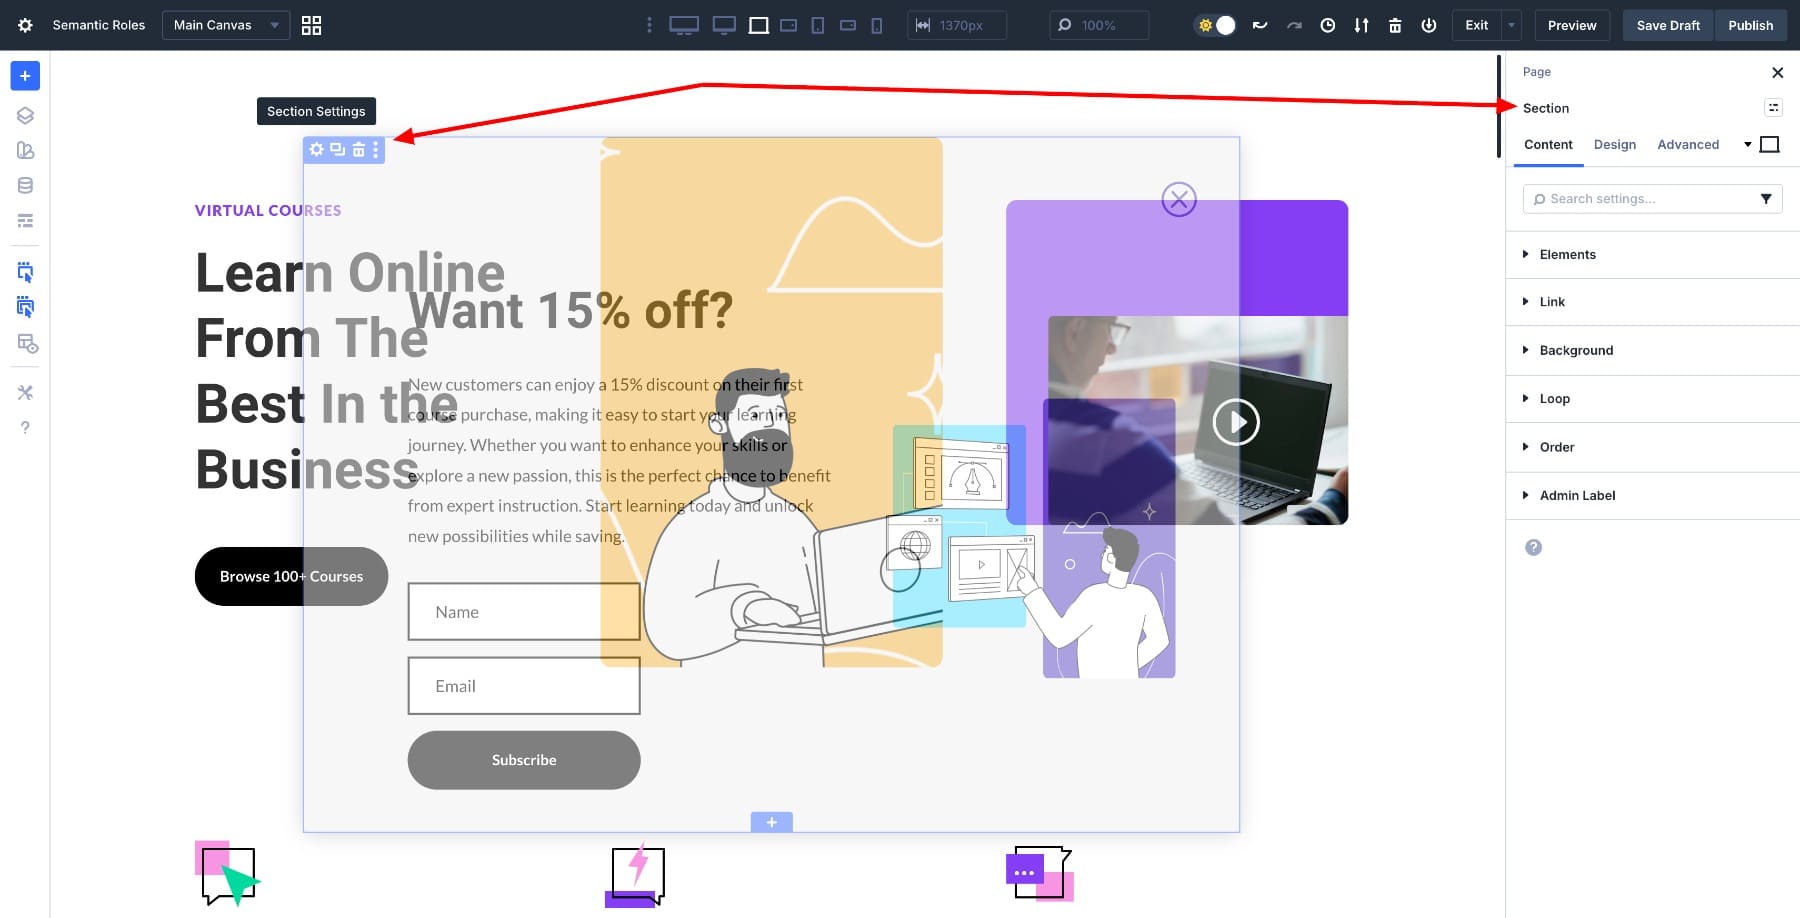
Click on the popup container (or the section acting as the popup). This opens the Settings panel.
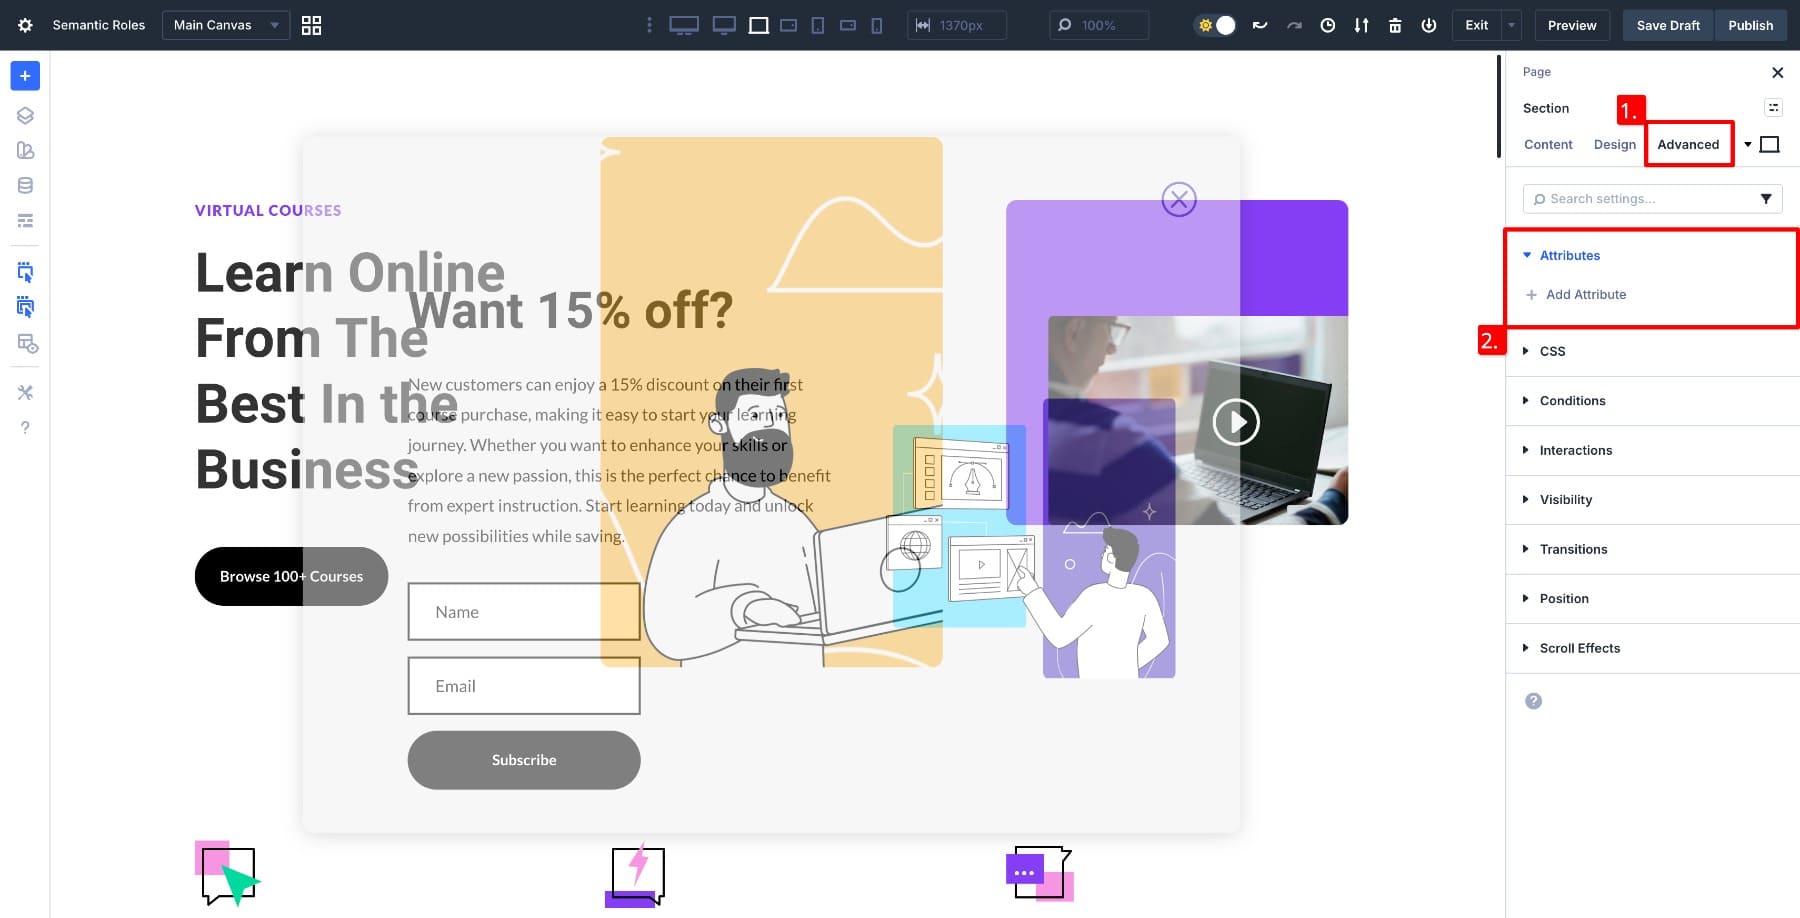
Go to the Advanced tab, then click on Attributes.
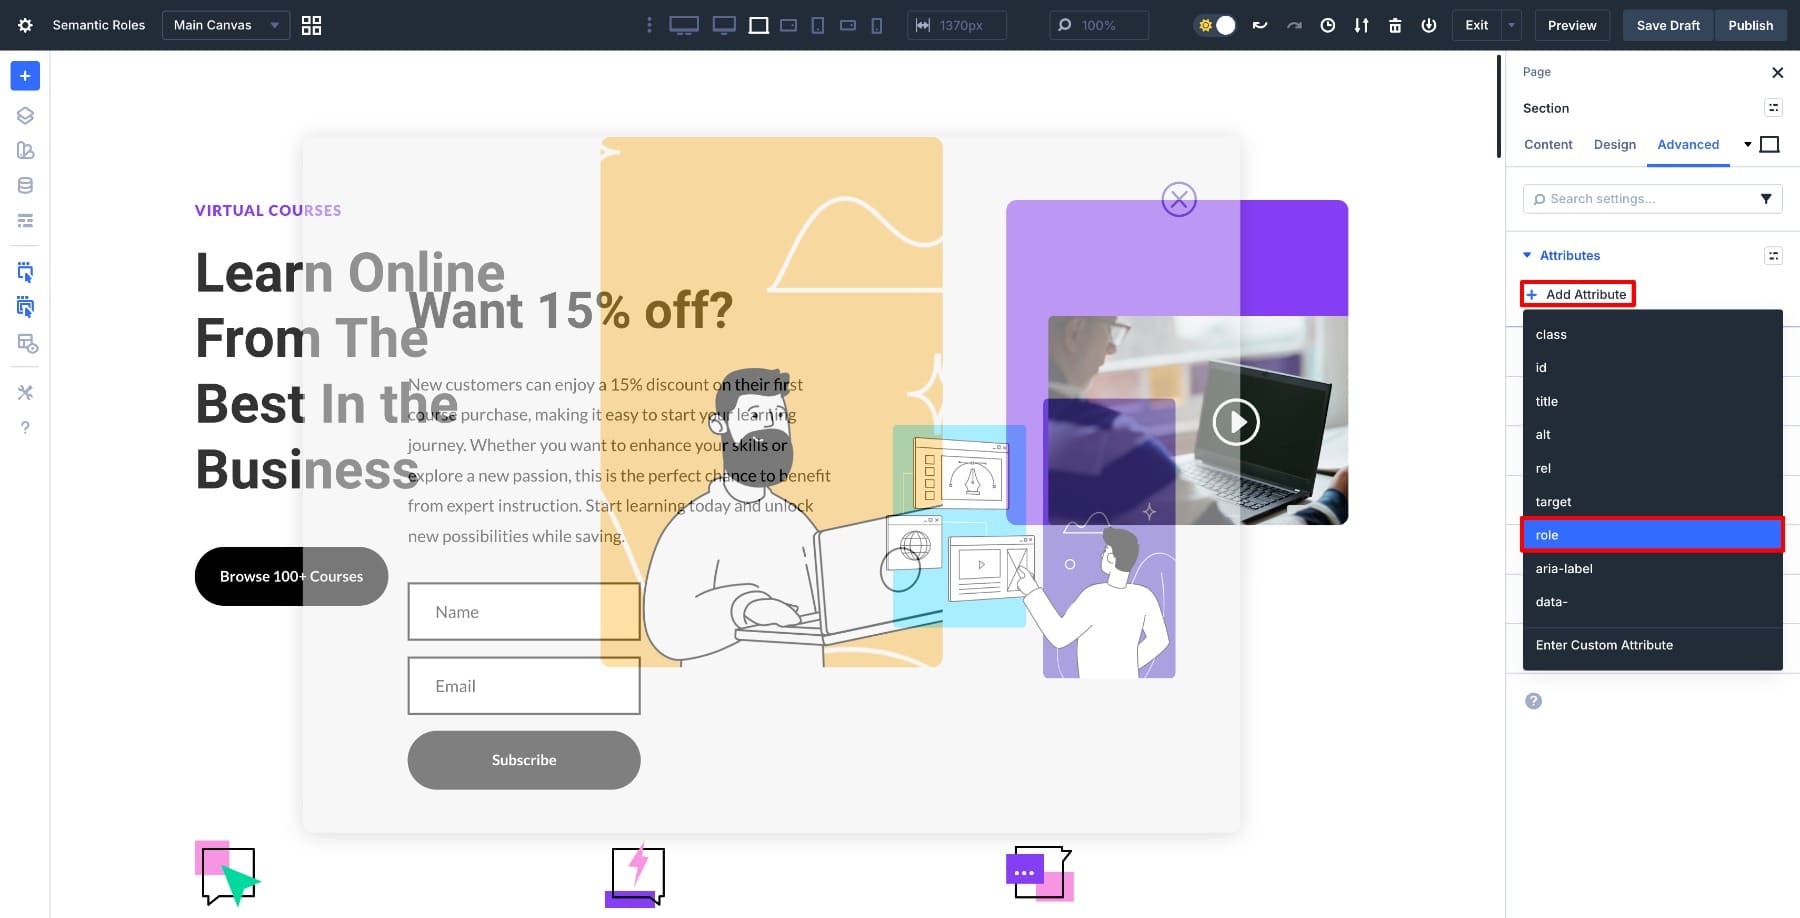
Click Add Attribute and select role from the attribute type list.
The Attribute settings will open. The Attribute Name field is automatically filled with role. Add a label, choose the Target Element as module, and add the Attribute Value as dialog.
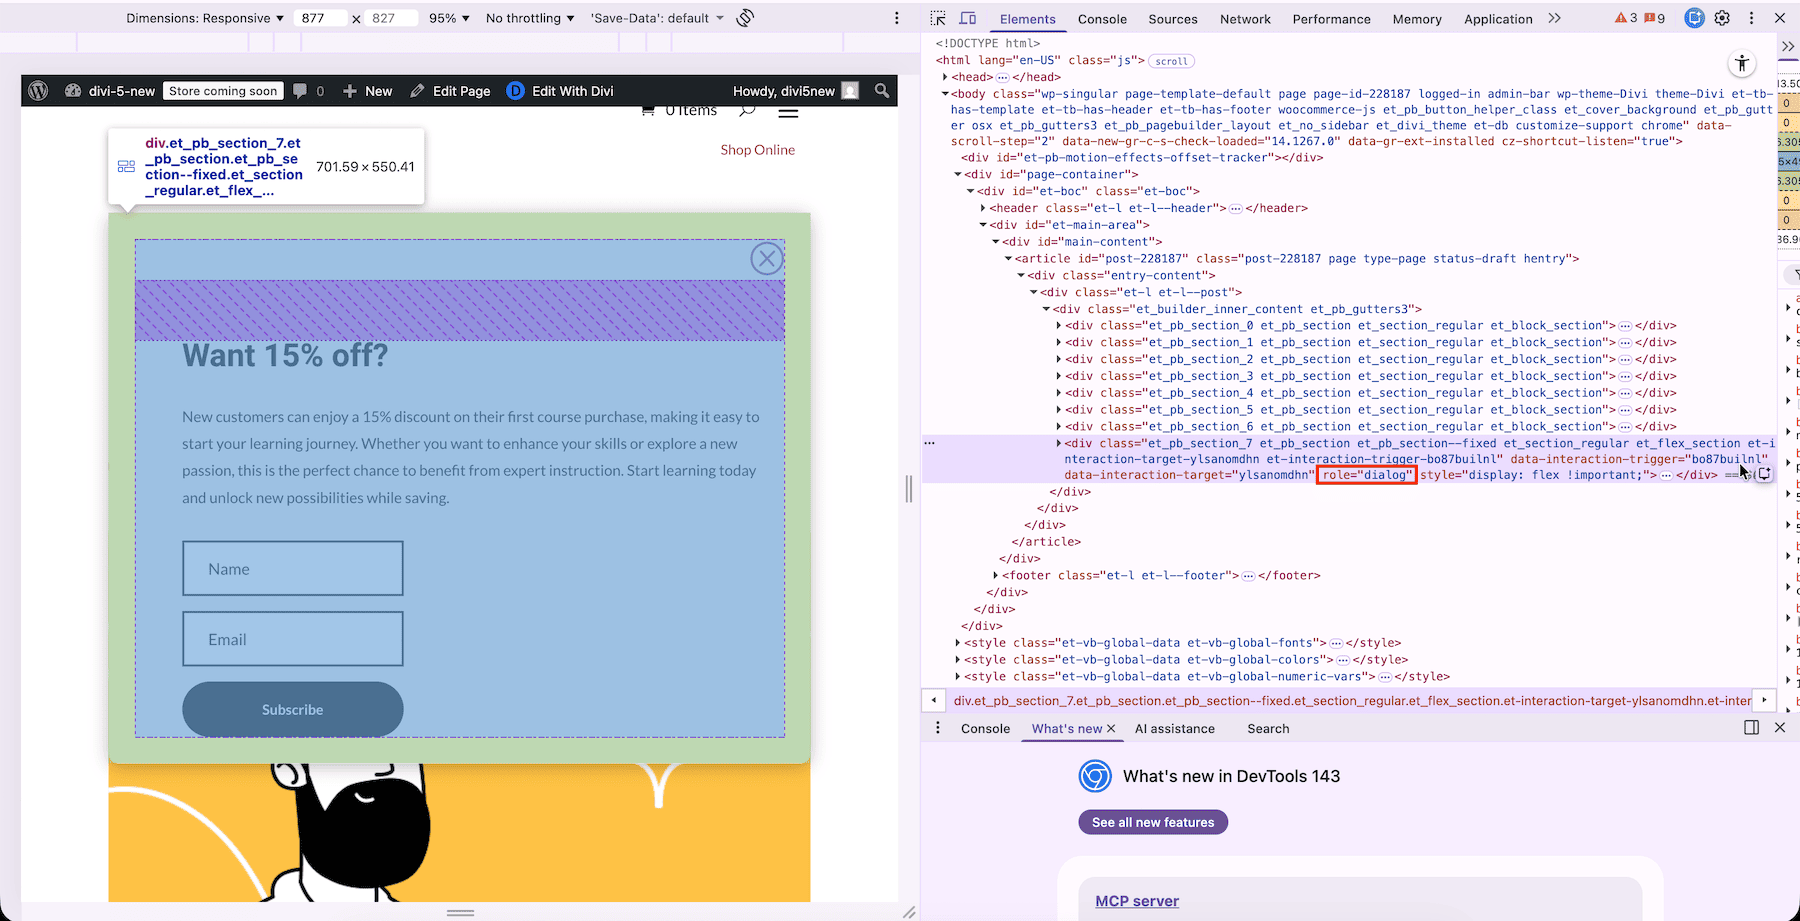
That’s it. Save the draft and preview your page to see the role added to the email popup section.
Did You Know?
The Attributes panel lets you add multiple attributes to a single element without any conflicts. You can assign (and manage) a semantic role, a CSS ID, and a custom data attribute all in the same place. They work independently, and every attribute you add appears in an organized list within the panel for easy editing later.
Quick Examples In Action
You’ve seen how the Attributes panel works. Now let’s look at some practical scenarios where semantic roles make the biggest difference.
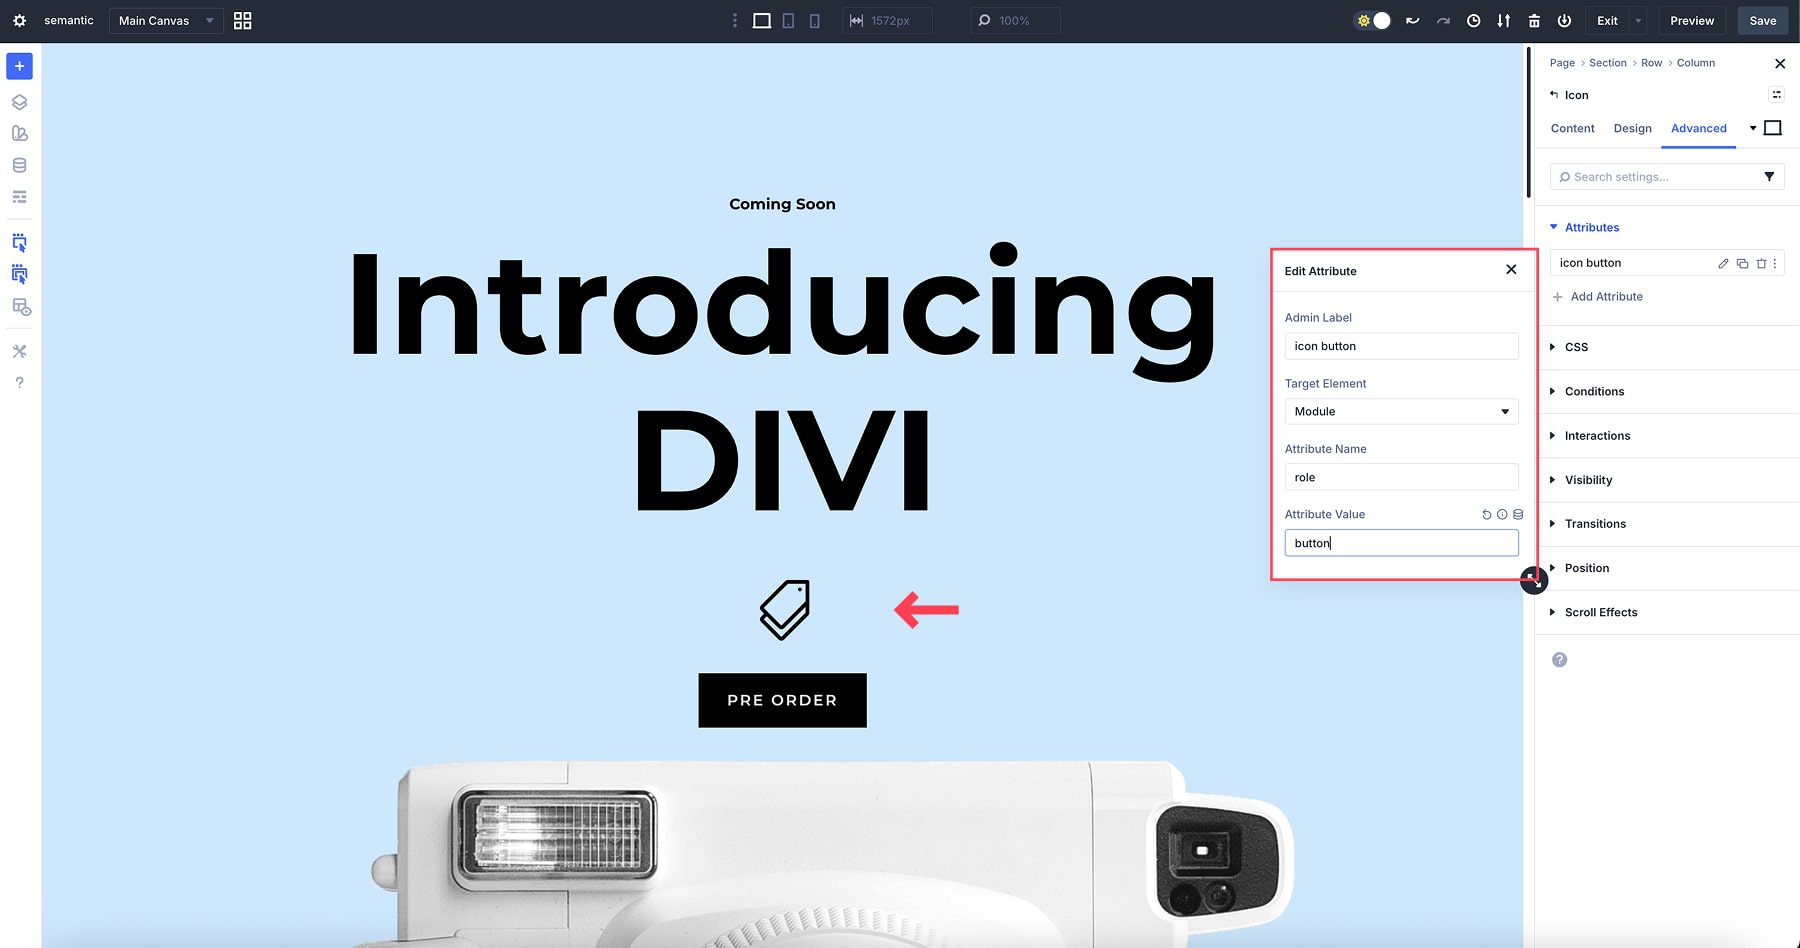
1. Adding role=”button” To A Non-Button Element
Divi’s Button Module already outputs semantic button markup, so you typically should not add role=”button” to it. Only use role=”button” when you turn a non-button element (like an Icon Module) into a button. You can make the role clear by explicitly adding role=”button”. Open the button settings, go to Advanced > Attributes, then add ‘role’ as the attribute name and ‘button’ as the value.
2. Making Elements Keyboard Accessible With tabindex
Divi’s flexible modules, like Text, Image, or Icon, often render as div elements that users can’t tab to with their keyboard. If you’re using one of these elements as an interactive component like a clickable card or a custom button, you need to make it focusable.
Adding tabindex=”0″ places the element in the natural tab order of your page, so keyboard users can navigate to it just like they would with links or buttons. You can add these to anything that isn’t already focusable, such as a card container or an icon. Add tabindex=”0″ by opening the element settings, going to Advanced > Attributes > Enter Custom Attribute, adding tabindex as the attribute name, and 0 as the value.

Now keyboard users can focus on this element as they tab through the page.
You can also use tabindex=”-1″ for elements that shouldn’t be part of the normal tab flow but need to be focusable programmatically, such as modal windows or hidden content that appears upon user interaction.
3. Targeting Elements Inside Modules For Granular Control
The Attributes panel goes beyond the module level. You can target specific elements within modules, providing precise control over individual components without requiring code changes.
Let’s work with a Contact Form module. We’ll target a single input field to add semantic roles and ARIA attributes that improve accessibility. Open the Target Element dropdown, and you’ll see all the individual elements within that module. You can choose Field and Button separately to assign them roles.
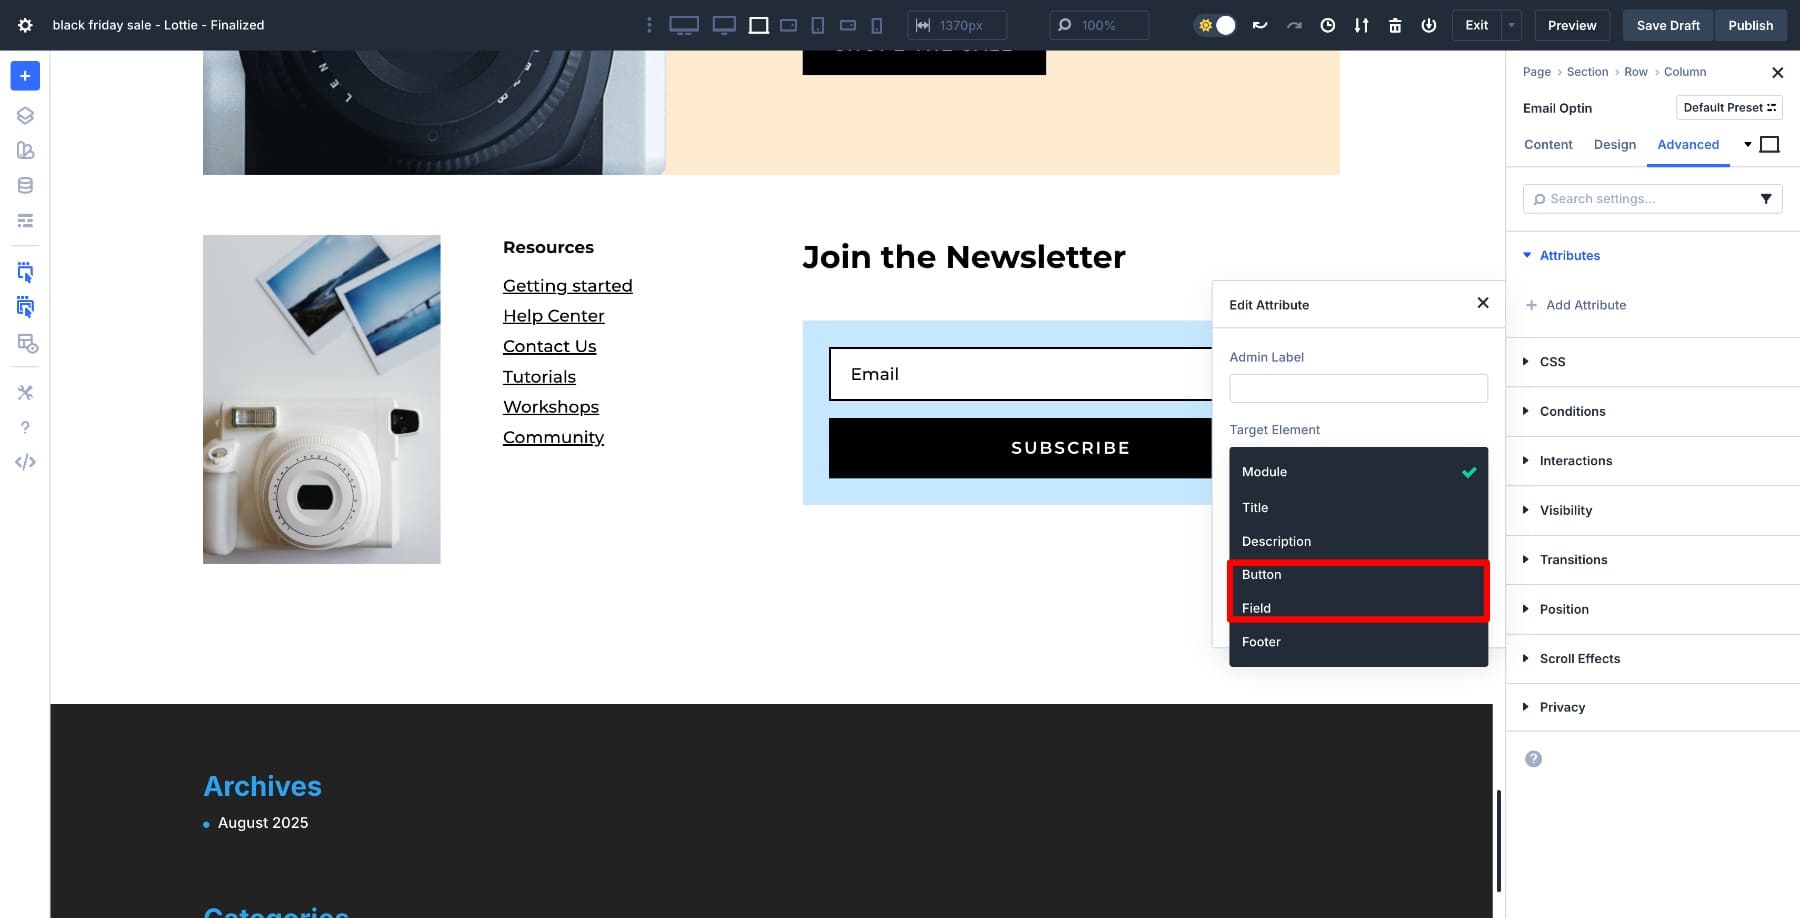
Select Field and add textbox as the Attribute Value.
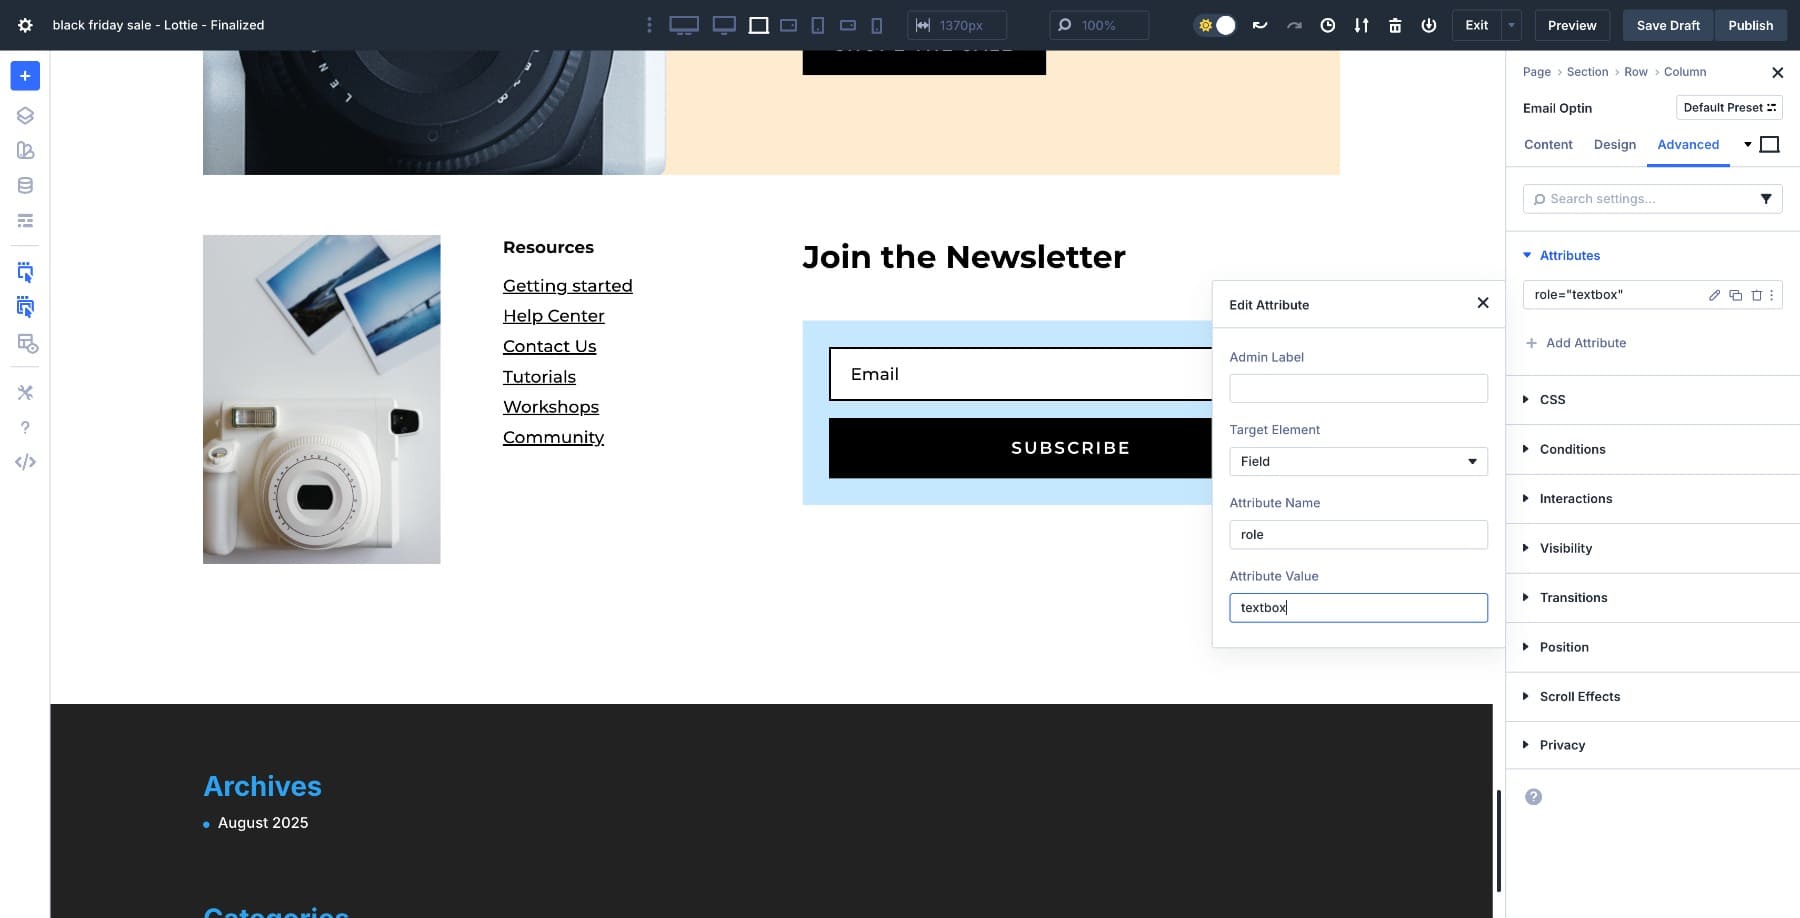
You’ve just added a semantic role to a single field inside a complex module without custom code or workarounds. Now, let’s add another attribute to that same field. Click Add Attribute again and select Enter Custom Attribute. Add aria-required as the attribute name, keep the same target element selected, and enter true as the value.

Screen readers will now announce that this field is required when users navigate to it, providing clear guidance before they attempt to submit the form.
This level of control used to require custom CSS selectors or JavaScript targeting. Now it’s built directly into the builder. You can apply multiple attributes to the same element, target different elements within the same module, and build genuinely accessible forms without ever leaving the visual interface.
4. Using role=”presentation” For Decorative Icons
Some icons are purely decorative and don’t add information for screen reader users. In this example, we added the role=”presentation” attribute to a decorative icon that precedes a heading. Consider aria-hidden=”true” for purely decorative icons (and ensure the icon is not focusable)
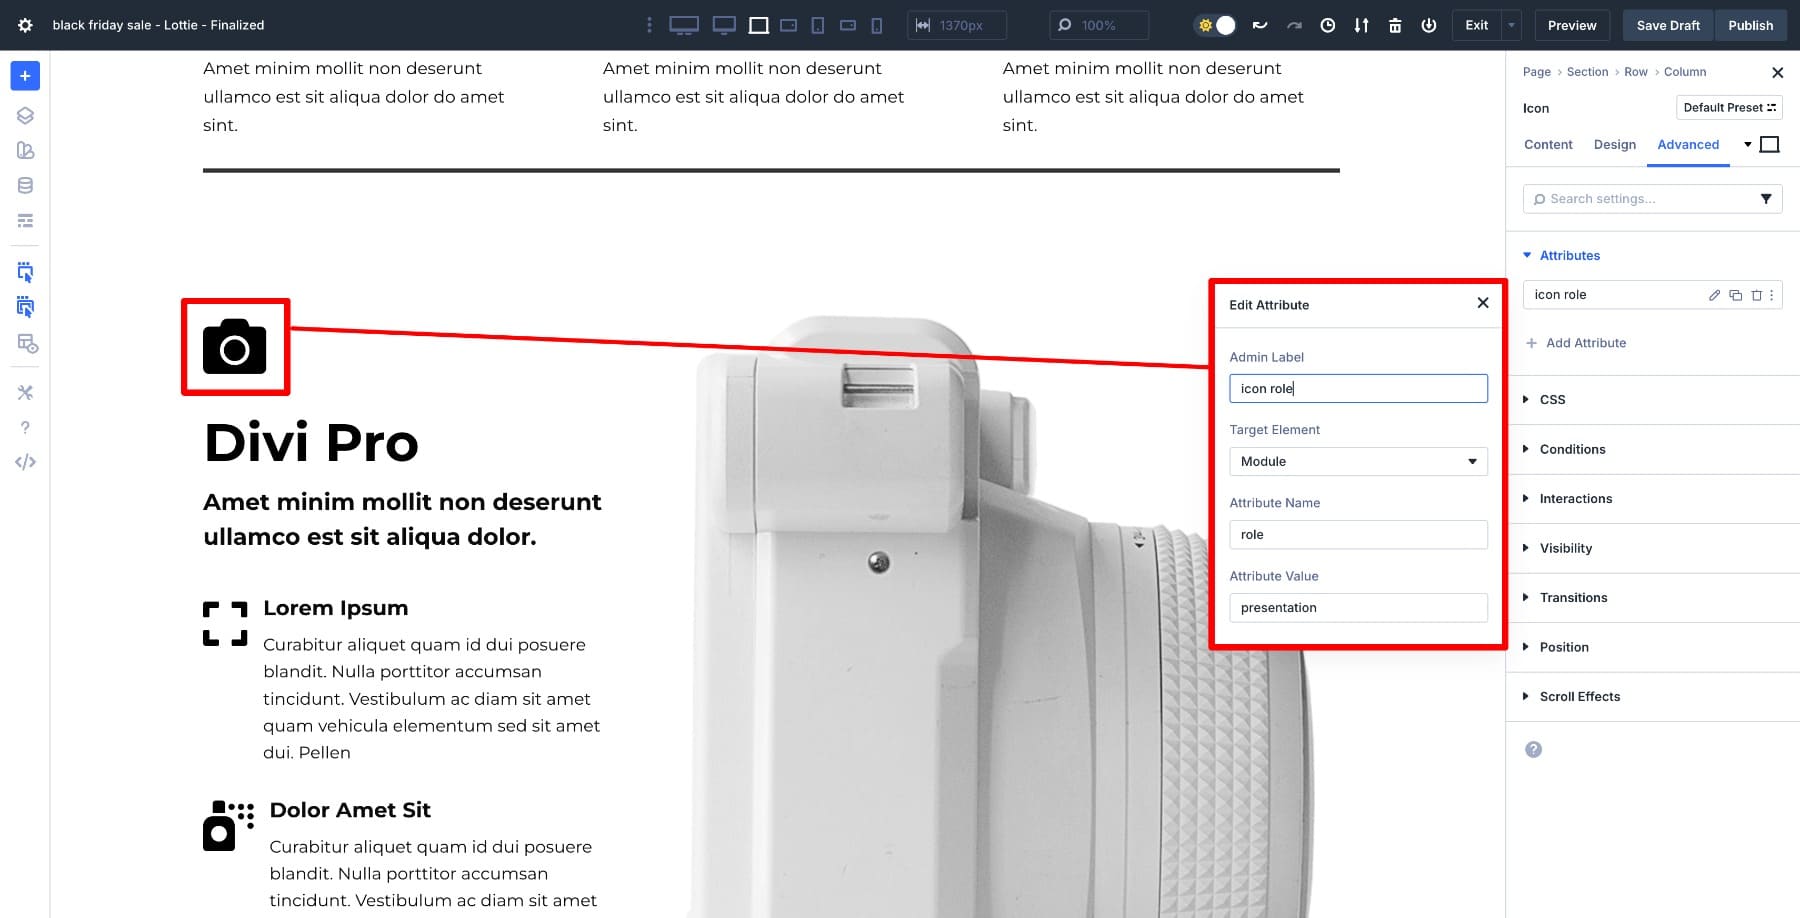
This tells assistive technology to skip over it entirely, reducing noise for users who rely on screen readers. The icon enhances the visual design but doesn’t convey any essential information, so marking it as presentational keeps the experience clean.
You can also assign roles to individual module elements, like an icon inside a Blurb module. Choose the right element in the Target Element dropdown list.

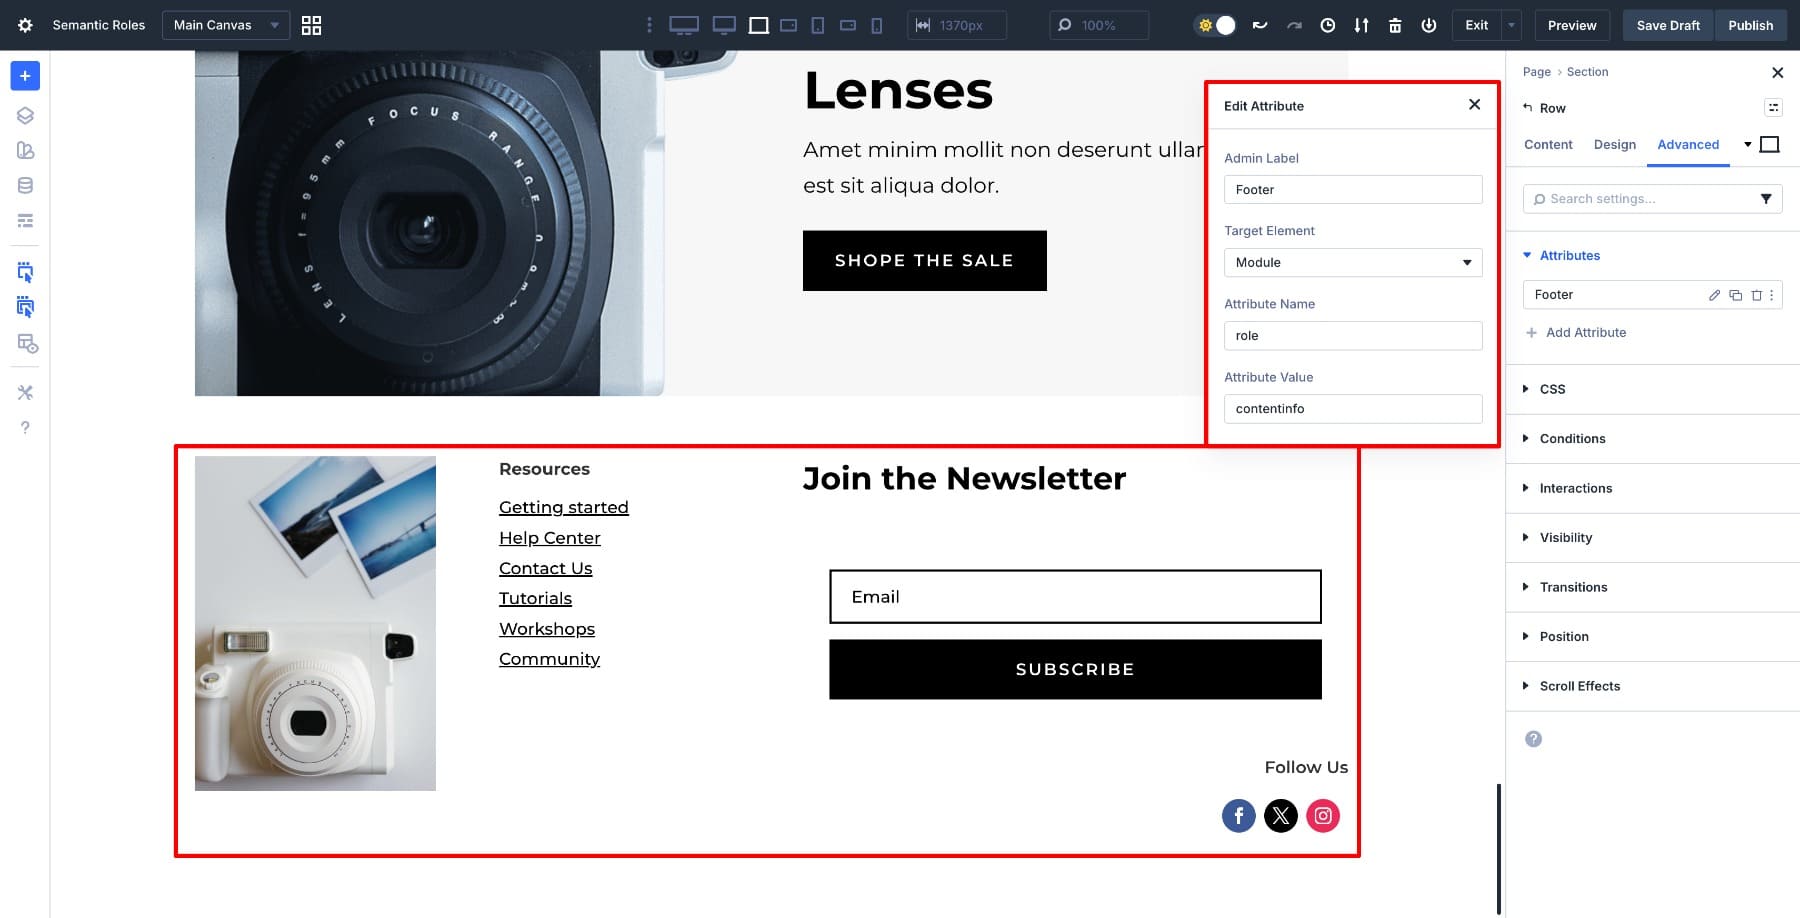
5. Assigning role=”contentinfo” To A Footer Container
Footers in Divi are often built using regular rows or sections, which don’t carry any semantic meaning by default. Add role=”contentinfo” to the footer container if it isn’t already output as a semantic footer, which helps distinguish it from the rest of the layout and identifies it as site-wide information. Screen readers can then recognize and jump directly to the footer without having to scan through the main content.
Try Custom Attributes In Divi 5 Today!
Semantic roles make a real difference in how people experience your site. They help users navigate faster and make your layout clearer to assistive technologies. For SEO, rely on semantic HTML and a solid heading structure, and your site functions properly for everyone who visits.
Divi 5’s Attributes panel puts all of this directly in the builder, so adding semantic roles becomes part of your normal workflow rather than extra work you have to plan for. These changes take seconds to implement, but they transform your site into something more usable, discoverable, and accessible.
Divi 5 Public Beta is available now. Read the announcement and download the latest version.
The post How To Add Semantic Roles To Elements In Divi 5 appeared first on Elegant Themes Blog.
The Tech Zone


Comments
Post a Comment