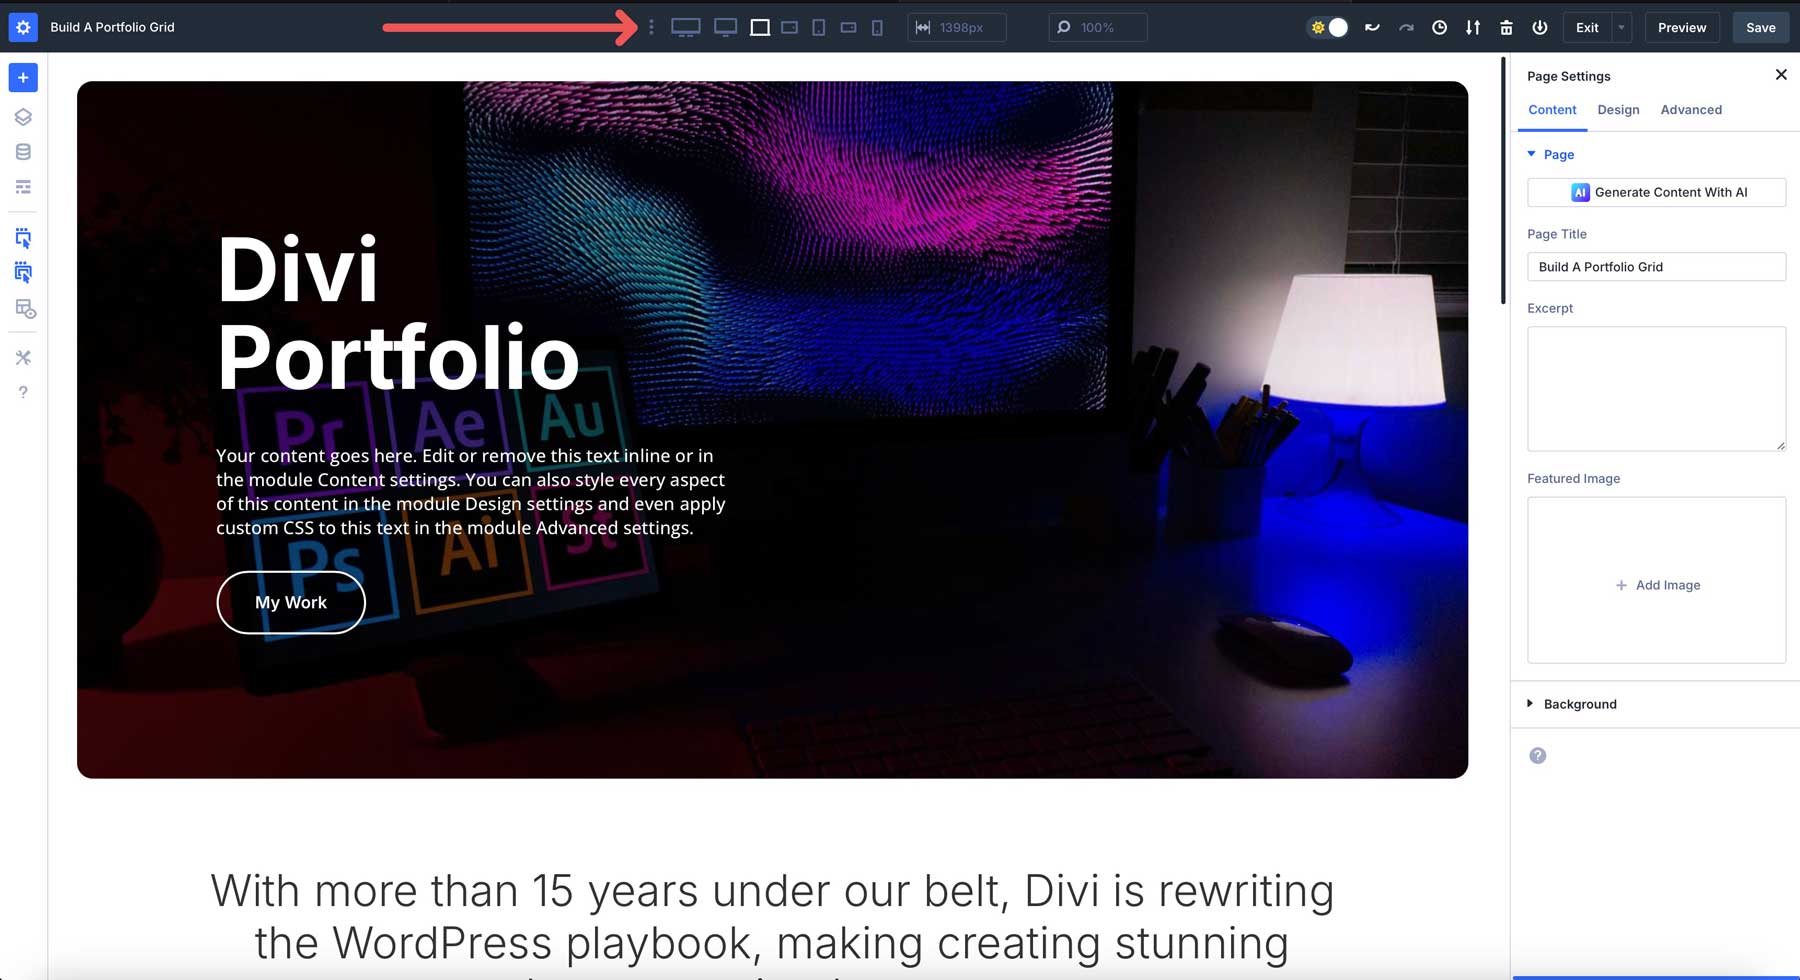
How To Build A Portfolio Grid With Divi 5’s Loop Builder
A portfolio grid is a simple, effective way to showcase your work. With Divi 5’s Loop Builder, you can design a reusable card layout and let it auto-populate from your content directly in the Visual Builder.
Unlike single-purpose modules, Loop Builder lets you use any Divi element, set a query for posts or custom post types, and output a responsive grid that inherits your global styles. In this tutorial, we’ll build a portfolio grid step by step using the Projects custom post type.
Understanding Divi 5’s Loop Builder
Divi 5’s Loop Builder is a new feature that lets you easily create dynamic, looping content layouts. Unlike the blog or portfolio modules, Loop Builder allows you to easily loop any Divi element to display posts, terms, or users. This means you can build a single template that automatically populates with content from your WordPress site.
Loop Builder supports various content types, including custom post types (CPTs), WooCommerce products, and Advanced Custom Fields (ACF), allowing you to display your portfolio exactly how you want.
Key Benefits Of The Loop Builder
Thanks to its robust customization options, Loop Builder is a perfect fit for creating portfolio grids. Here are its standout features:
- Flexibility To Design Custom Loop Templates: With Loop Builder, you’re not confined to predefined layouts. You can use any Divi module to design a unique template for each portfolio item.
- Customizable Queries: Loop Builder lets you fine-tune which content appears in your grid. Filter by category, post type, or custom fields to display only the desired items in your preferred order.
- Dynamic Content Integration: Seamlessly pull in dynamic content data like project titles, featured images, descriptions, or custom metadata to make each portfolio item engaging.
These features make Divi 5’s Loop Builder an ideal tool for creating a polished, professional portfolio that’s fully customizable and easy to navigate.
Building A Portfolio With Loop Builder
We’ll use Divi’s built-in projects custom post type (CPT) to create a portfolio with the Loop Builder. The Projects CPT is designed to showcase portfolio-style content, making it an ideal choice for our layout. While Divi does offer a Portfolio module, we’ll use the Loop Builder because it gives us unlimited options for creating a unique portfolio.
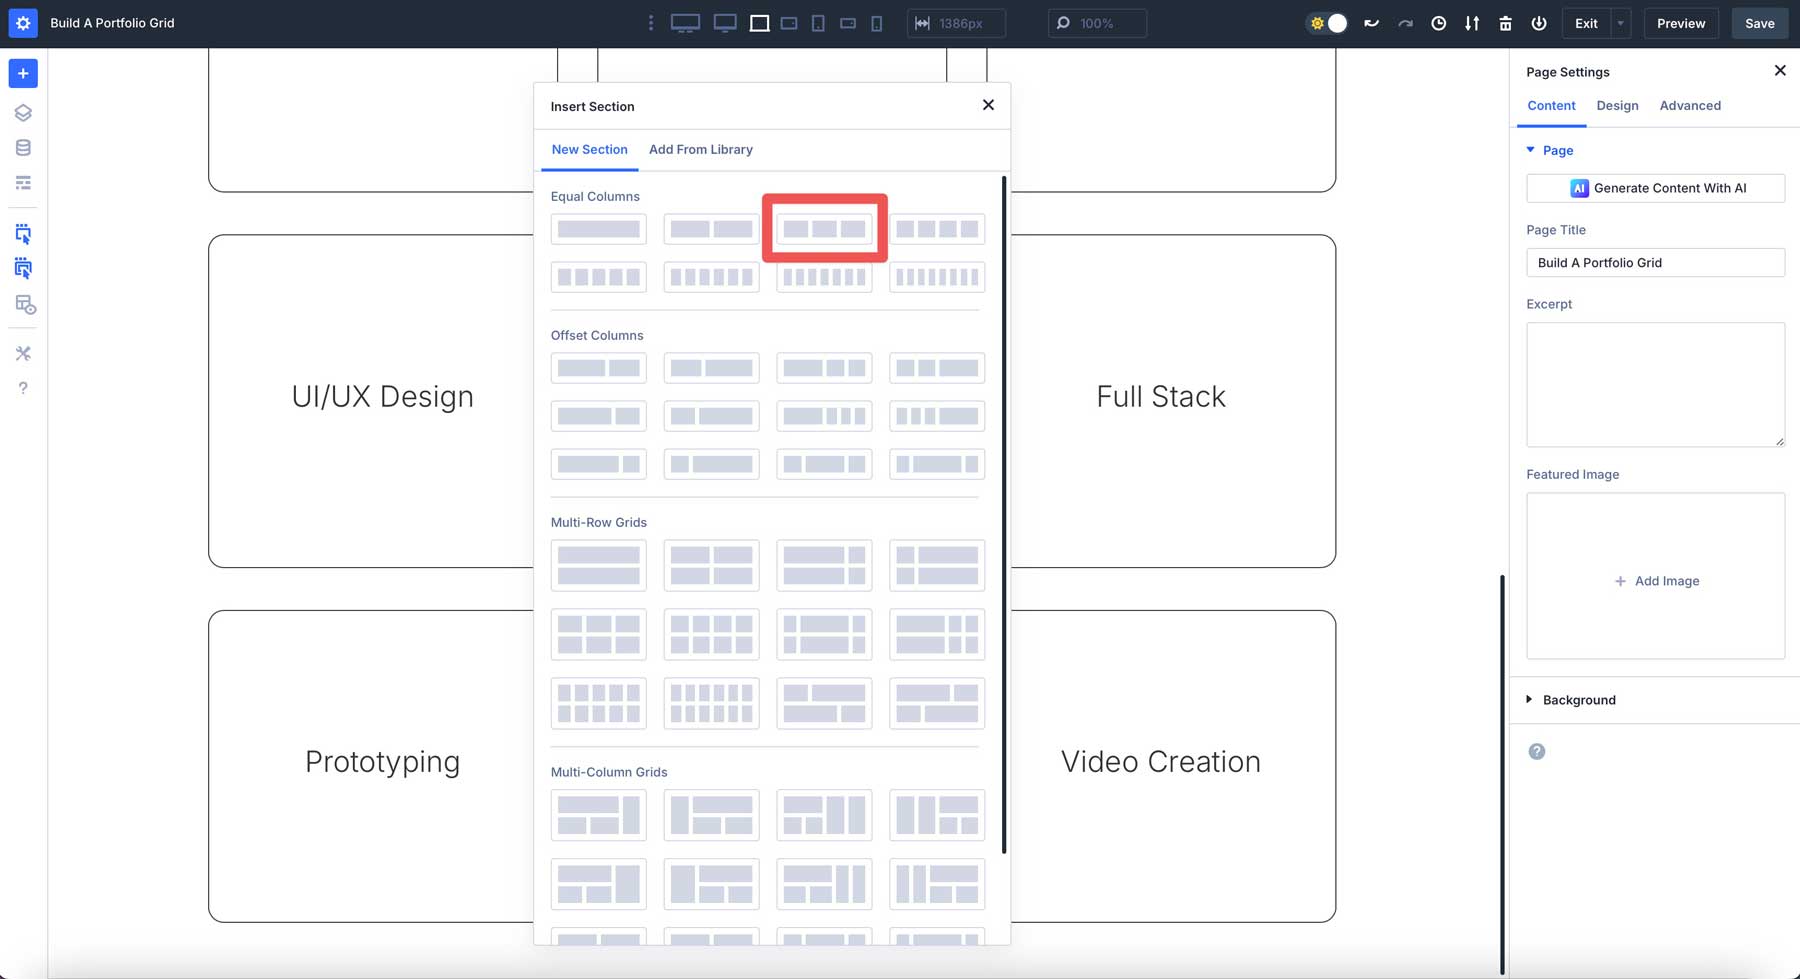
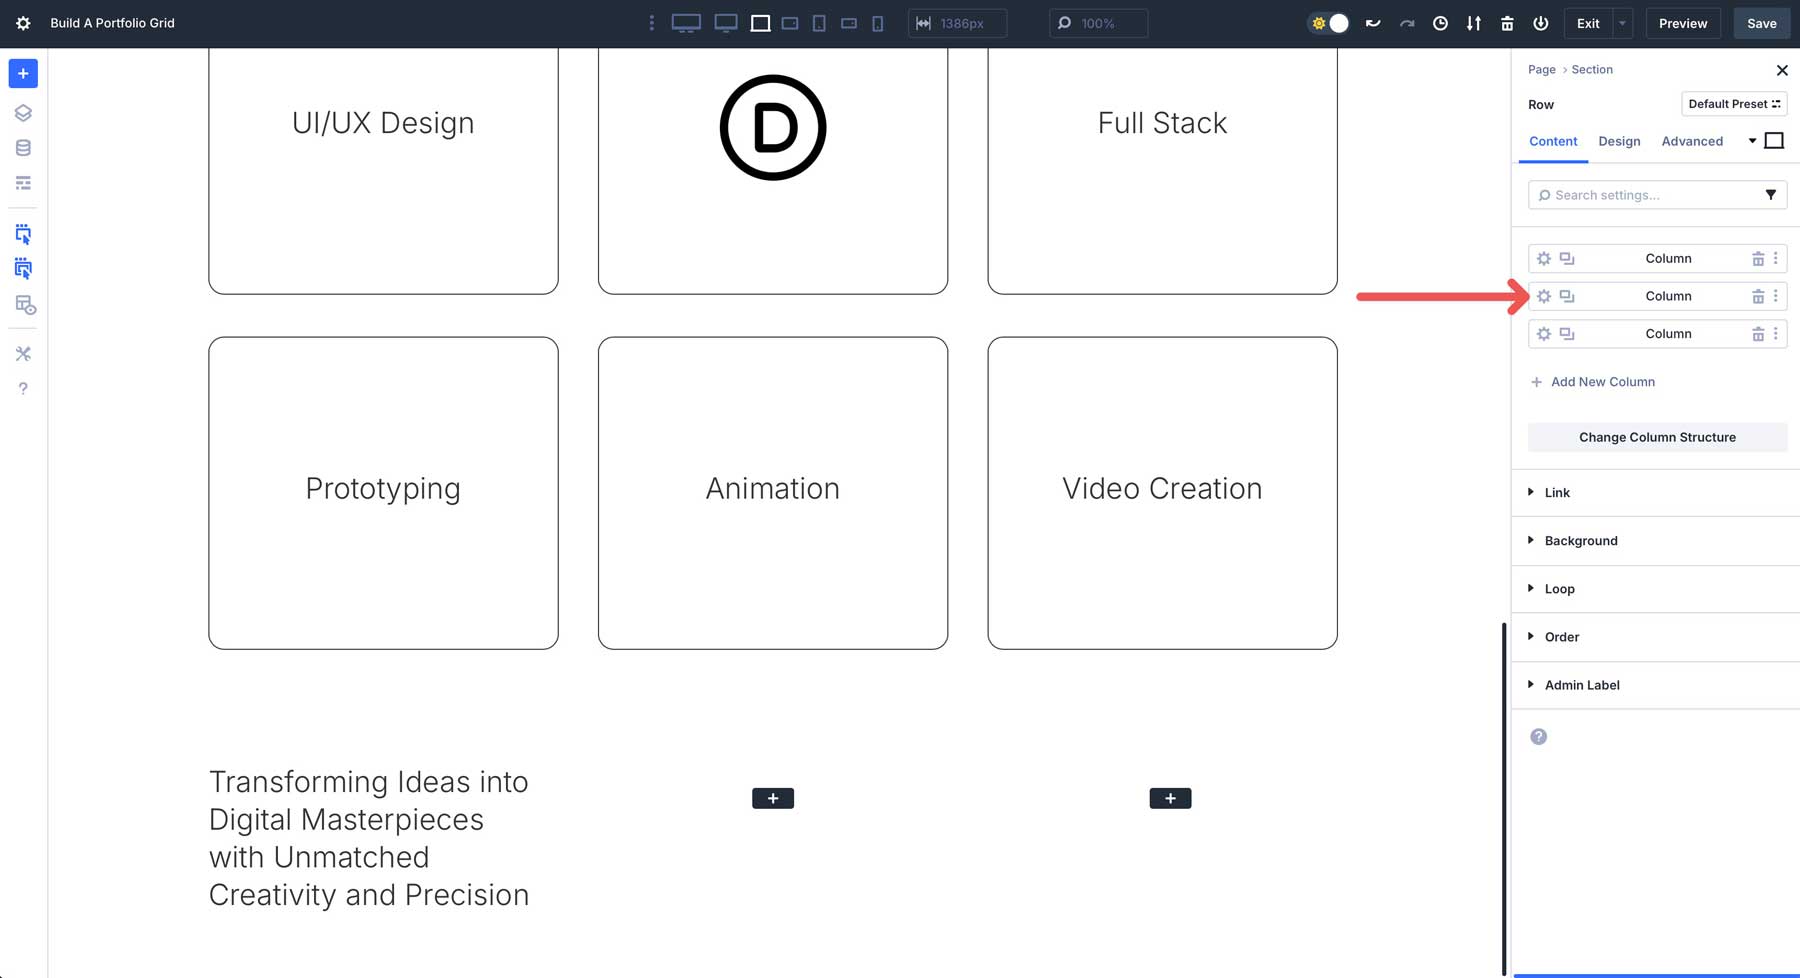
Start by adding a new row to your page. For this, we’ll use a 3-column layout.
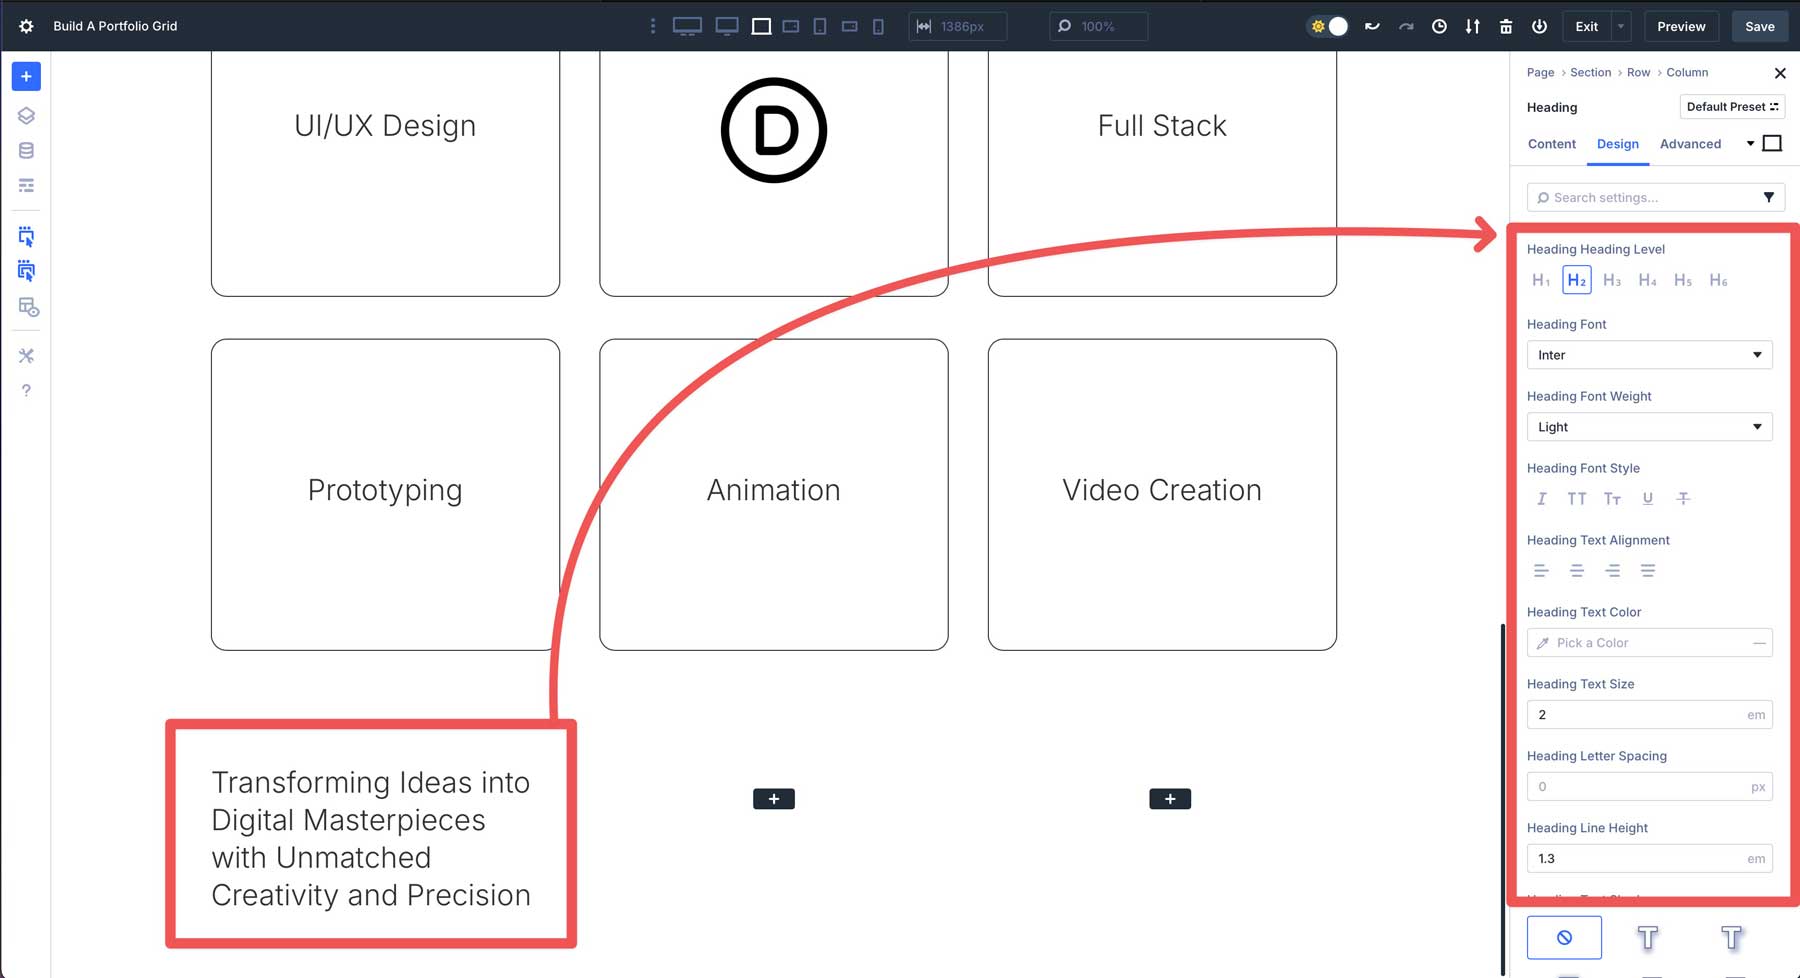
We’ll add a Heading module to the first column.
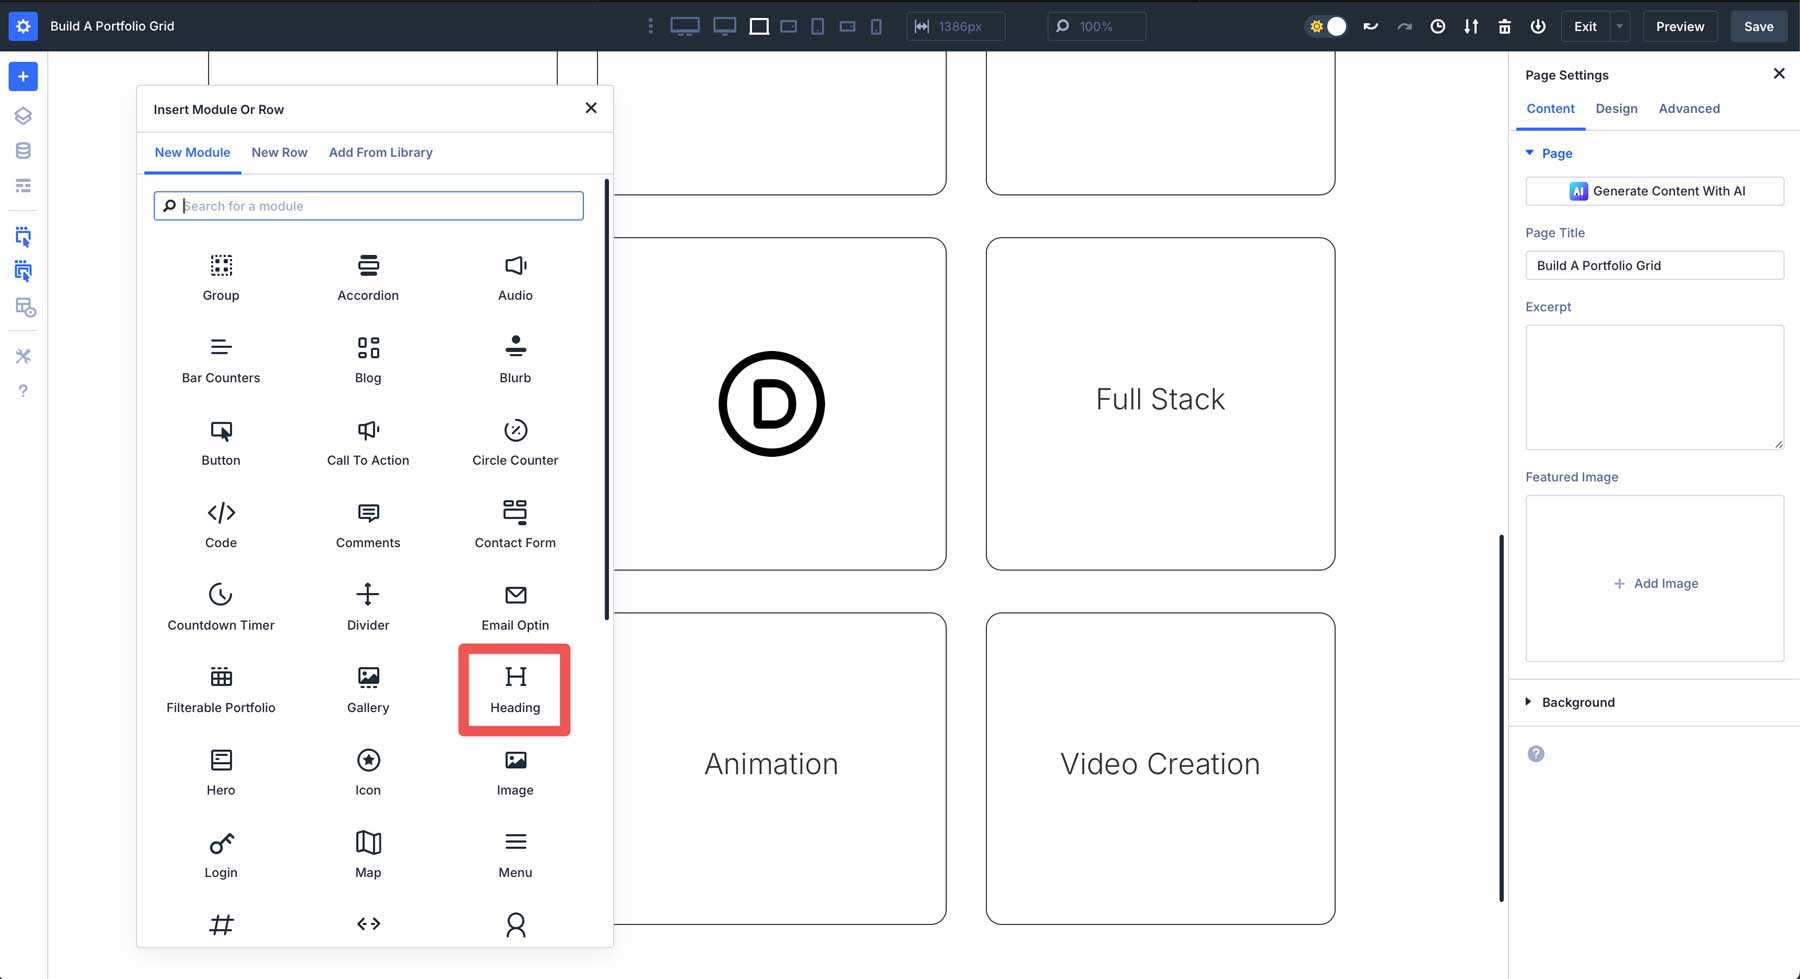
Enter a Title or use Divi AI to generate one for you.
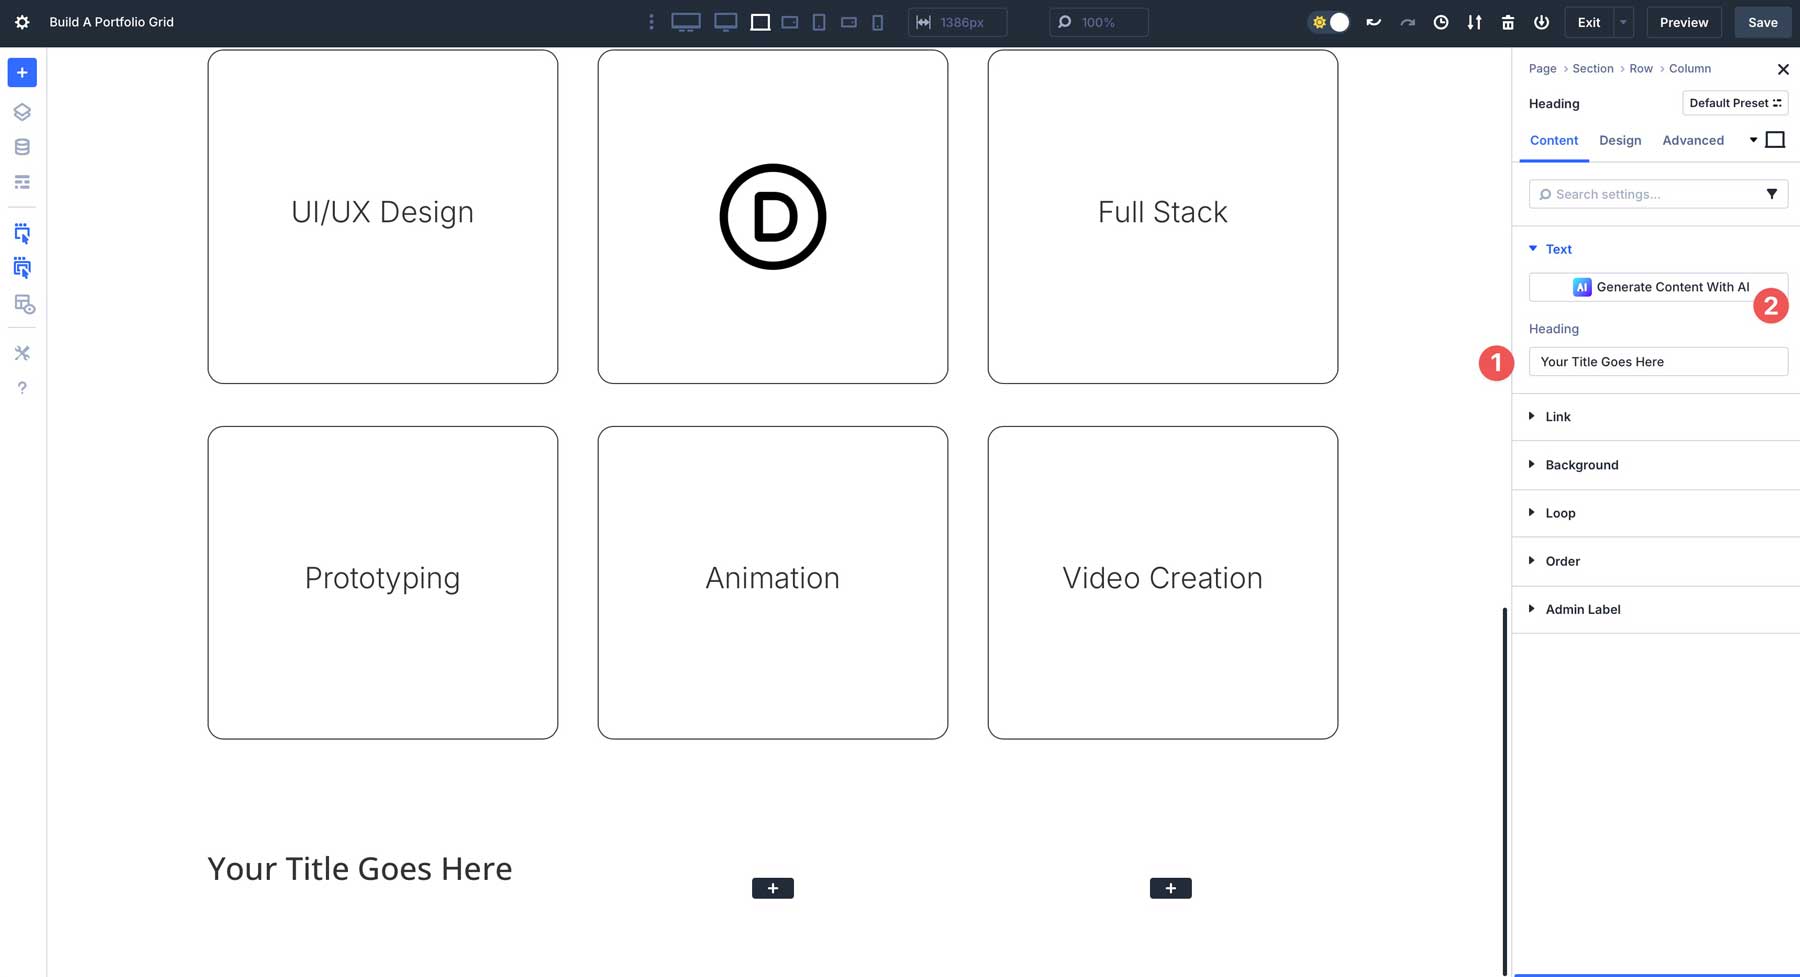
Navigate to the Design tab, choose Inter for the Heading Font, light for the Heading Font Weight, set the Heading Text Size to 2em, and assign a 1.3em Heading Line Height.
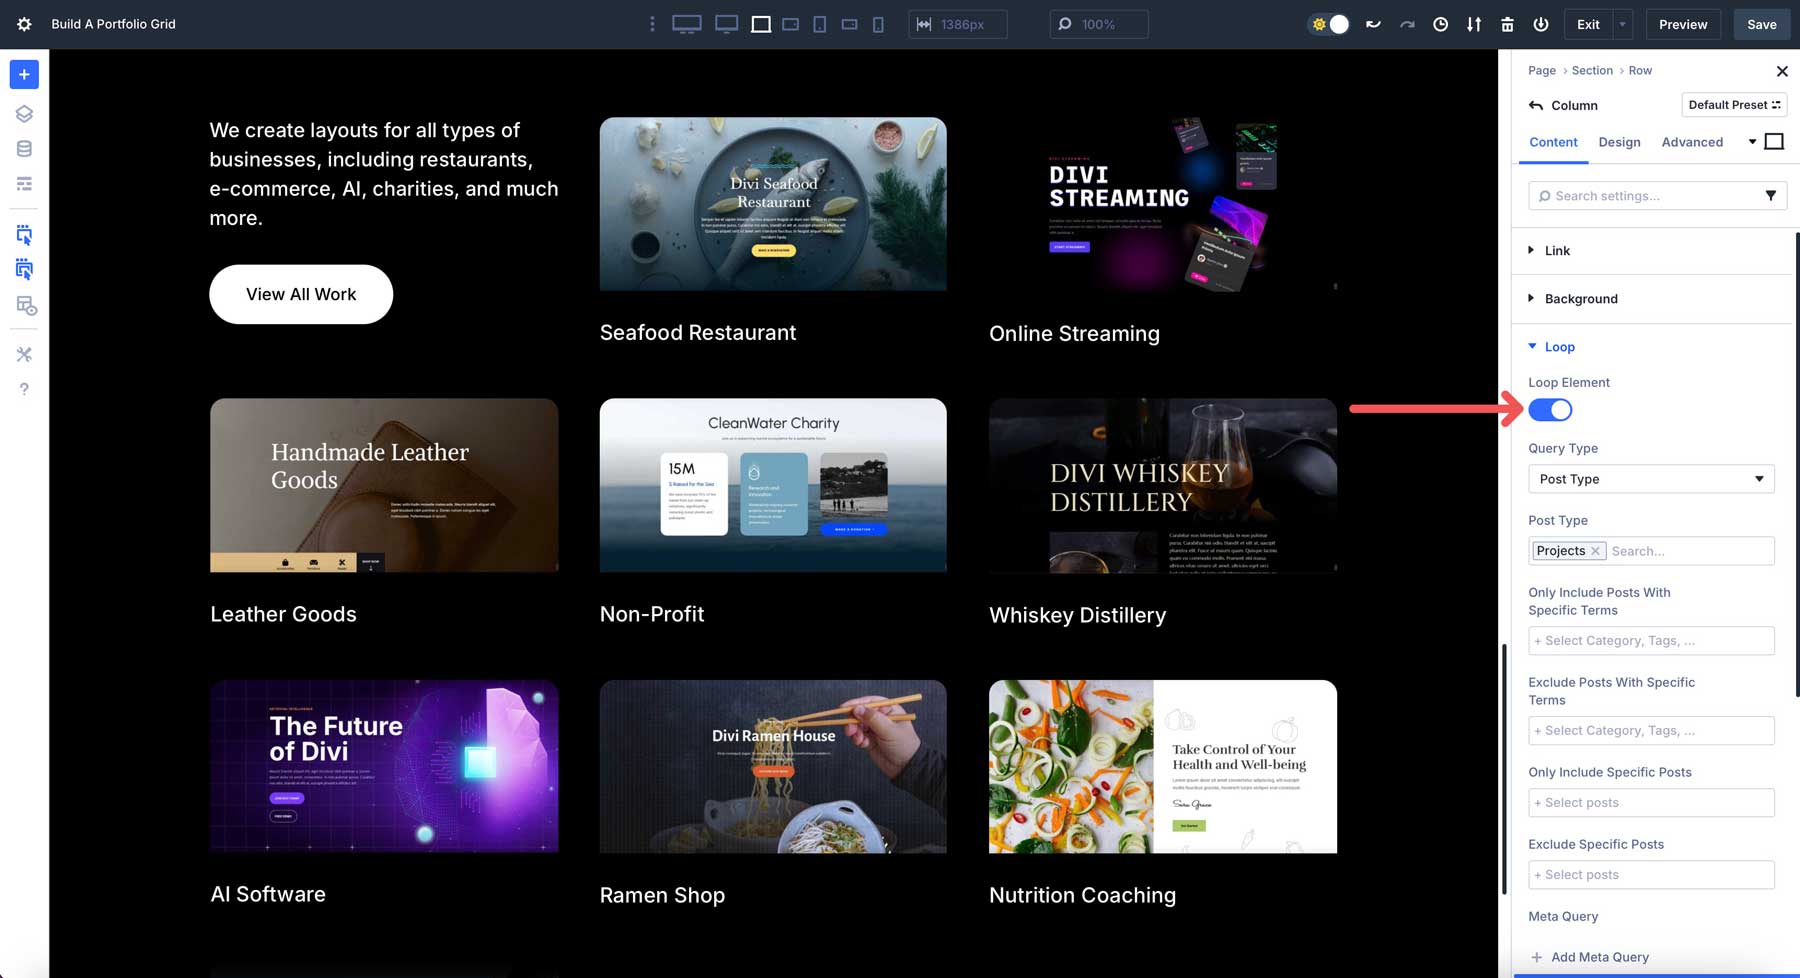
Now, let’s build our Loop. Navigate to our row’s 2nd column.
Locate the Loop tab, expand it, and enable the Loop Element toggle.
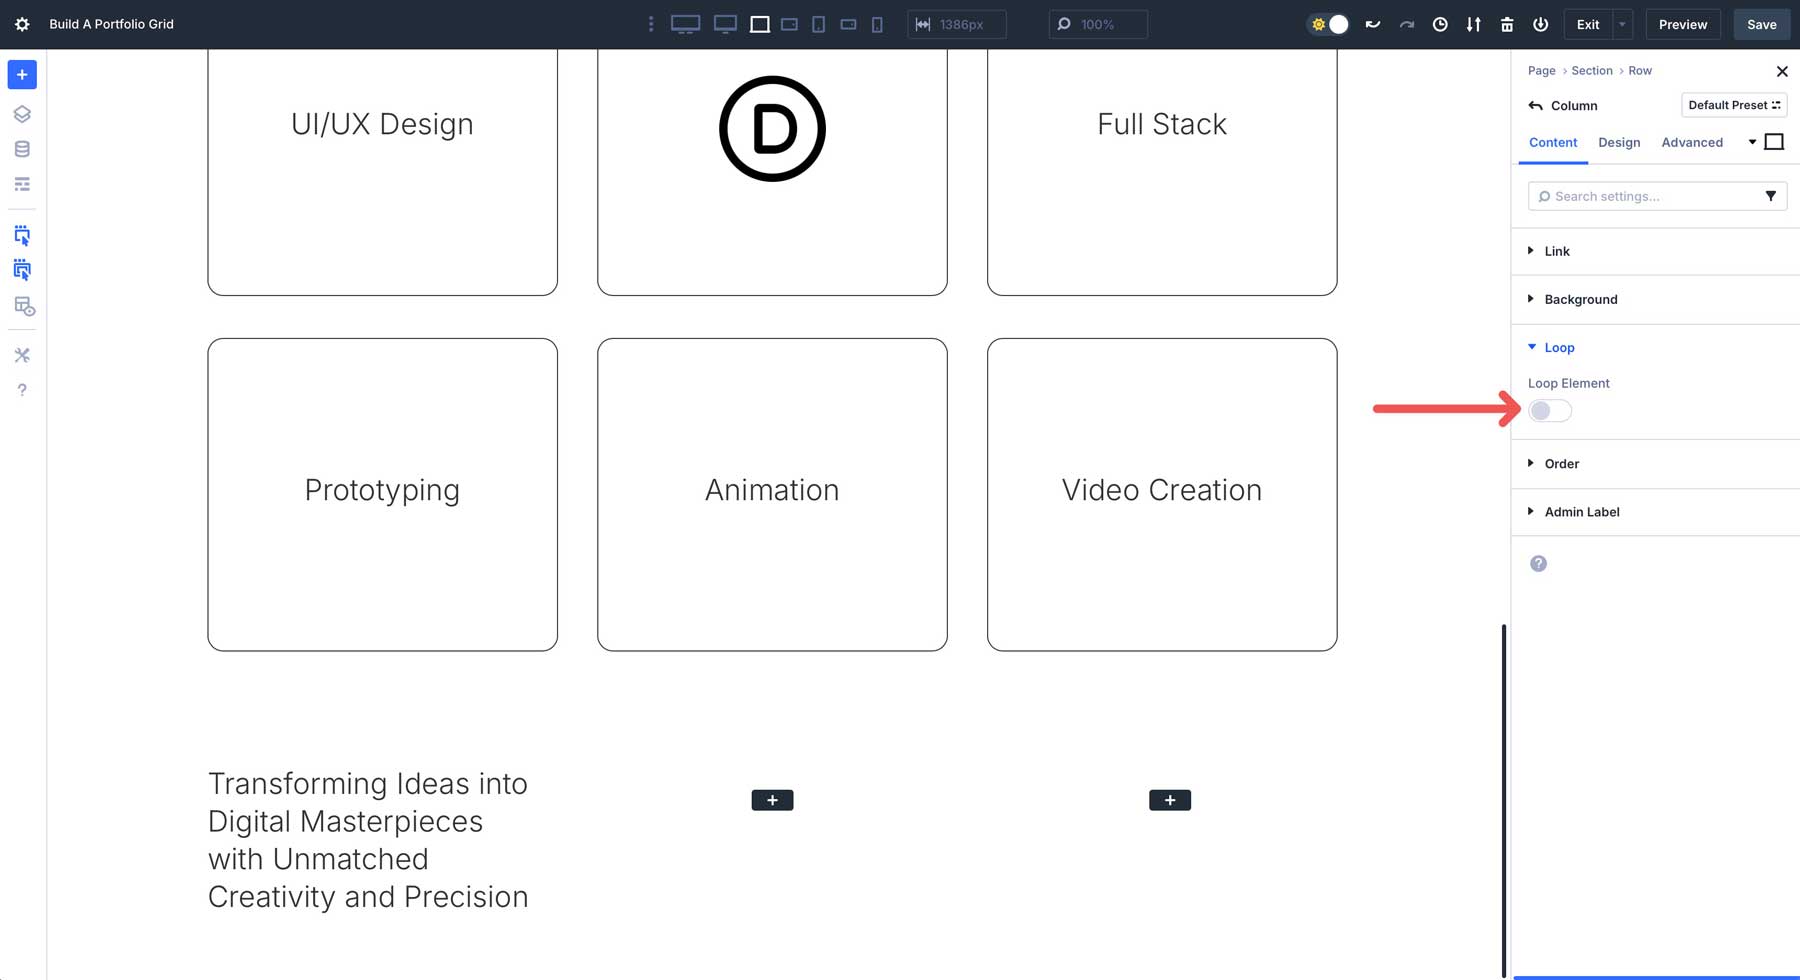
Next, choose the Query Type. For this tutorial, we’ll use Divi’s built-in CPT, projects. Under Post Type, select Projects. We want to showcase all projects, so we will leave everything as is.

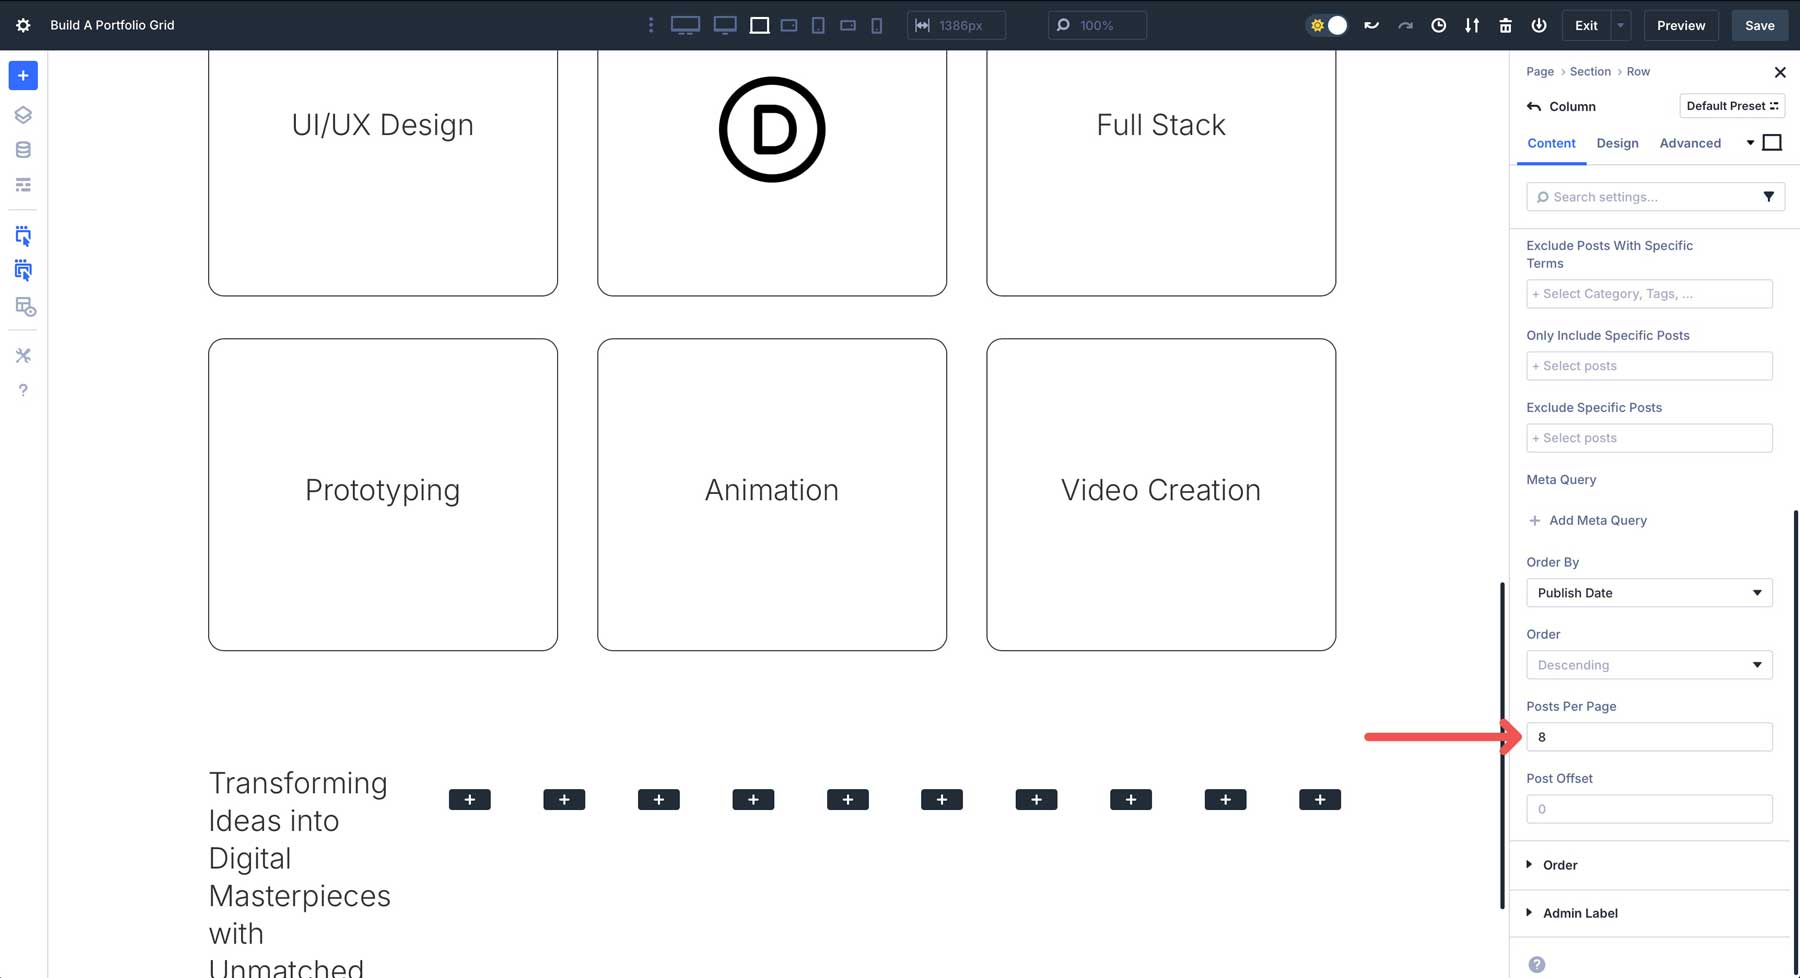
You can choose the Order By settings, Posts Per Page, and Post Offset. Since our first column contains a Heading module, we’ll set the Posts Per Page to 8. That way, the output will be even across our three-column row.
You’ll notice that our Loop is trying to stack all the columns. To fix this, we need to go to the row settings. Navigate to the 3-column row, click the Design tab, and locate the Layout settings.
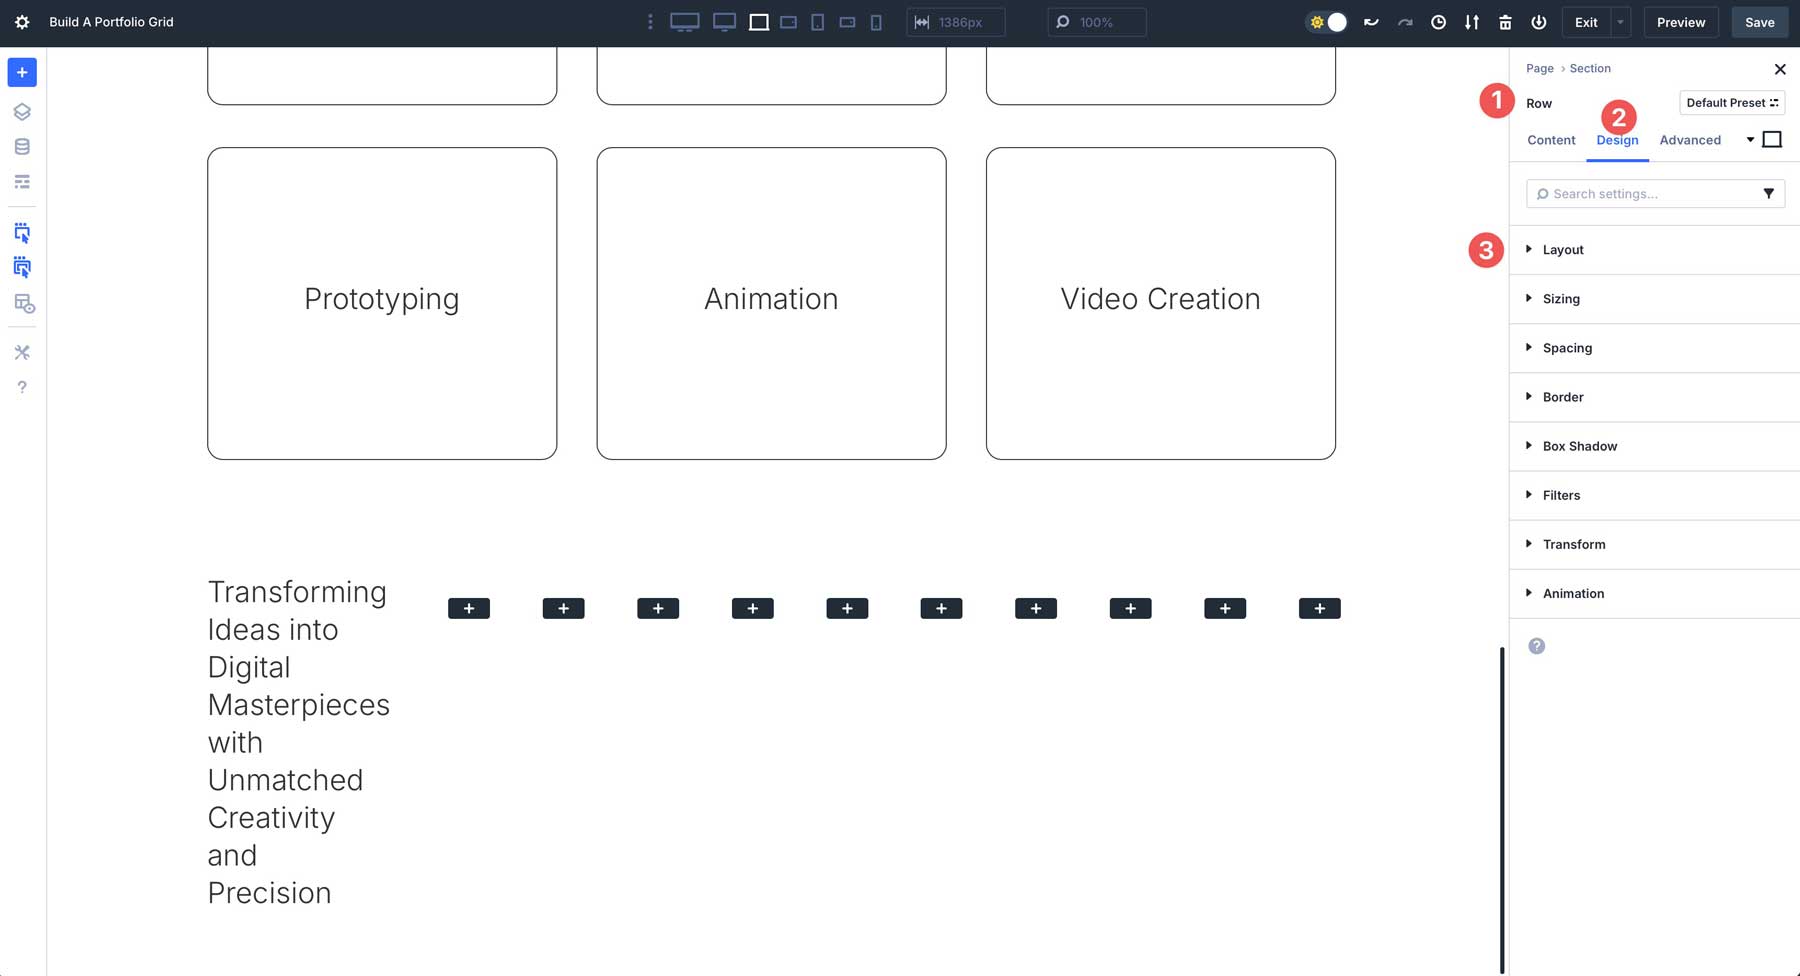
Expand the Layout settings tab. Locate the Layout Wrapping setting and select Wrap. This will wrap our Loop back into 3 columns.
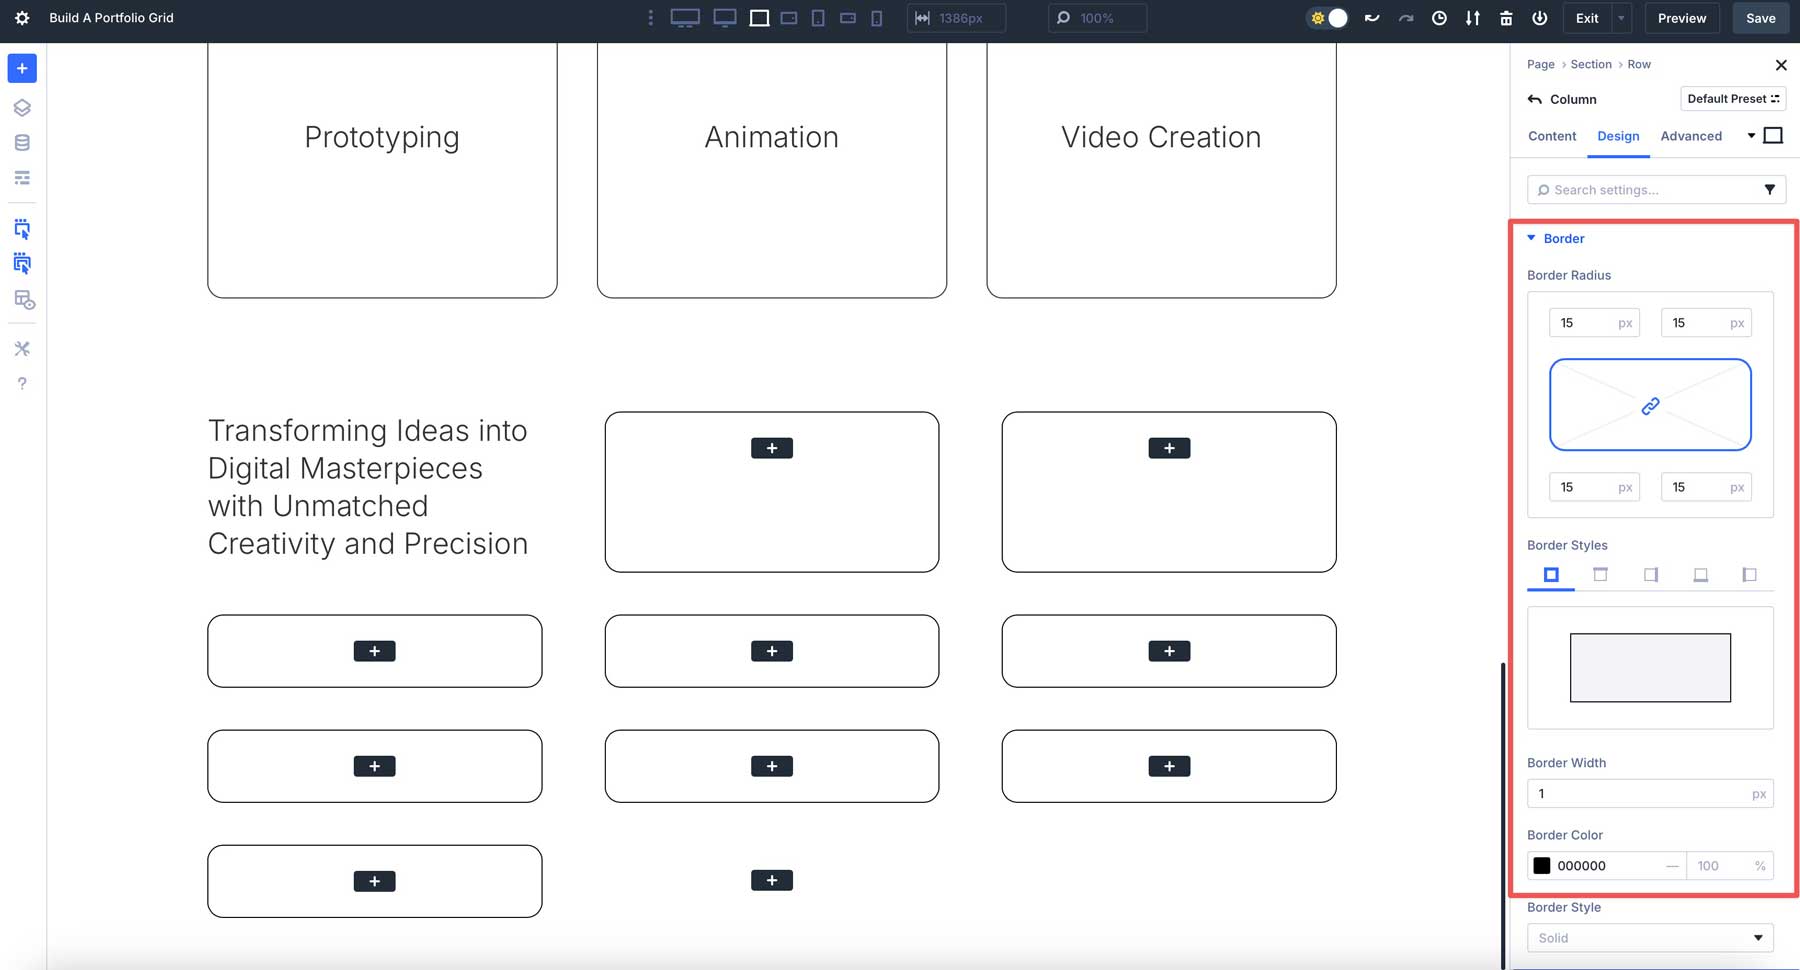
Styling The Loop Column
Now that the Loop settings are in place, it’s time to style our columns. The style settings we choose here will affect the remaining columns in the Loop. In the 3-column row, click into the 2nd column and click the Design tab. Navigate to the Border dropdown and assign a 15px Border Radius to the column. Under Border Styles, add a 1px Border Width and use #000000 as the Border Color.
Add Content To The Loop
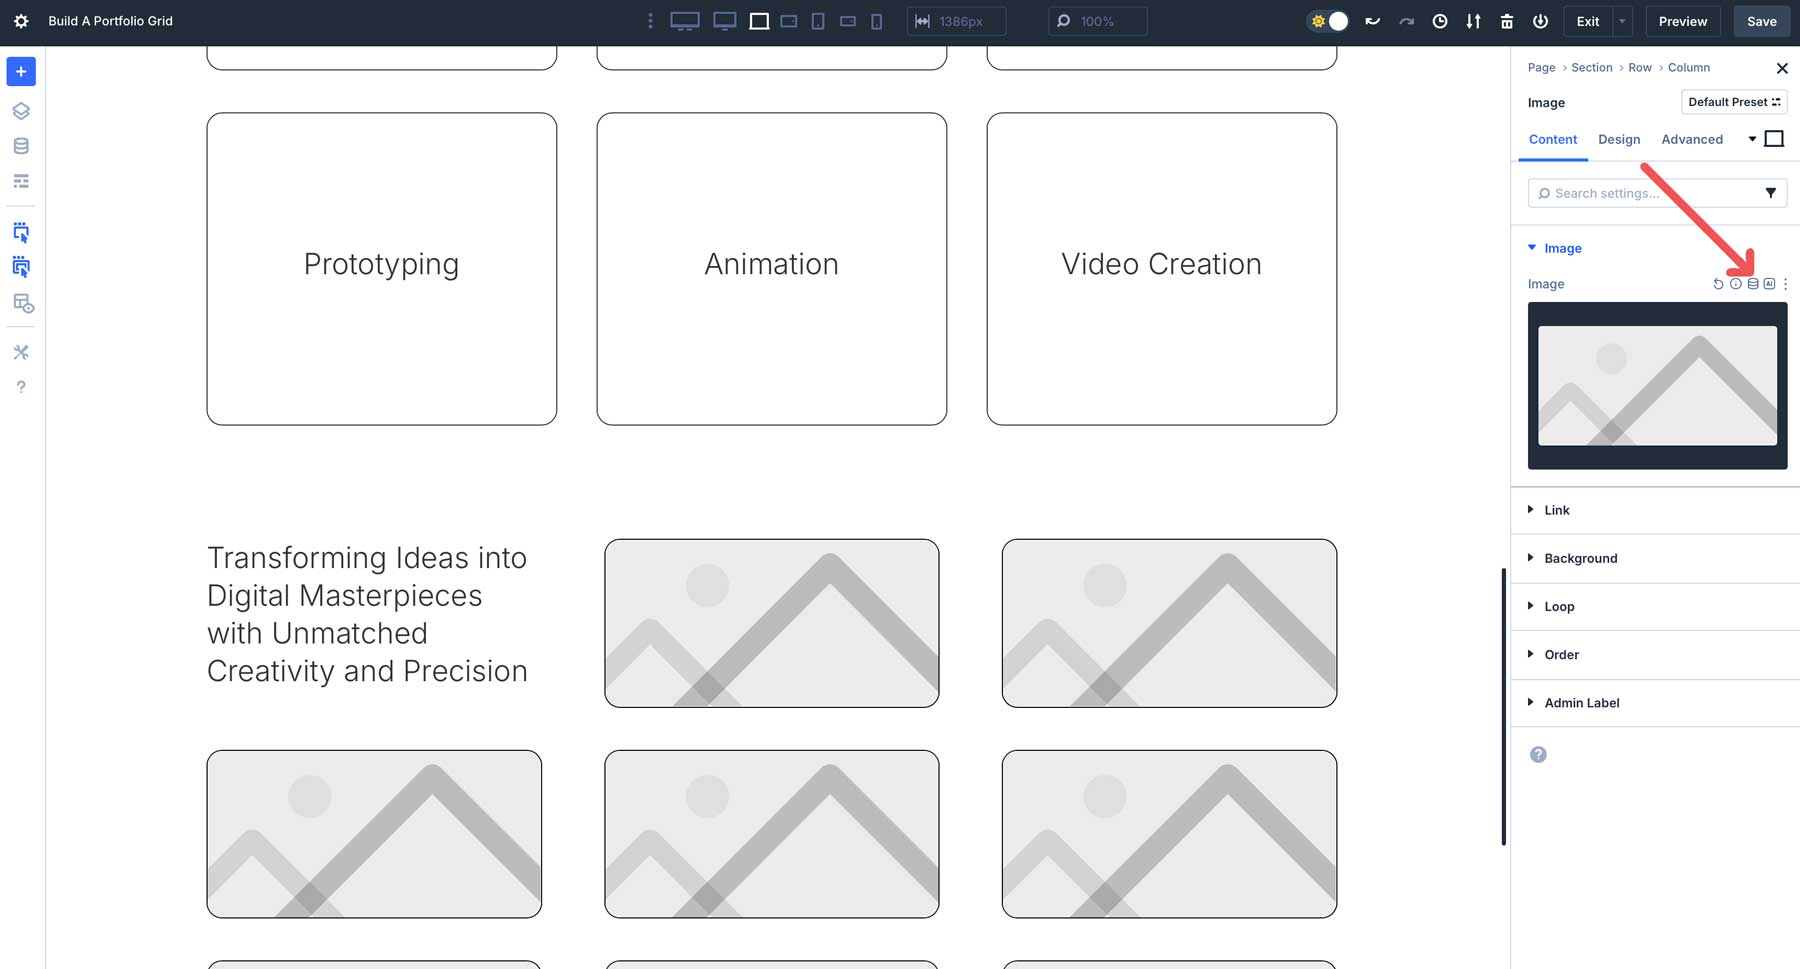
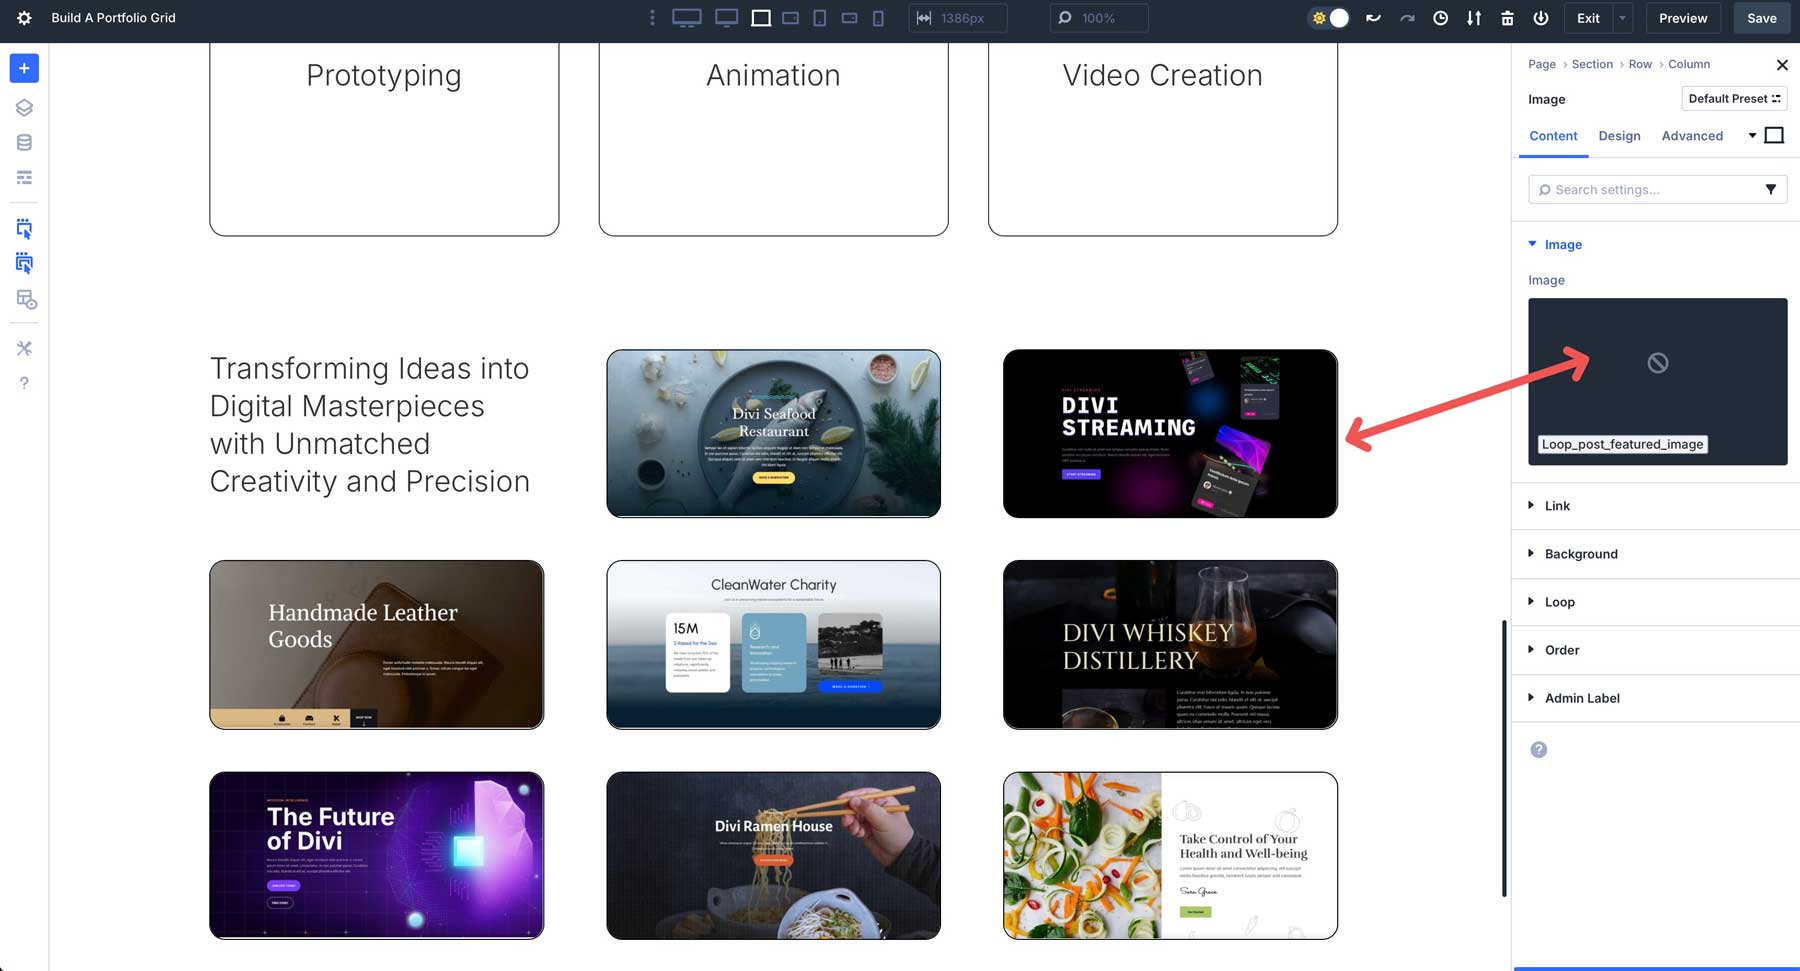
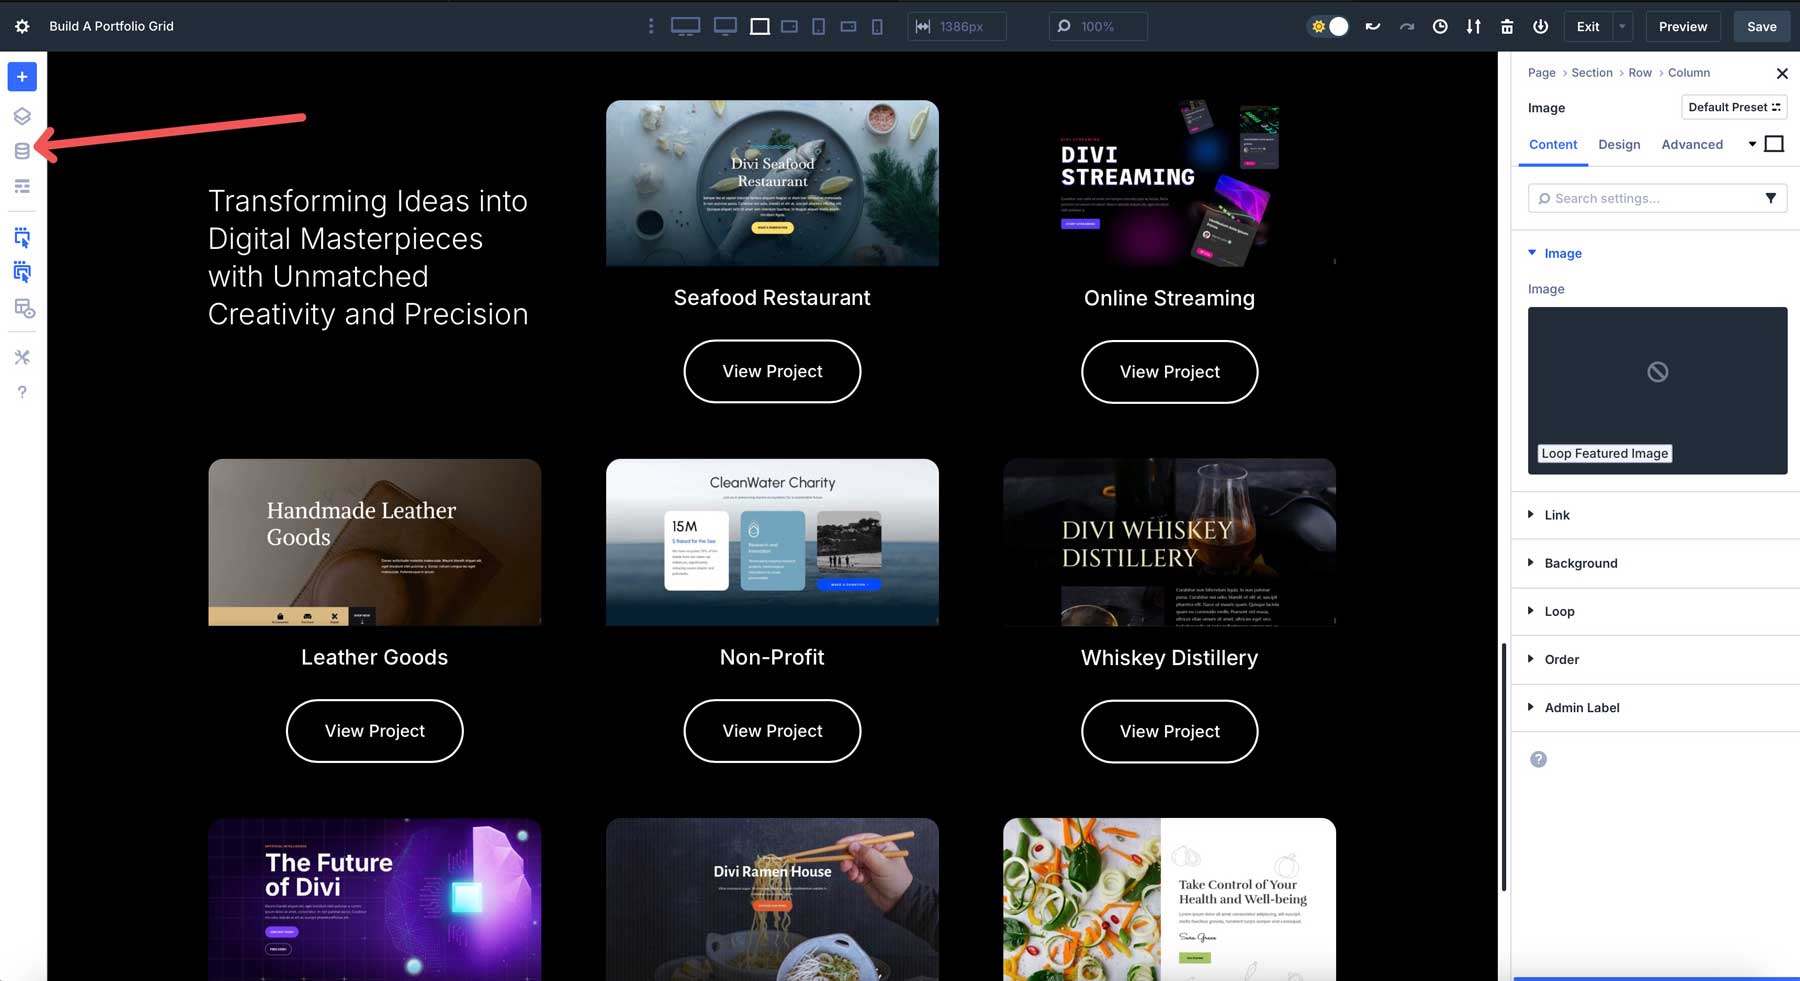
We can start adding content to the Loop with the column’s styles assigned. Click to add an Image module into the 2nd column. Once added, each column within the Loop will show an image placeholder.
We’ll use Divi 5’s dynamic content power to pull in our project’s featured image. Hover above the image to reveal the icons. Click the Dynamic Content Icon to continue.
Choose Loop Featured Image when the options appear.
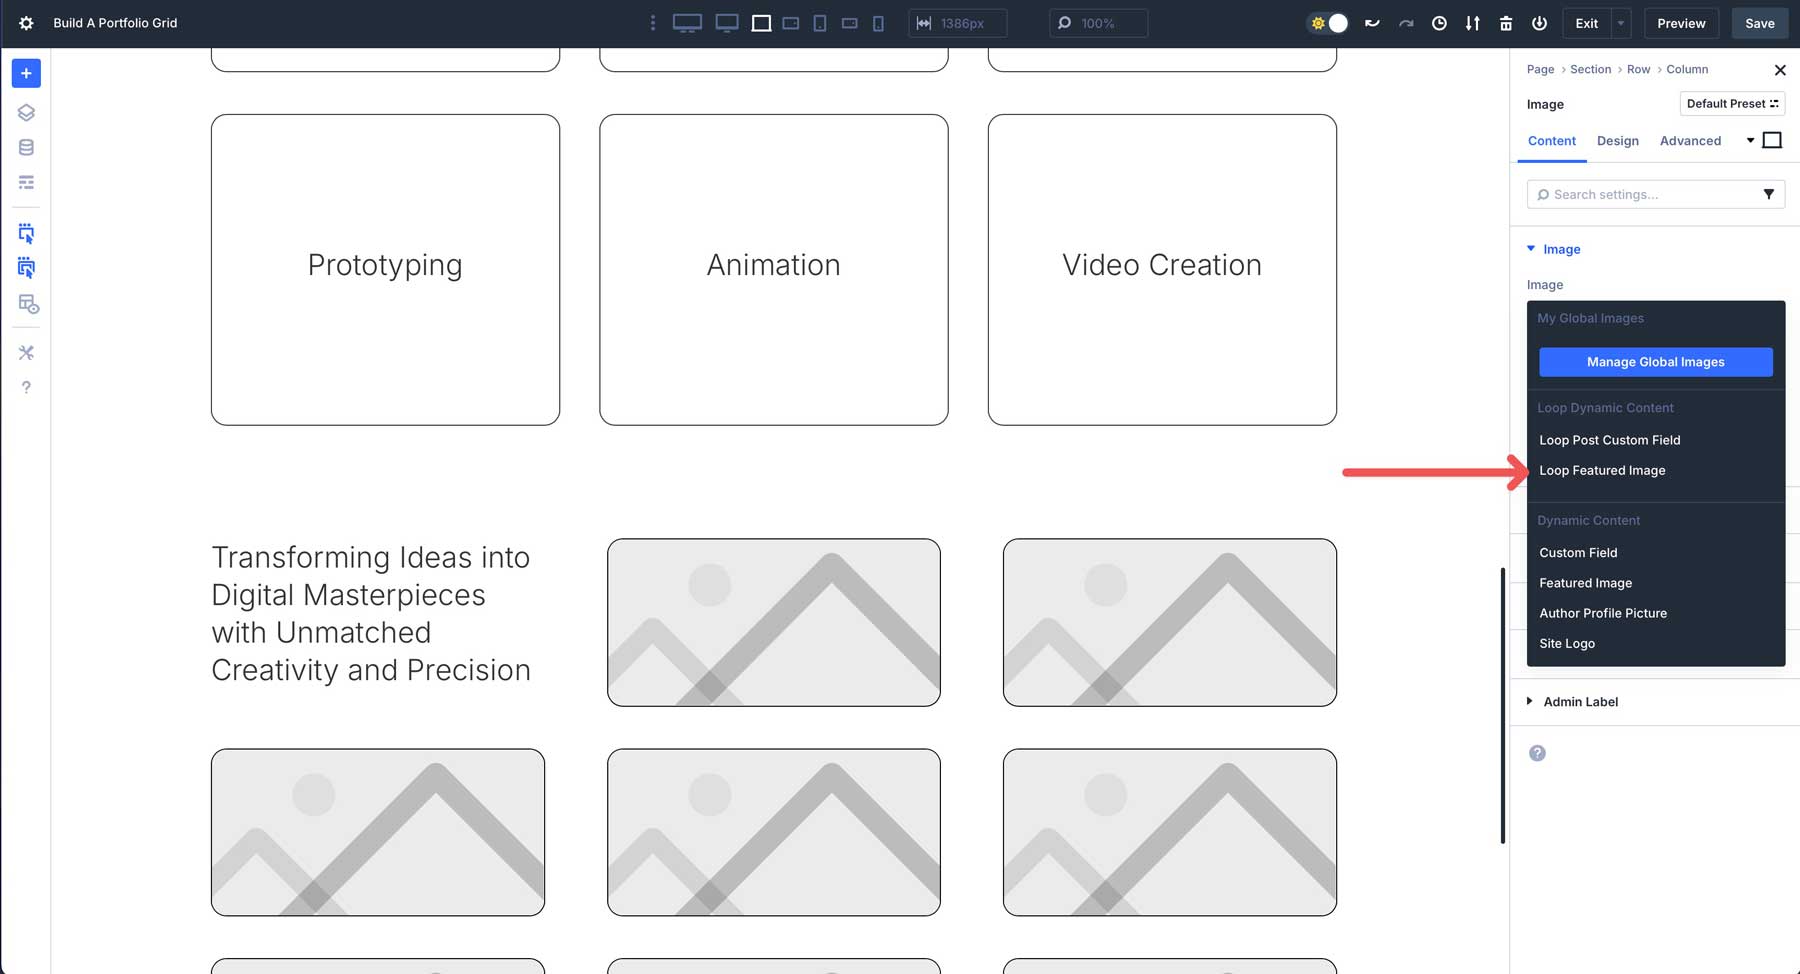
Our Loop will place the Featured Image of each Project directly into our portfolio Loop.
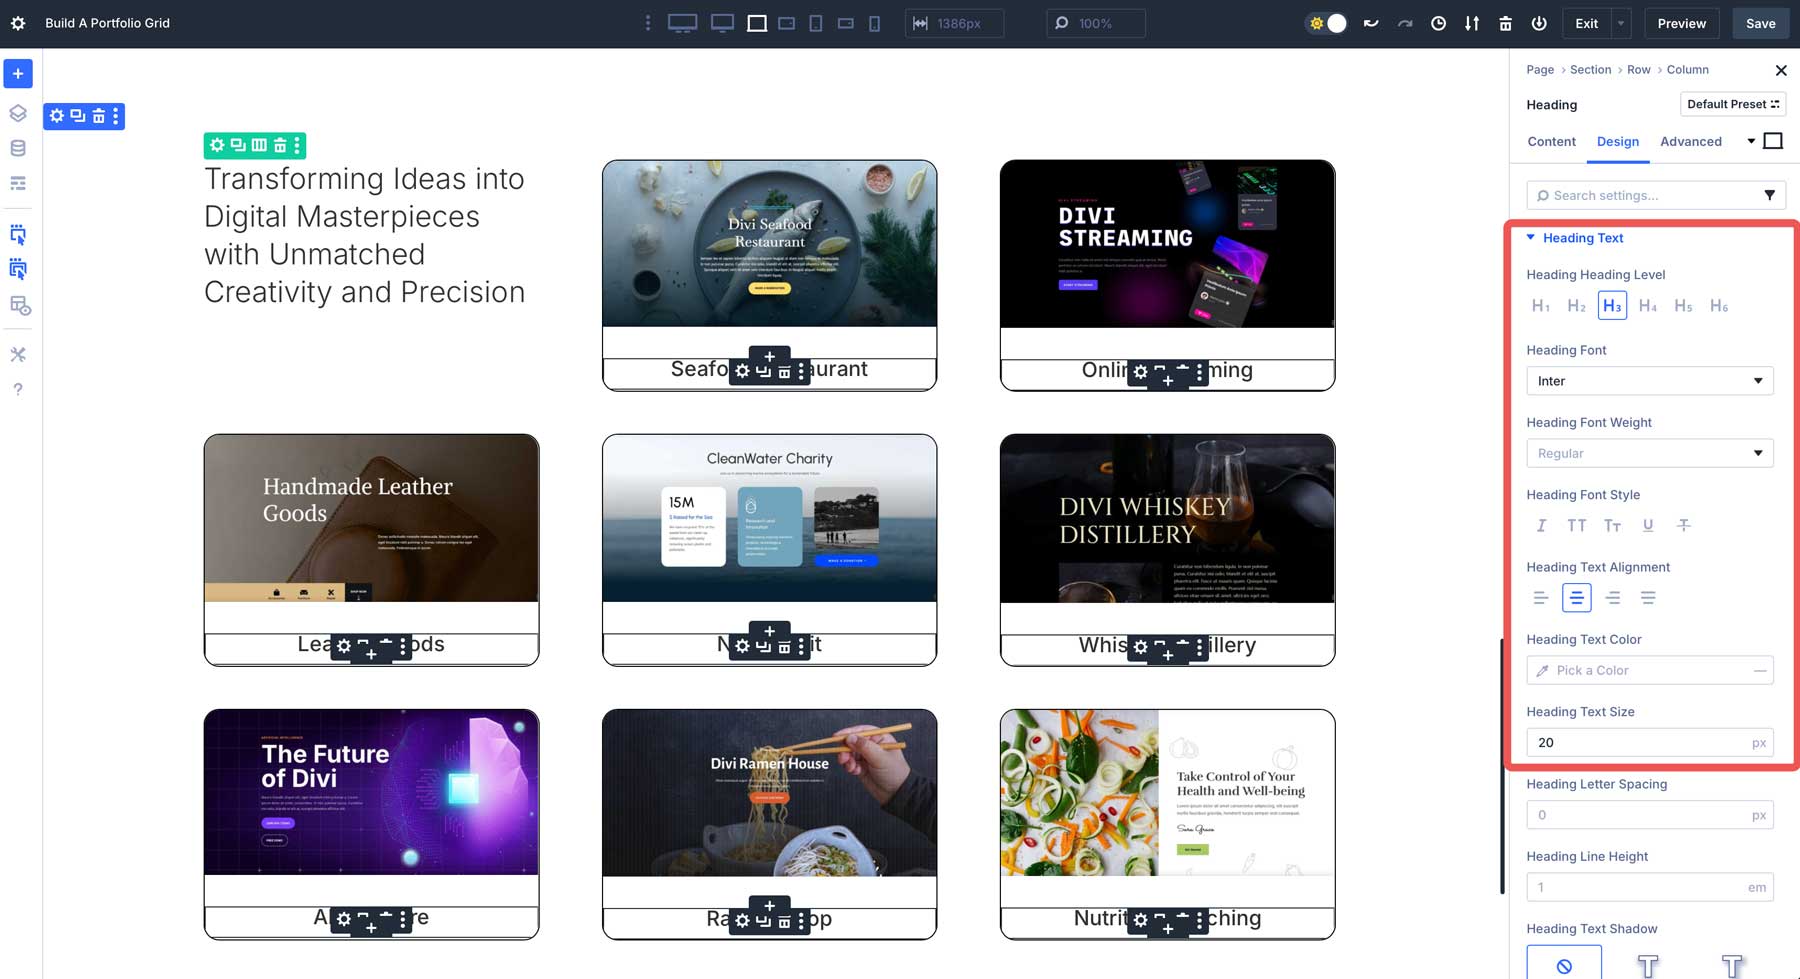
Next, add a Heading module to the 2nd column under the Featured Image. This will be used for the Project Title. Repeat the steps above to add the Title. However, choose Loop Post Title this time.

In the Design tab, select H3 for the Heading Level, Inter for the Heading Font, center for Heading Text Alignment, and 20px for Heading Text Size.
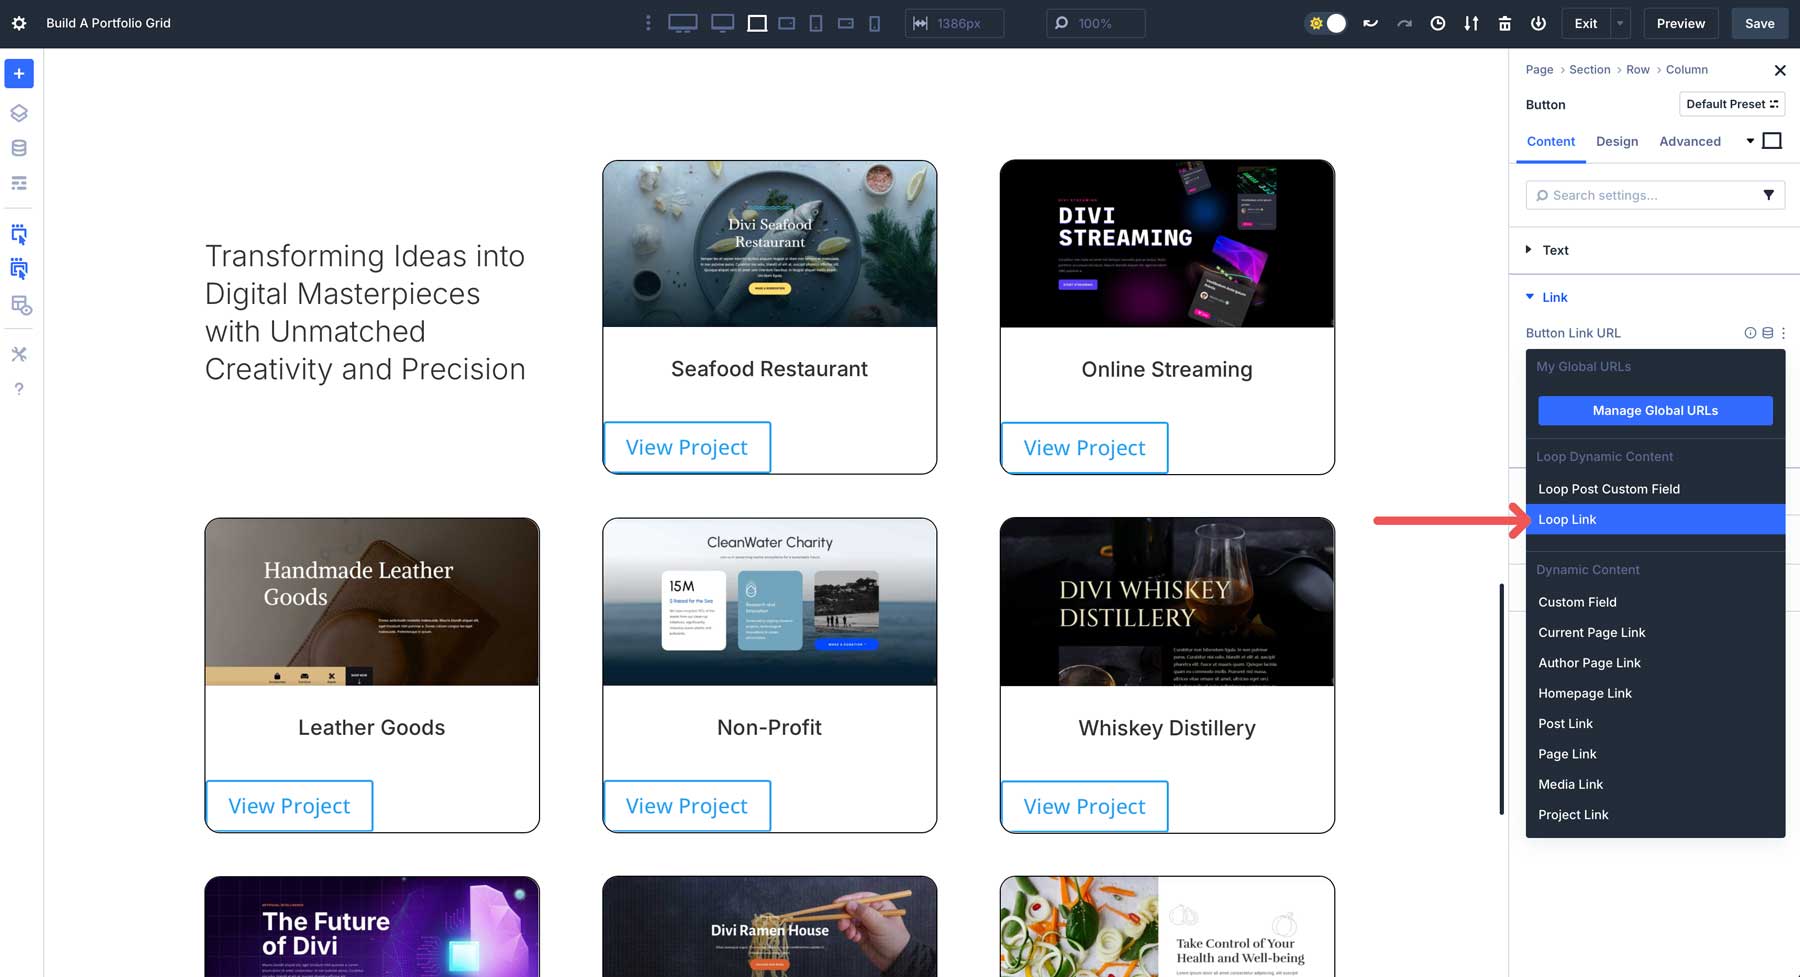
Finally, we’ll add a button that links to each Project. Add a Button module to the 2nd column underneath the Post Title. Click the Dynamic Content Icon in the Button Link URL and select Loop Link.
Switch to the Design tab and set the Alignment to Center.
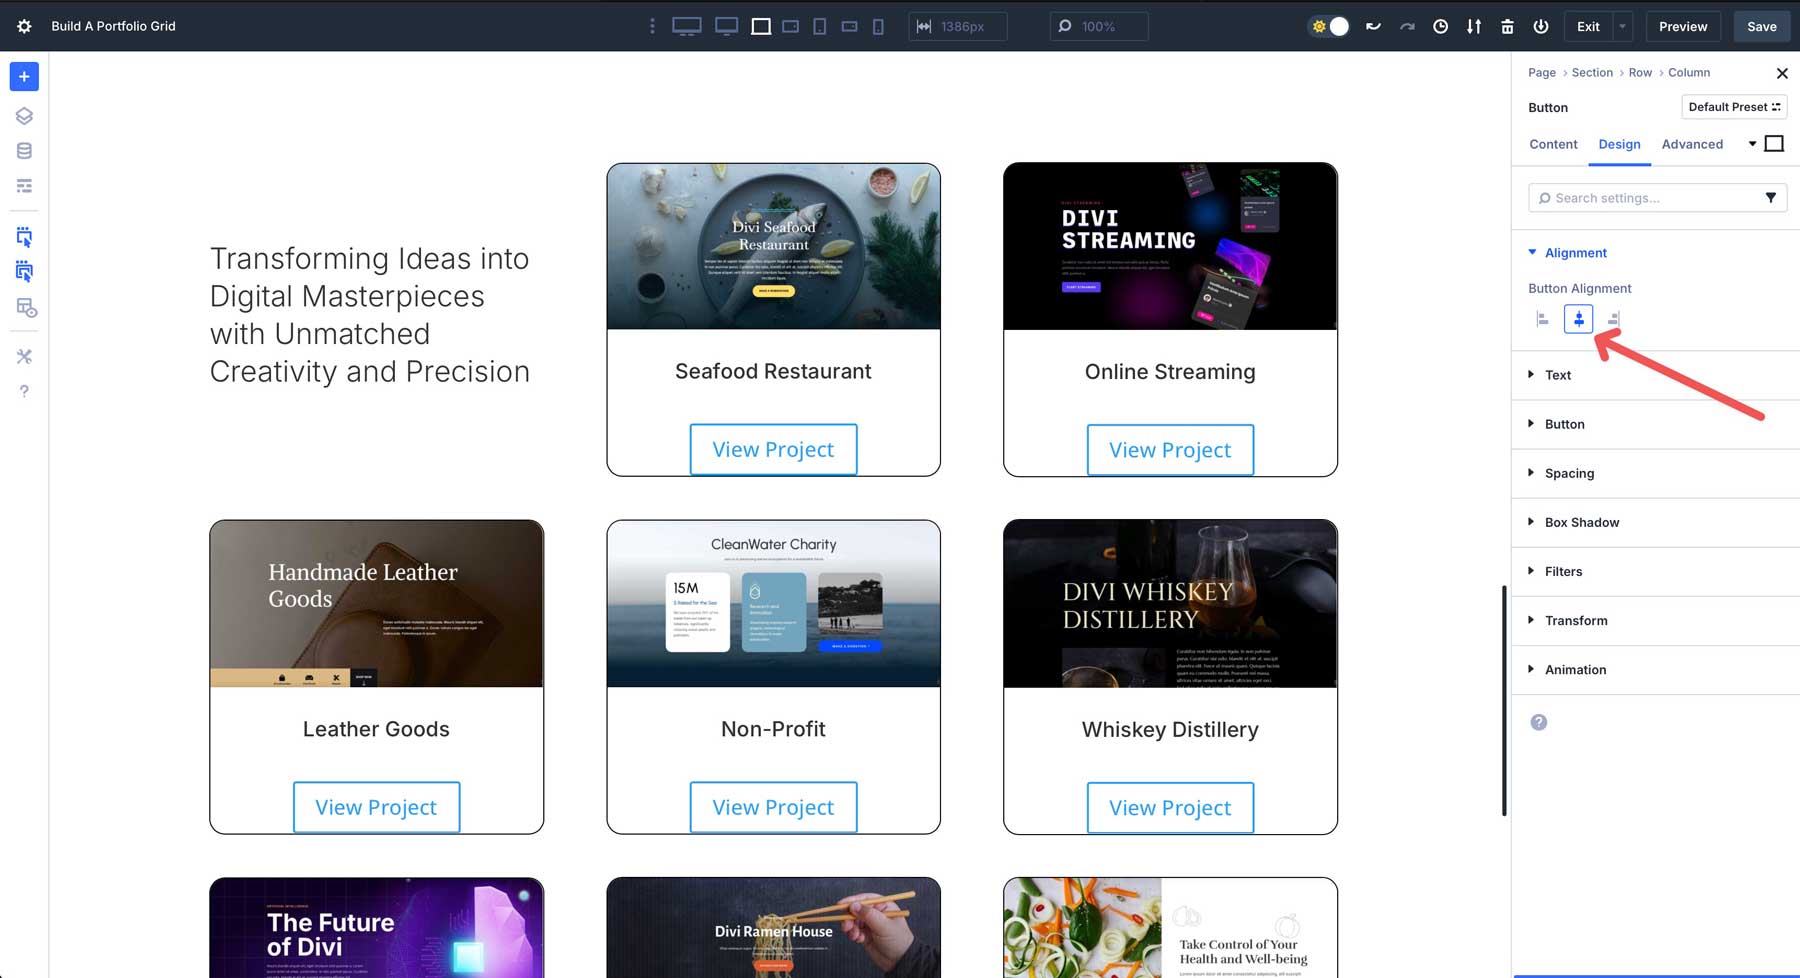
Expand the Button dropdown settings and enable Use Custom Styles For Button. Enter the following design settings:
- Button Background: #000000
- Button Border Radius: 15px
- Button Border Width: 0px
- Button Font: Inter
- Button Text Color: #ffffff
- Button Text Size: 16px
- Margin: 15px bottom
- Padding: 15px top & bottom, 35px left & right
That’s it! As you can see, creating a Loop with Divi 5 is a straightforward process.
Changing Styles With Loop Builder
Editing your Loop’s styles is just as simple as creating the Loop itself. Let’s say you want to swap from a light to a dark theme for your Loop. Making design changes only takes a couple of seconds. You can change the section’s background color and then make changes to individual Loop elements with a couple of clicks.
There’s no need to edit Loop items individually. Since they are all connected, you only have to edit modules once, and Divi 5 will apply the updated styles automatically across every module in the Loop.
You can add more modules to the Loop, like the Project Excerpt, Publish Date, Comment Count, Author Bio, Custom Fields, and more.
If you want to tighten up the space around the items within your Loop, you can adjust the Vertical Gap in the Row and Column settings. This controls the amount of space between each row and individual modules using Divi 5’s Flexbox Layout System, allowing you to perfect how your Loop looks.
Testing And Refining The Portfolio Loop
Once you’ve built a portfolio, it’s time to test it to ensure everything works as intended. Start by previewing the grid on the front end using the Preview link in the top bar of the Visual Builder.

Verify that each Project’s Title, Featured Image, Excerpt, and Loop Link are pulling correctly from the Projects CPT. Ensure no placeholders are broken elements that appear.
Back in the Visual Builder, check to ensure the layout adapts properly using Divi 5’s Customizable Responsive Breakpoints. By default, Divi 5 offers 3 Breakpoints — one for Desktop, Tablet, and Phone — but you can enable up to 7 by clicking the Ellipsis Menu in the middle of the top bar of the Visual Builder.
Navigate through each Breakpoint, check the layout, and make adjustments as necessary.
To make the layout more mobile-friendly, you can use Divi 5’s Change Column Structure setting to change the number of columns displayed on smaller devices.
Best Practices And Tips
To ensure you’re getting the most out of Divi 5 and Loop Builder, here are a few best practices to follow when building your portfolio.
1. Ensure Design Consistency With Design Variables
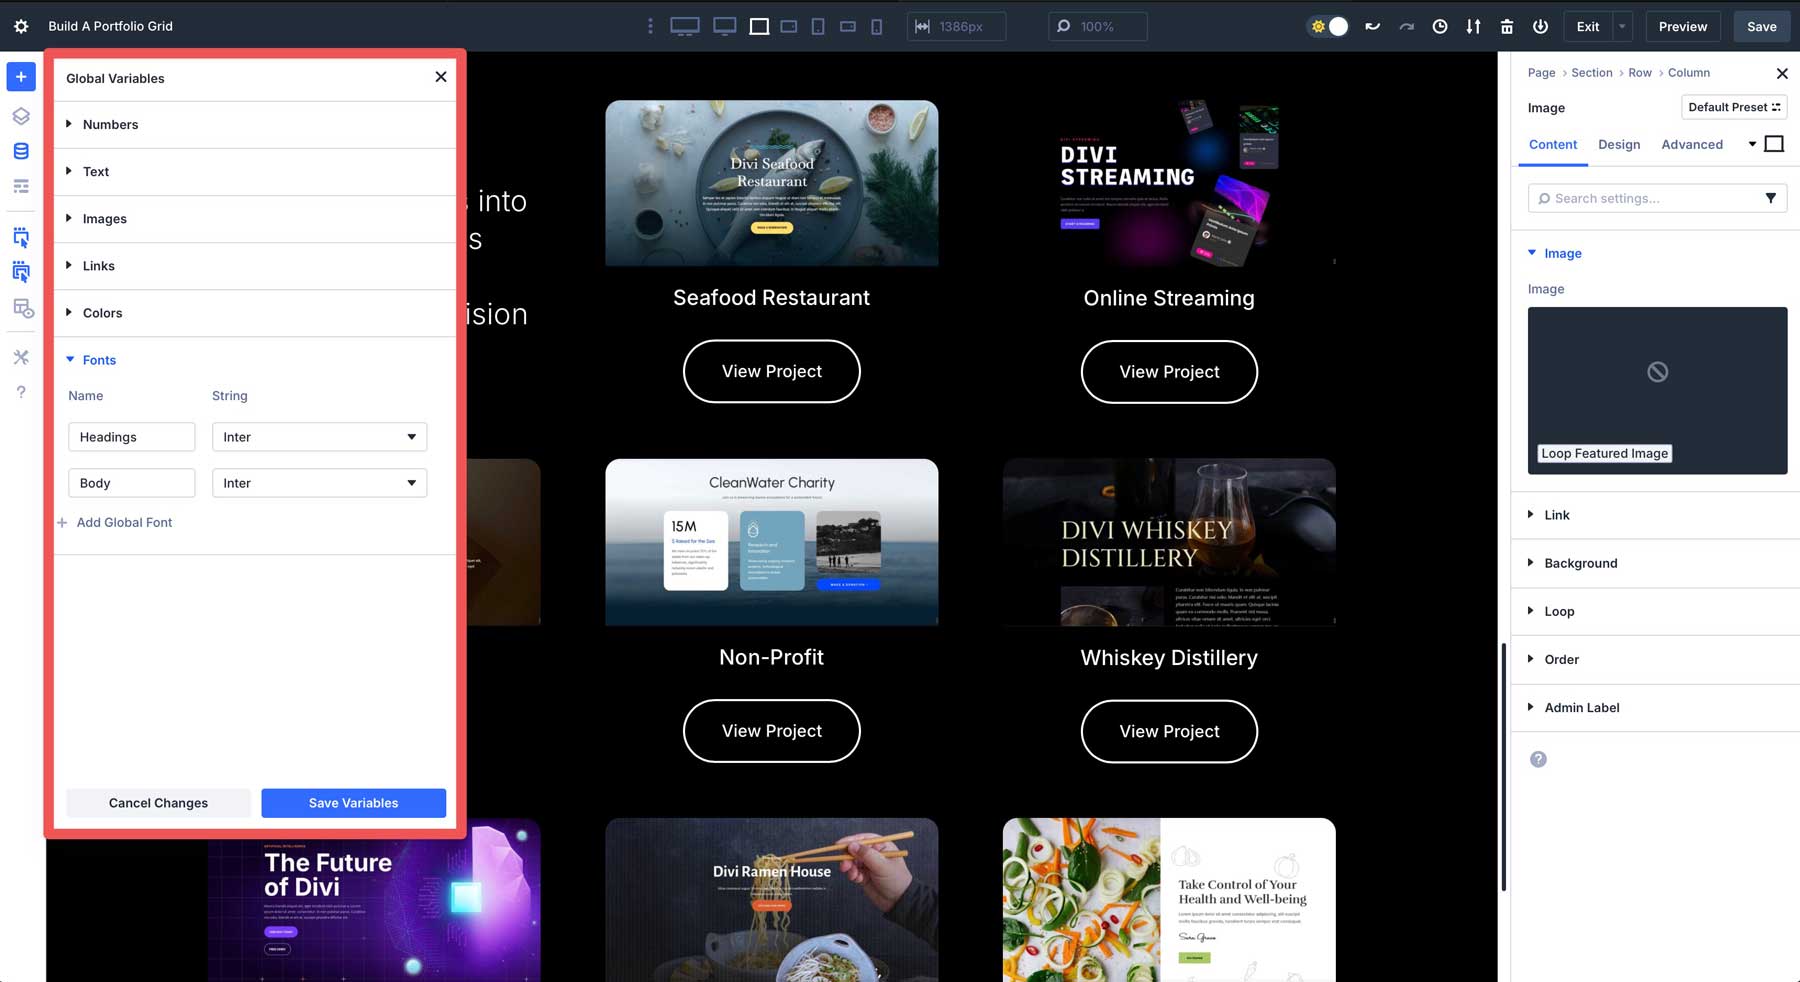
Divi 5’s Design Variables feature allows you to define consistent typography, colors, and spacing across your portfolio page. In the Visual Builder, set Global Variables for fonts, colors, and padding/margins to ensure every portfolio item looks uniform. To create Variables, click the Variable Manager Icon on the left-hand side menu in the Visual Builder.
From there, you can assign Global Fonts, Colors, and more, ensuring your designs are consistent across your entire website, not just your portfolio page.
2. Consider Accessibility
Accessibility ensures all users, including those with disabilities, can navigate and enjoy your work. Make sure to add Alternative Text for images as you upload them to the media gallery. This helps screen readers convey the content to visually impaired users.

It’s also good to select colors with sufficient contrast ratios to ensure readability for users with visual impairments.
3. Save And Reuse Templates
After perfecting your Loop Builder template, save it to the Divi Library by right-clicking on the portfolio section and selecting Save To Library. Give it a descriptive name for easy reference. This allows you to reuse the template on other pages without rebuilding from scratch.
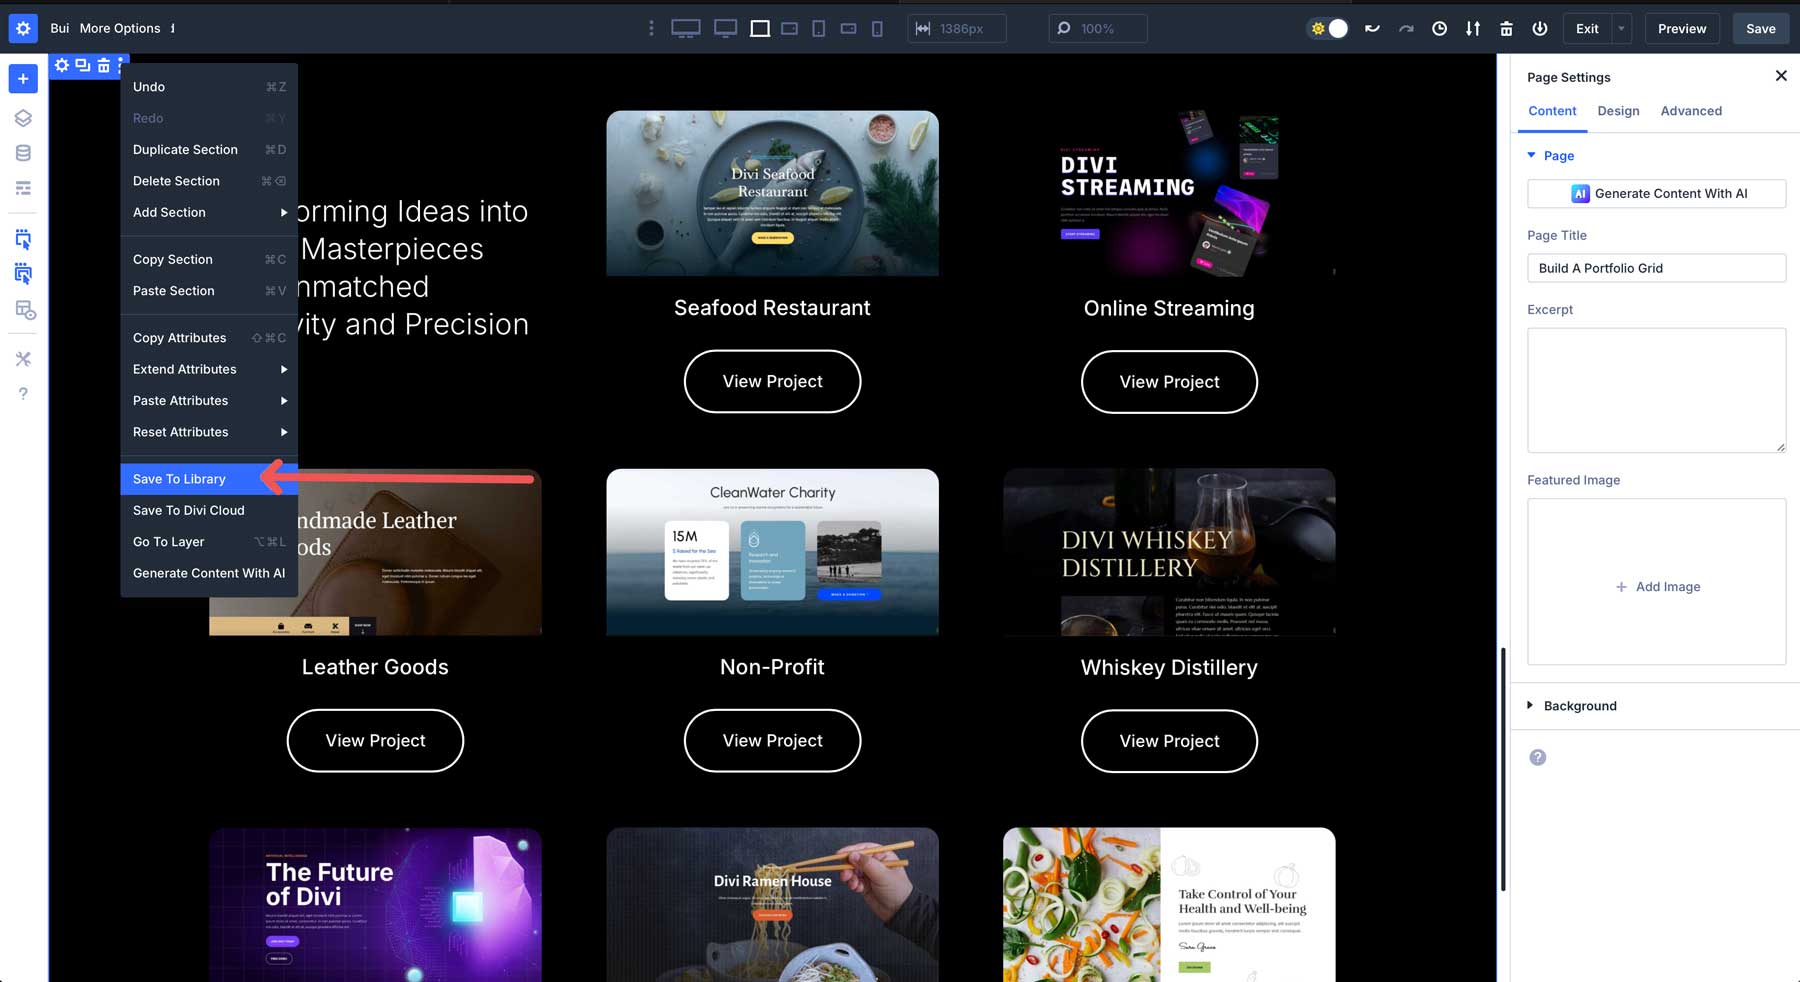
To use the template on other websites, you can save it to Divi Cloud and import it into other web projects with one click.
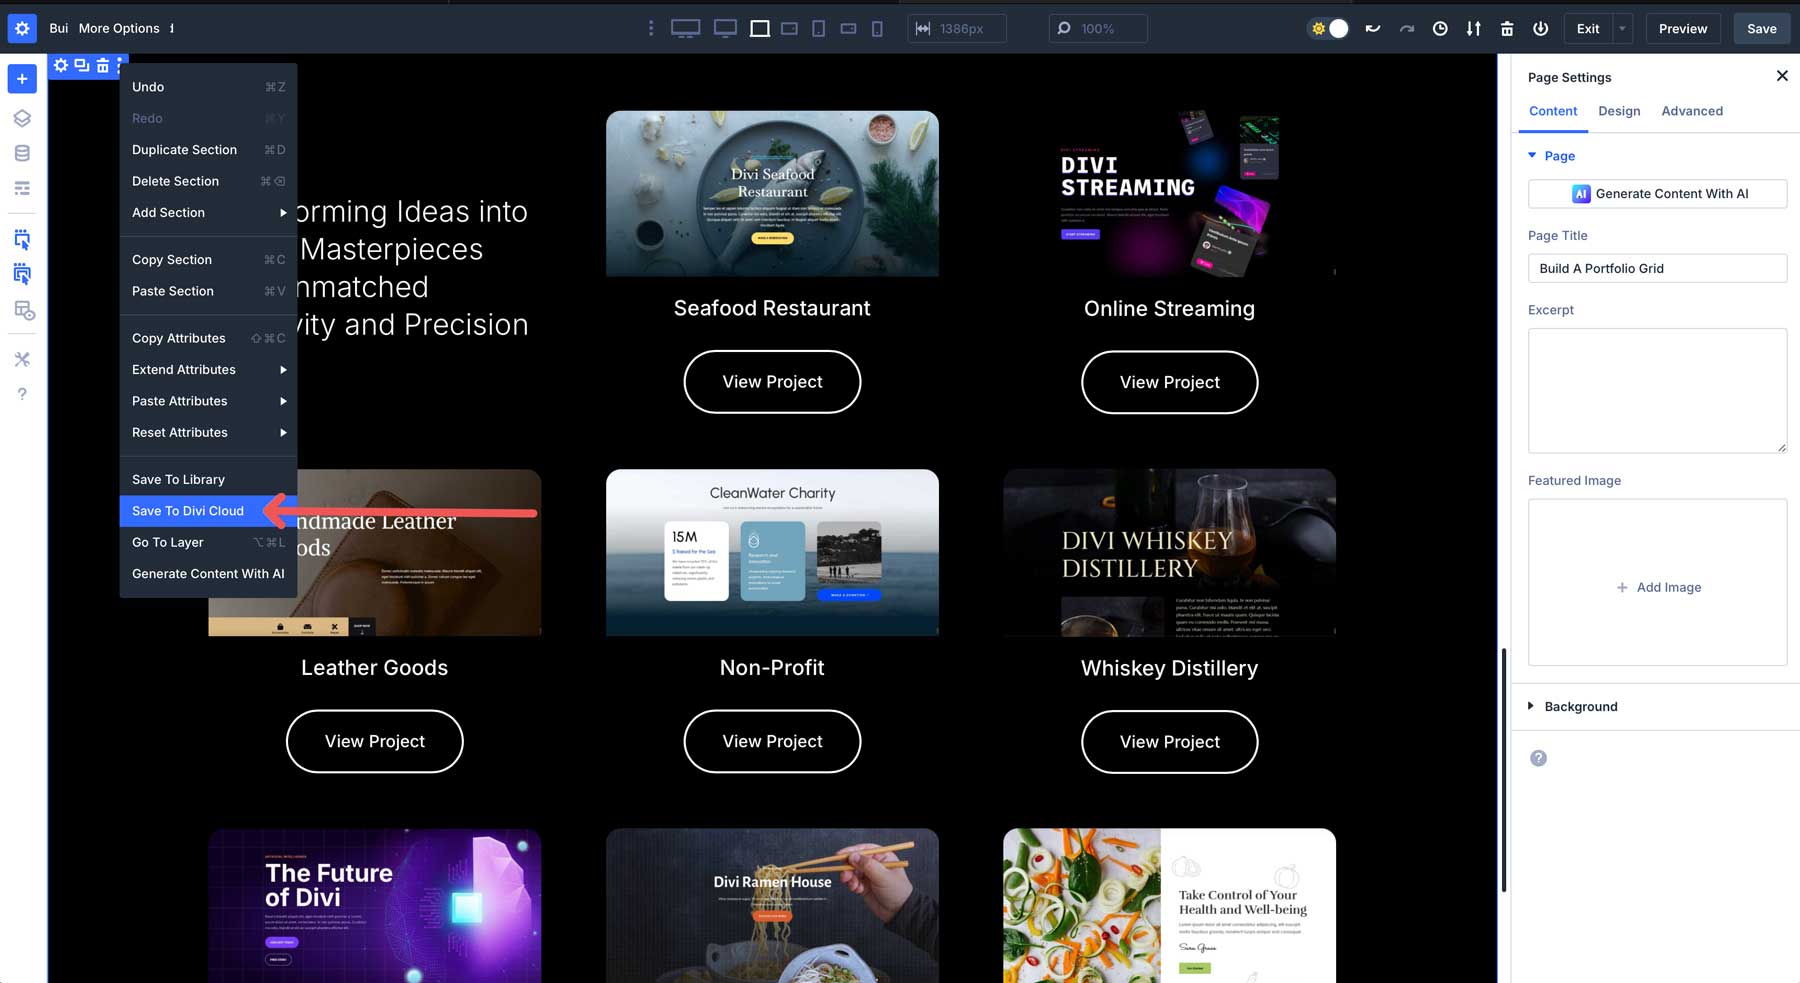
Saving templates streamlines your workflow and ensures you can quickly deploy professional portfolio grids for future projects.

Try Out The Loop Builder In Divi 5 Today
Divi 5‘s Loop Builder makes it easy to create dynamic portfolio grids, allowing you to showcase your work with style and efficiency. By leveraging the built-in Projects CPT and the Loop Builder’s powerful features, you can create flexible and fully customizable grids that dynamically pull in your project’s content. Its flexibility allows you to design unique layouts using any Divi module, set up queries to display specific projects, and create responsive grids that shine on any device.
Are you ready to bring your portfolio to life? Dive into Divi 5’s latest Public Alpha release and experiment with your portfolio layout. Whether you’re a freelancer showcasing projects or a business highlighting client work, Loop Builder allows you to easily create a professional, dynamic display.
The post How To Build A Portfolio Grid With Divi 5’s Loop Builder appeared first on Elegant Themes Blog.
The Tech Zone


Comments
Post a Comment