How to Use Photoshop AI Generative Fill in 2023 (Detailed Tutorial)
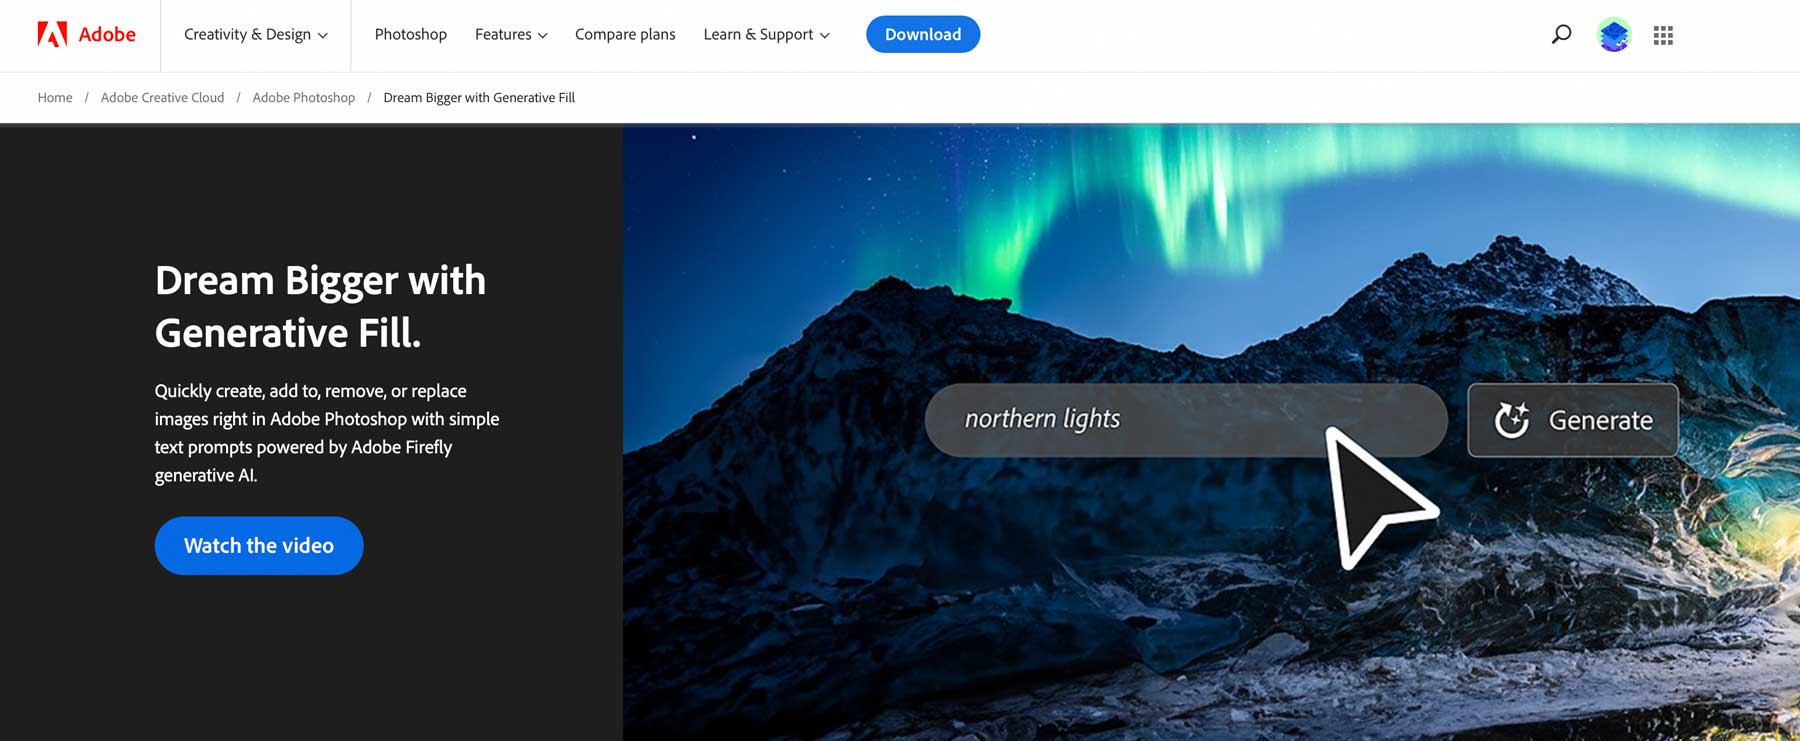
Adobe Photoshop has been the go-to software for image editing for over thirty years. In early 2023, Adobe released the next big thing in image editing – Photoshop AI generative fill. Using Photoshop’s latest beta version, you can add or delete elements, extend the width or height of an image, and remove backgrounds, to name a few things. This post will explain Photoshop AI’s generative fill, what you can do with it, and some tips on using it effectively.
Let’s dive in.
What is Photoshop AI Generative Fill?
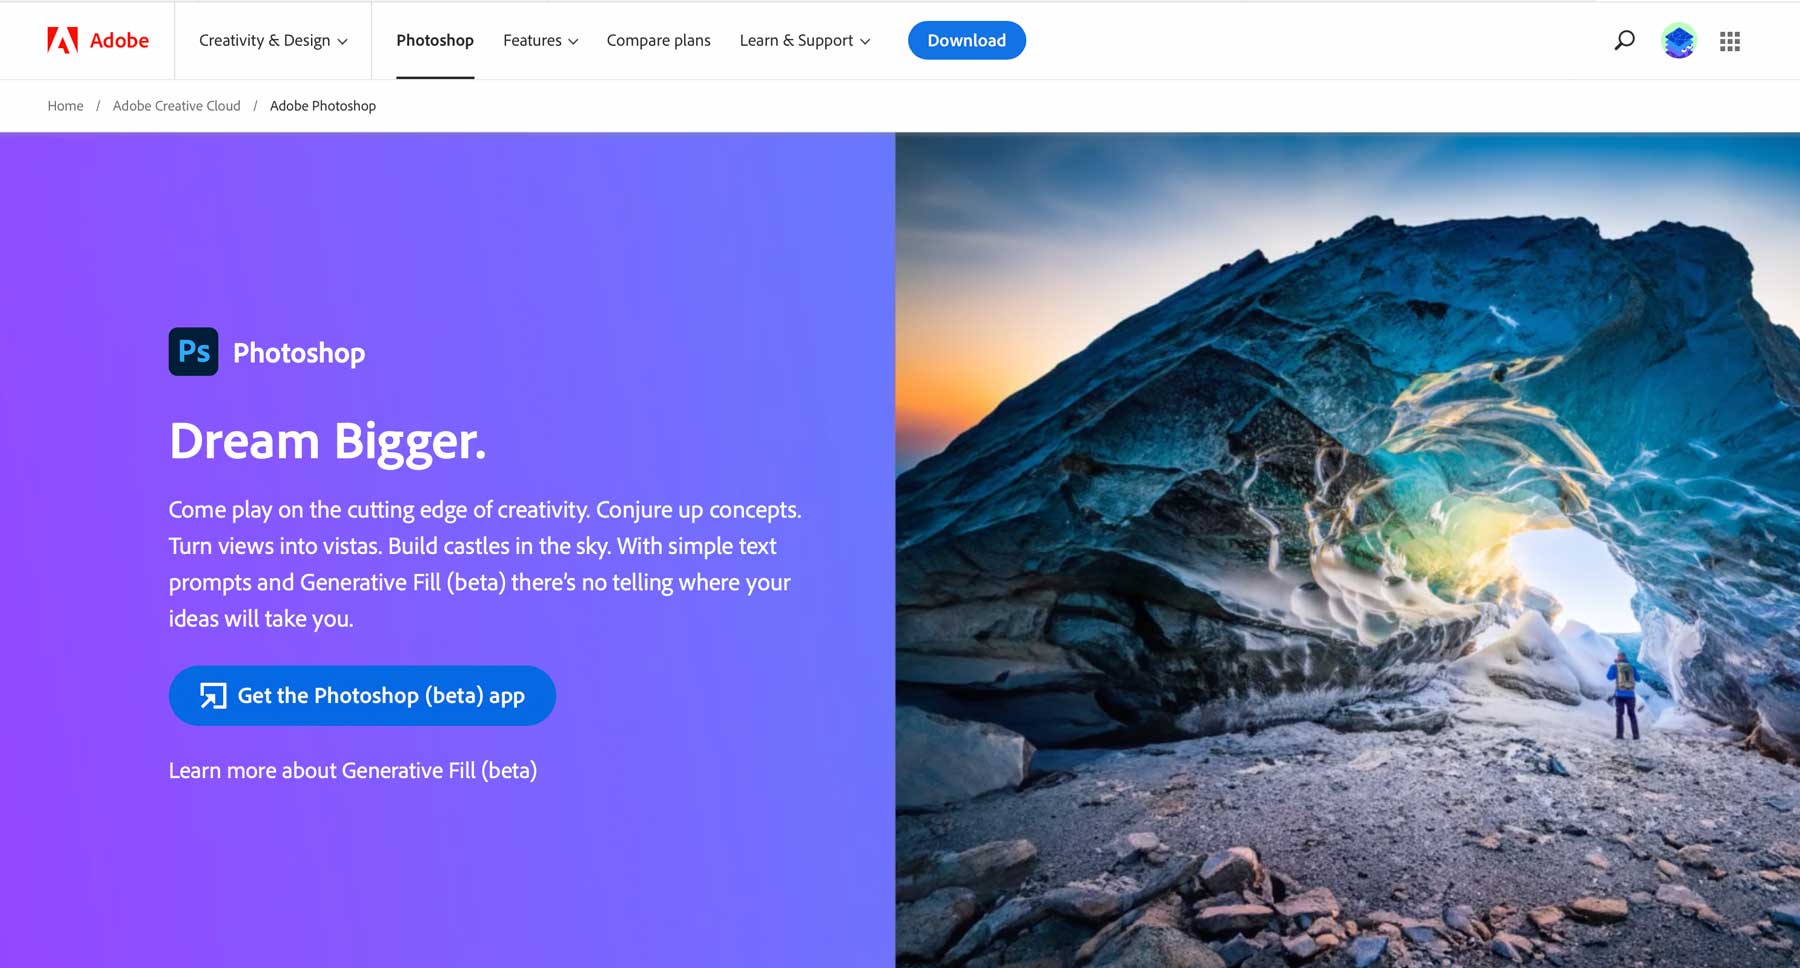
Photoshop’s AI generative fill is a powerful feature that enables you to effortlessly fill, edit, and remove image elements with just a few clicks. Powered by machine learning AI, it generates parts of images or even entire composite photos in a fraction of the time it would take if a human were to do it. By analyzing each pixel of an image, it matches lighting, perspective, coloring, and shadows, resulting in a remarkably realistic piece of art. This non-destructive tool allows you to revert easily any changes you aren’t happy with, as it organizes every generated element into its own layer, complete with a layer mask. As a result, you can enhance and modify the designs you create using any of Photoshop’s other tools, such as blending modes or filter effects. Even better, it also works with your favorite Photoshop keyboard shortcuts.
Currently, the Photoshop AI generative fill tool is only available through Photoshop beta, so you’ll need to download it from Adobe before you can experiment.
Subscribe To Our Youtube Channel
How to Download Photoshop Beta
You must subscribe to Adobe’s Creative Cloud platform to use Photoshop AI generative fill unless you want to experiment with it on Adobe’s Firefly web app. The cost varies depending on your desired tools, but you can get Photoshop as a standalone product for around $21 a month. If you want to test out the features of Photoshop before purchasing, they offer a 7-day free trial, so you can decide if you’d like to continue using it.
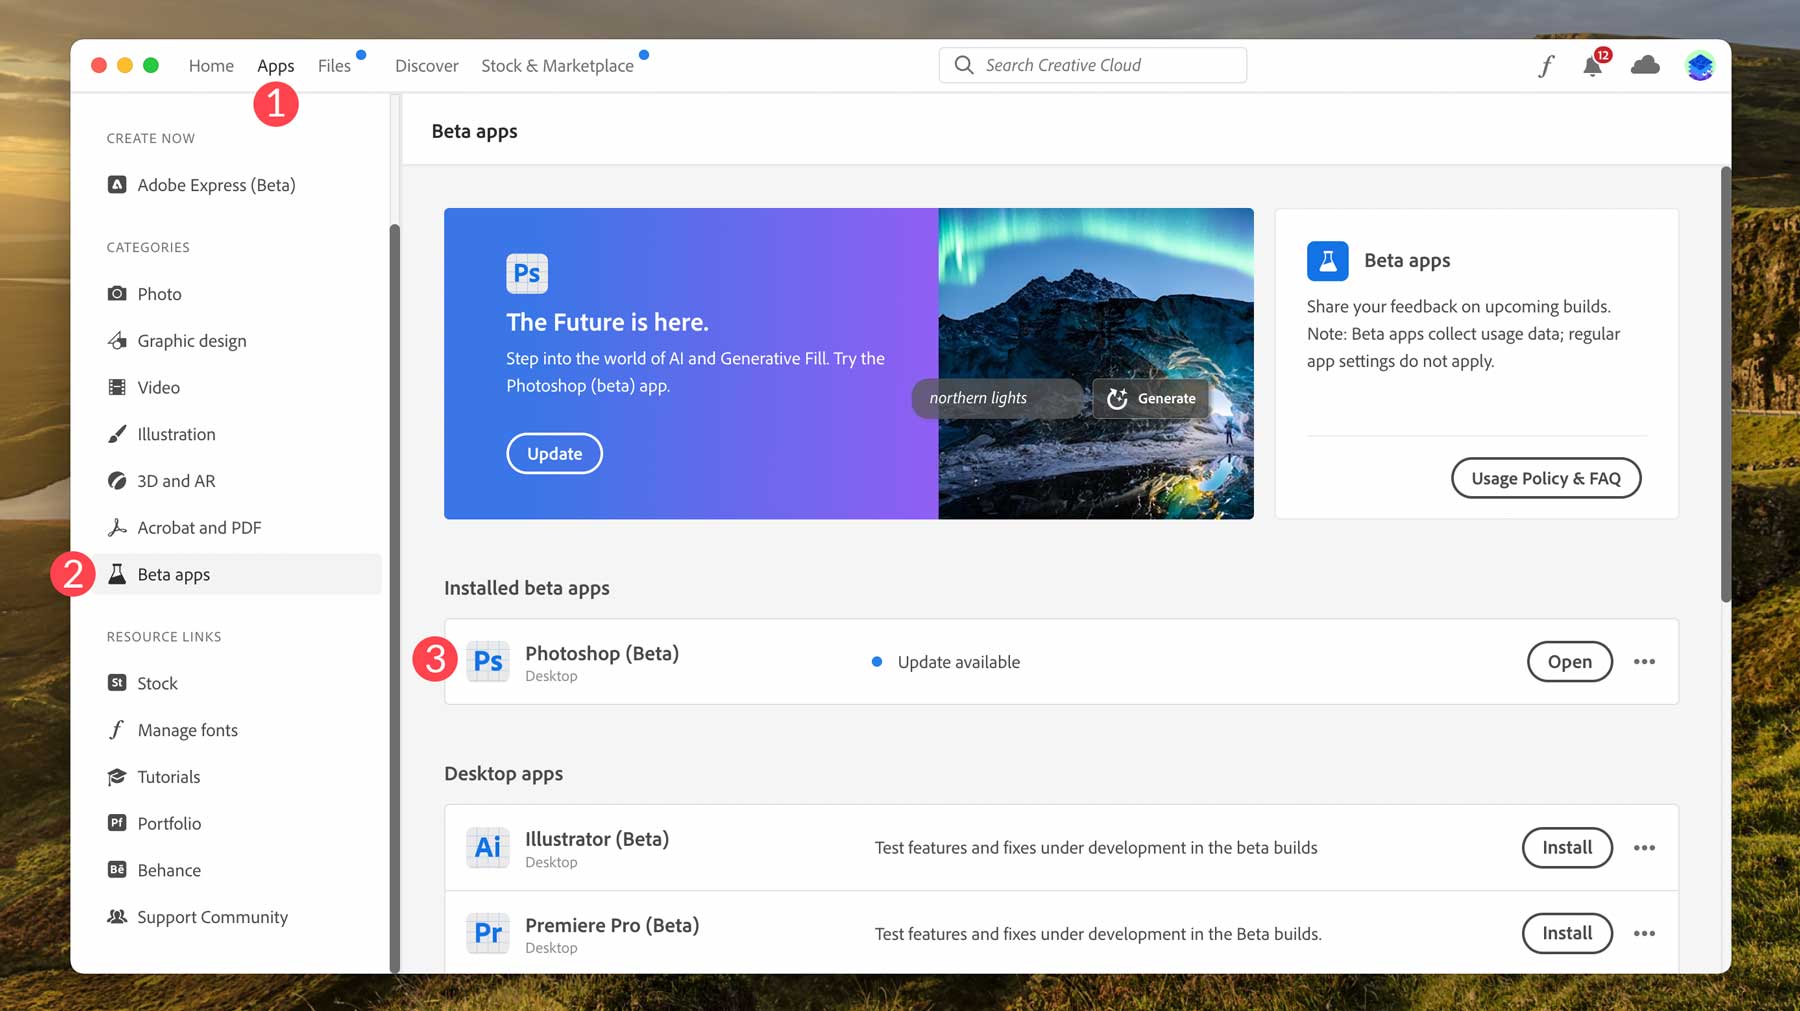
Once you sign up, click the download button to get Photoshop. Doing so will install the Creative Suite control panel on your computer. Open the Creative Cloud dashboard, then navigate to the Apps tab. From there, search for the Beta Apps tab on the left-hand side of the dashboard. Click on it, then search for Photoshop (Beta) to install the application.
Navigating the Photoshop AI Generative Fill Taskbar
Once you’ve installed Photoshop beta, you’re ready to start creating. Before that, let’s look at the generative fill contextual taskbar and its settings so you know what the tools are and where they are located. The taskbar will appear underneath the image area after importing a new image or creating a new document.
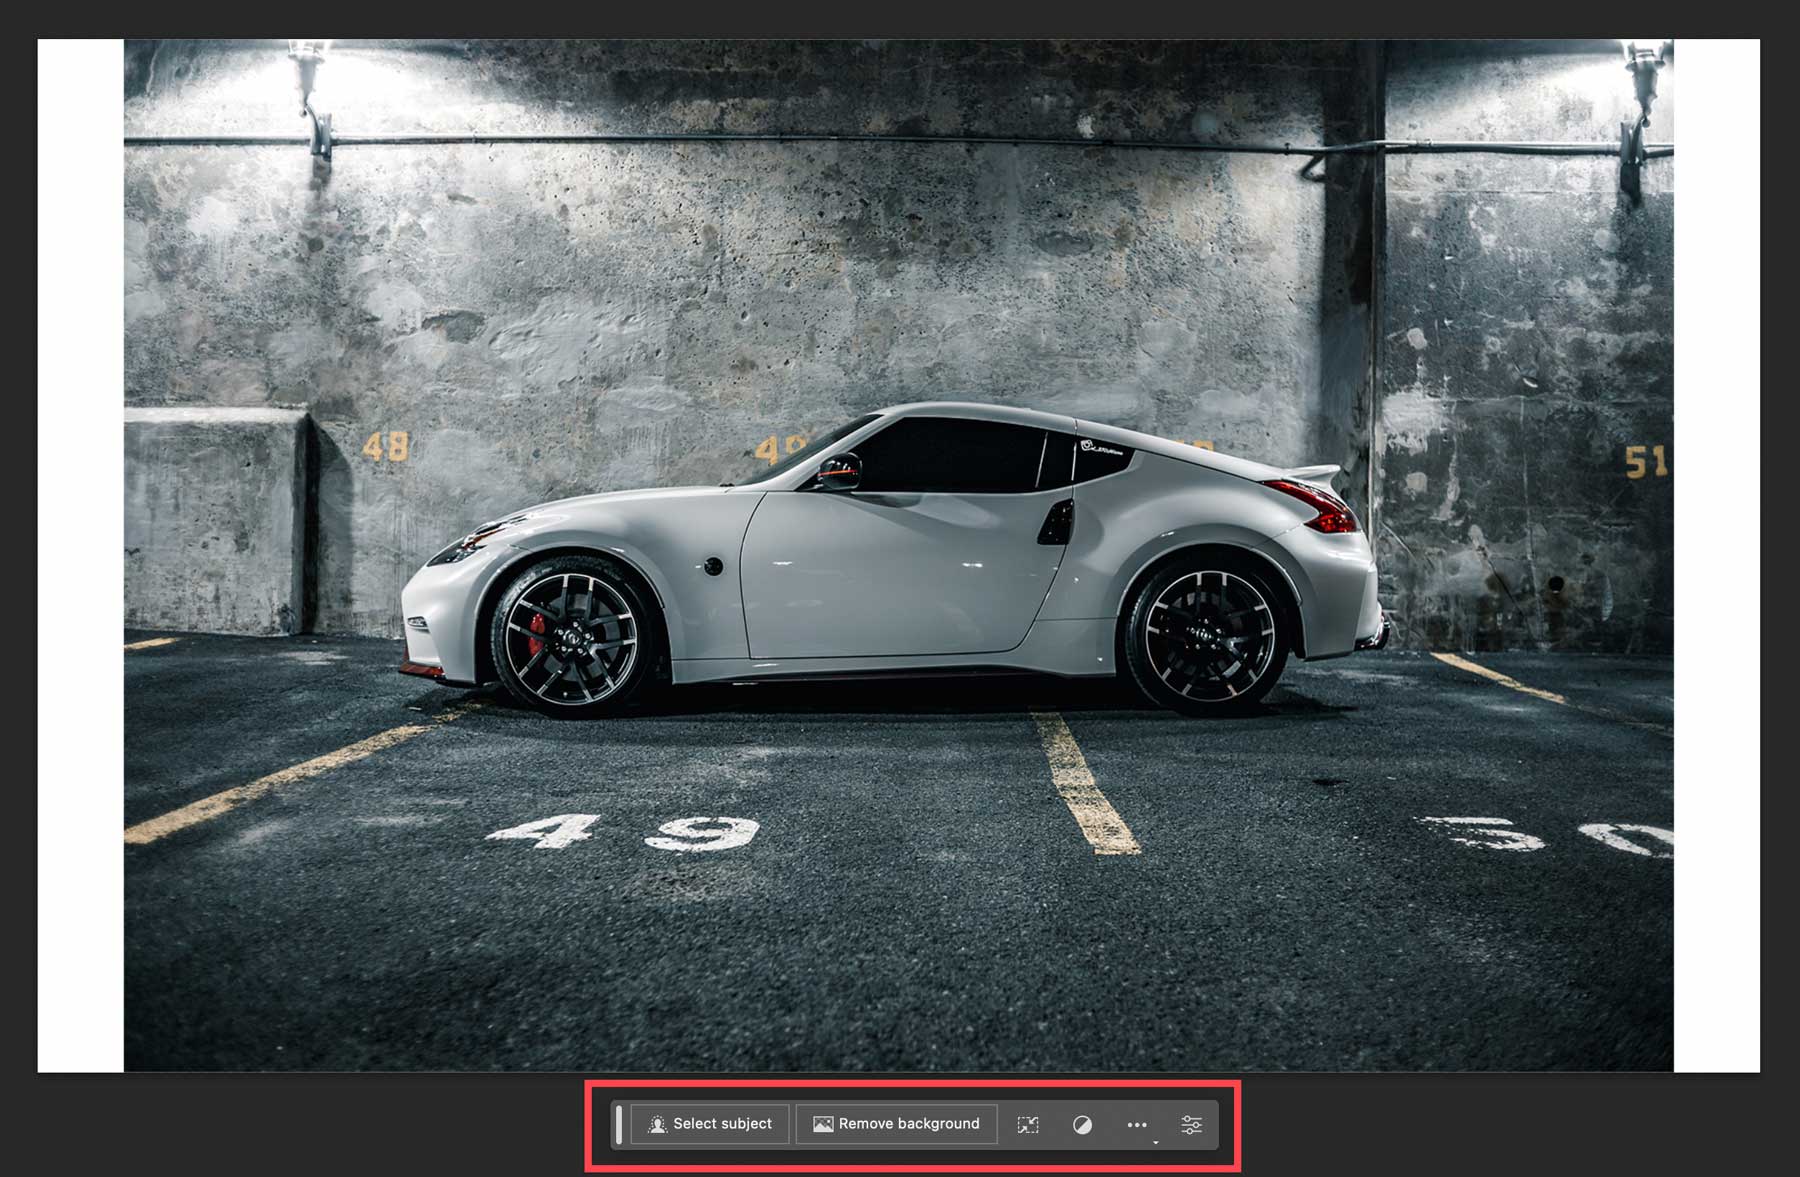
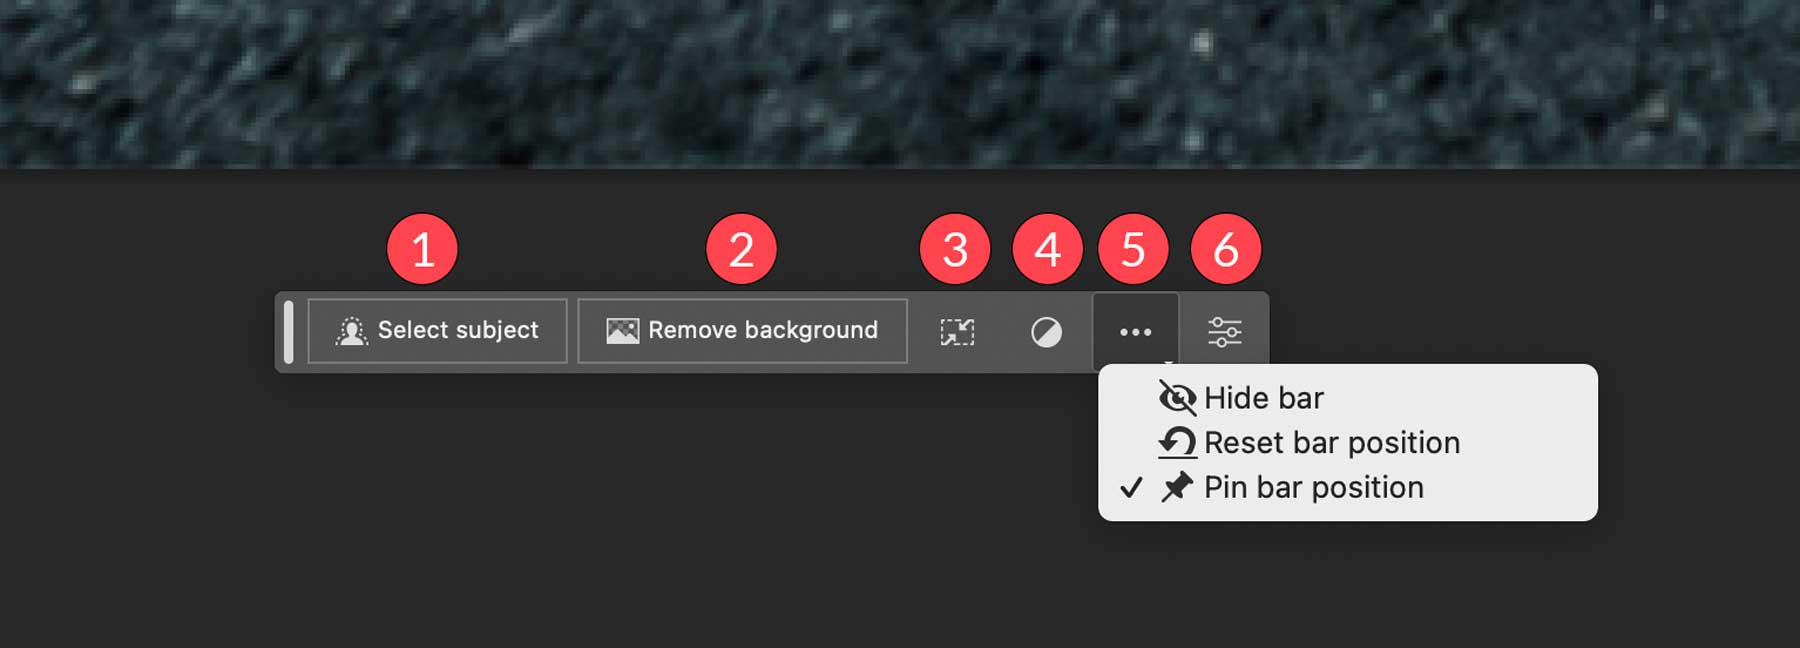
Here’s a breakdown of the taskbar’s settings when an image or subject is not selected, along with a brief description of each:
- Select subject: Use this button to allow Photoshop to select the subject of your photo. This is useful when you want to remove the background of your photos or select a subject, such as a person, car, animal, etc., that you want to use.
- Remove background: Photoshop uses AI to detect the most likely subject in your photo and deletes the background around it.
- Transform image: flip your photo horizontally or vertically.
- Add an adjustment layer: This allows you to apply one of many adjustment presets to alter the color and tone of your image. Additionally, you can create your own adjustment layer using this tool.
- Taskbar appearance: Choose whether to show, hide, pin, or unpin the taskbar to its current location.
- Properties panel: Shows or hides the properties panel for your image and all generative fill layers.
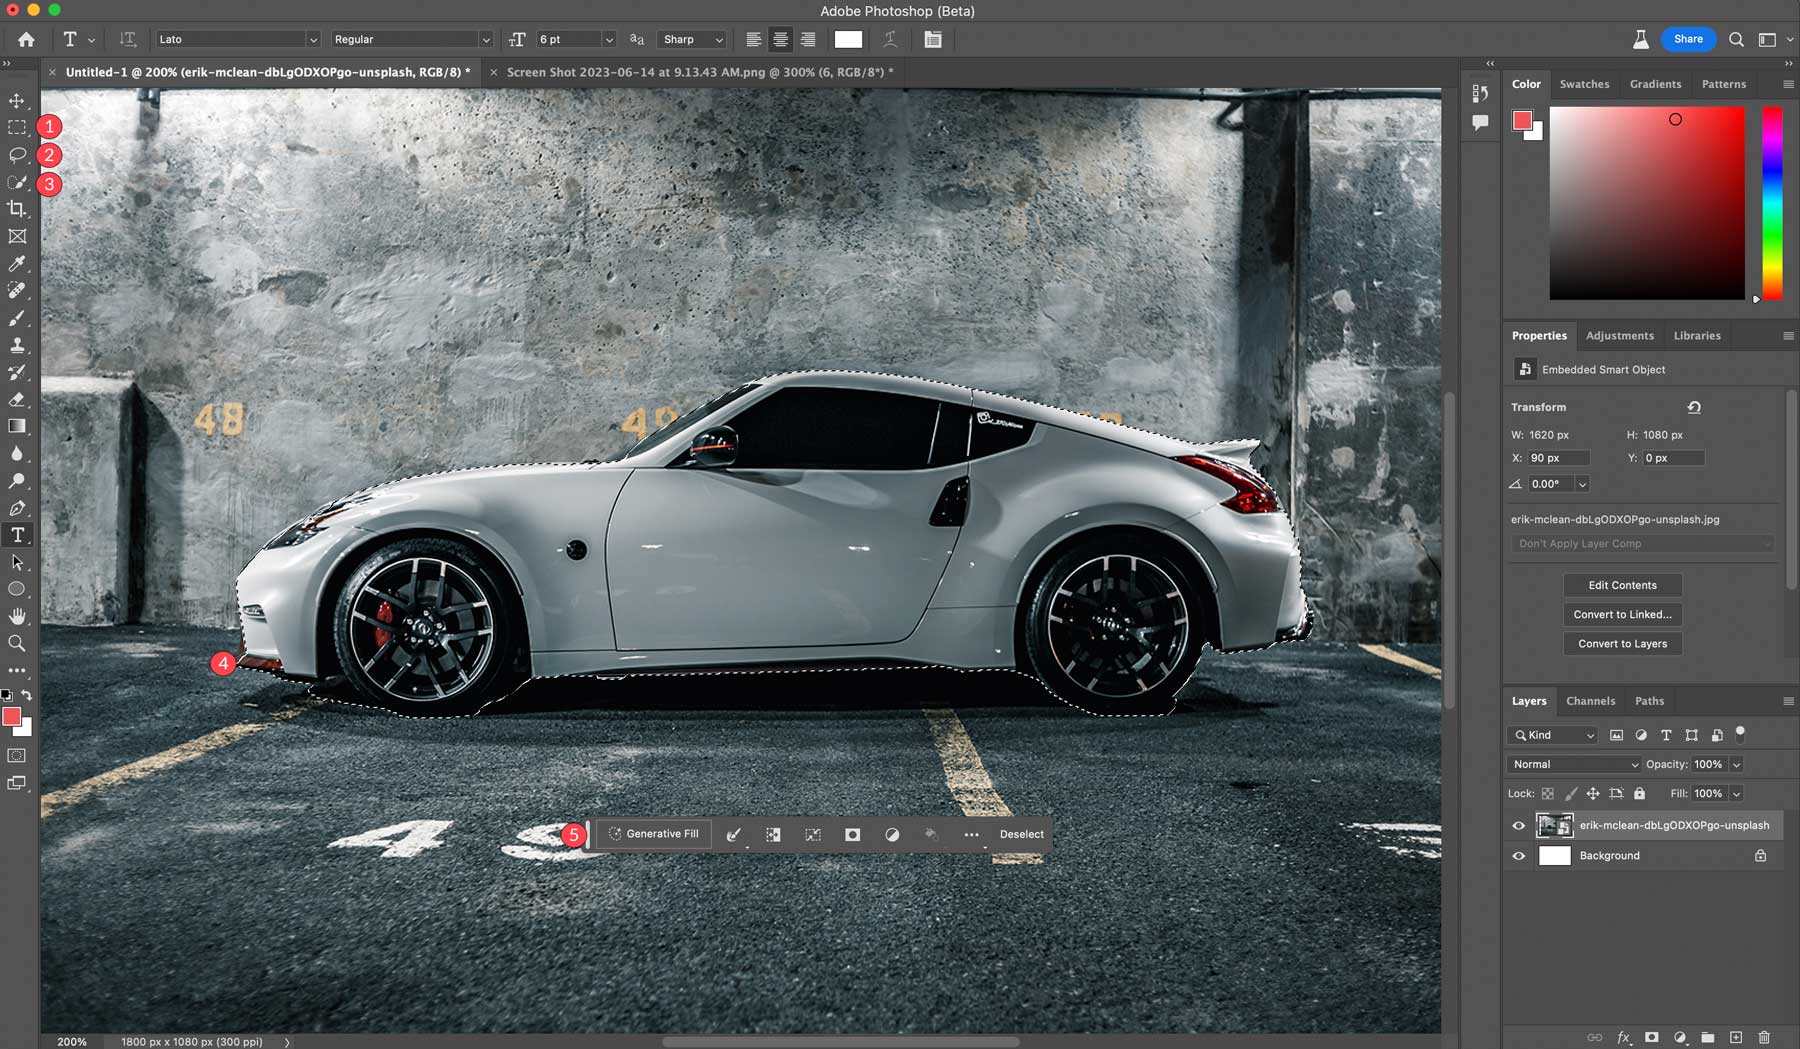
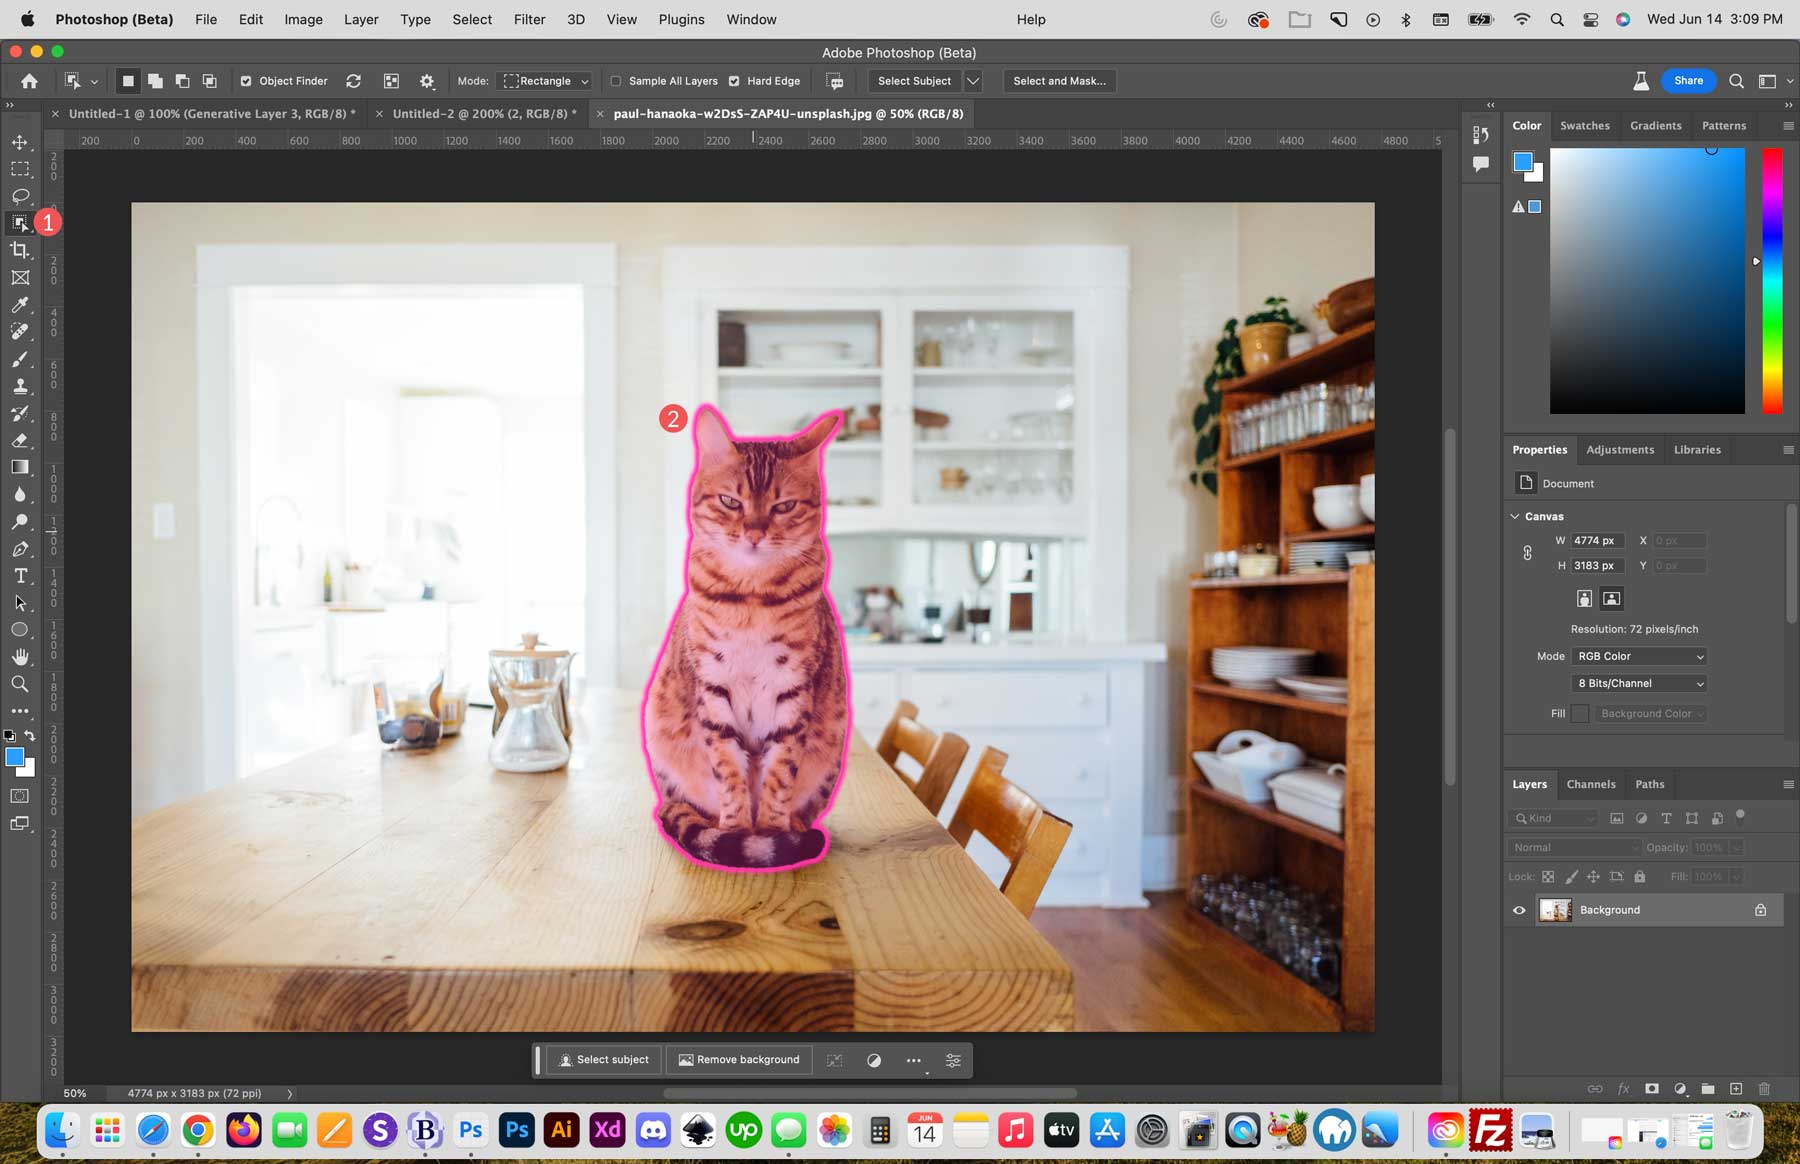
To make a selection in your image, you can use the select subject tool (1), any of the marquee or lasso tools (2), and the object selection, quick selection, or the magic wand tool (3). The selection appears with the marching ants (4) around it, then reveals the generative fill tools in the taskbar (5).
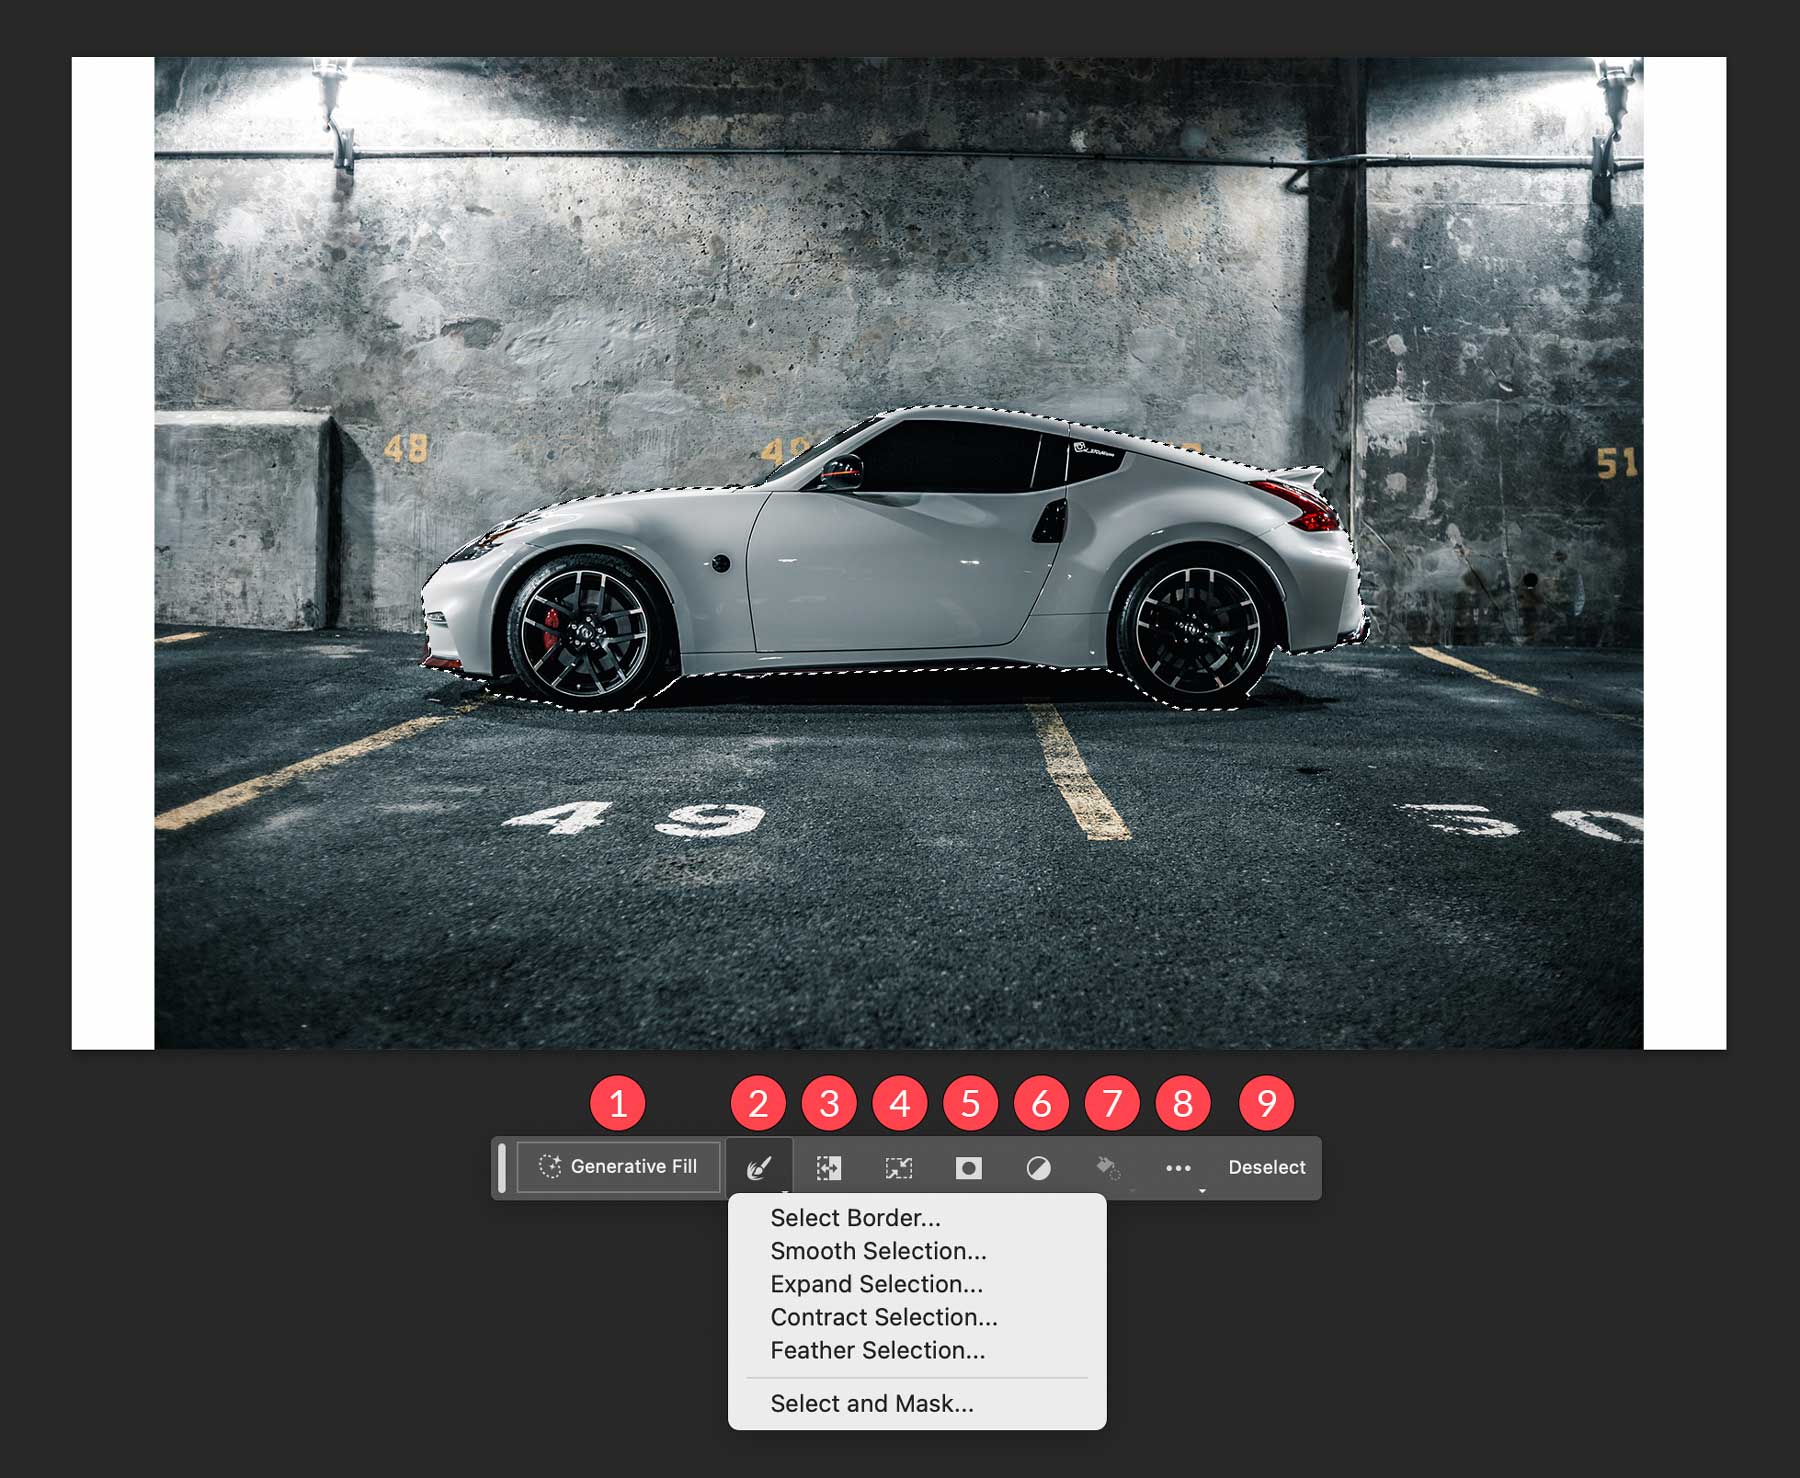
Now let’s look at the tools available when a subject is selected:
- Generative fill: Where you’ll add text prompts to create images.
- Selection tool: You can select the border, expand, contract, feather, or smooth the selection for better results.
- Invert selection: Selects the pixels outside of the selection rather than inside.
- Transform selection
- Mask selection
- Create a new adjustment layer
- Fill selection with color or gradient
- Toolbar positioning settings
- Deselect selection
How to Use Photoshop AI Generative Fill
There are several different ways to use Photoshop AI’s generative fill tools. You can use it to create images from scratch, remove objects and backgrounds, extend the size of your canvas, and generate backgrounds or realistic objects. Even though there are only a few, these tools will save designers a ton of time editing low-quality or unattractive photos.
Extend Images With Photoshop AI
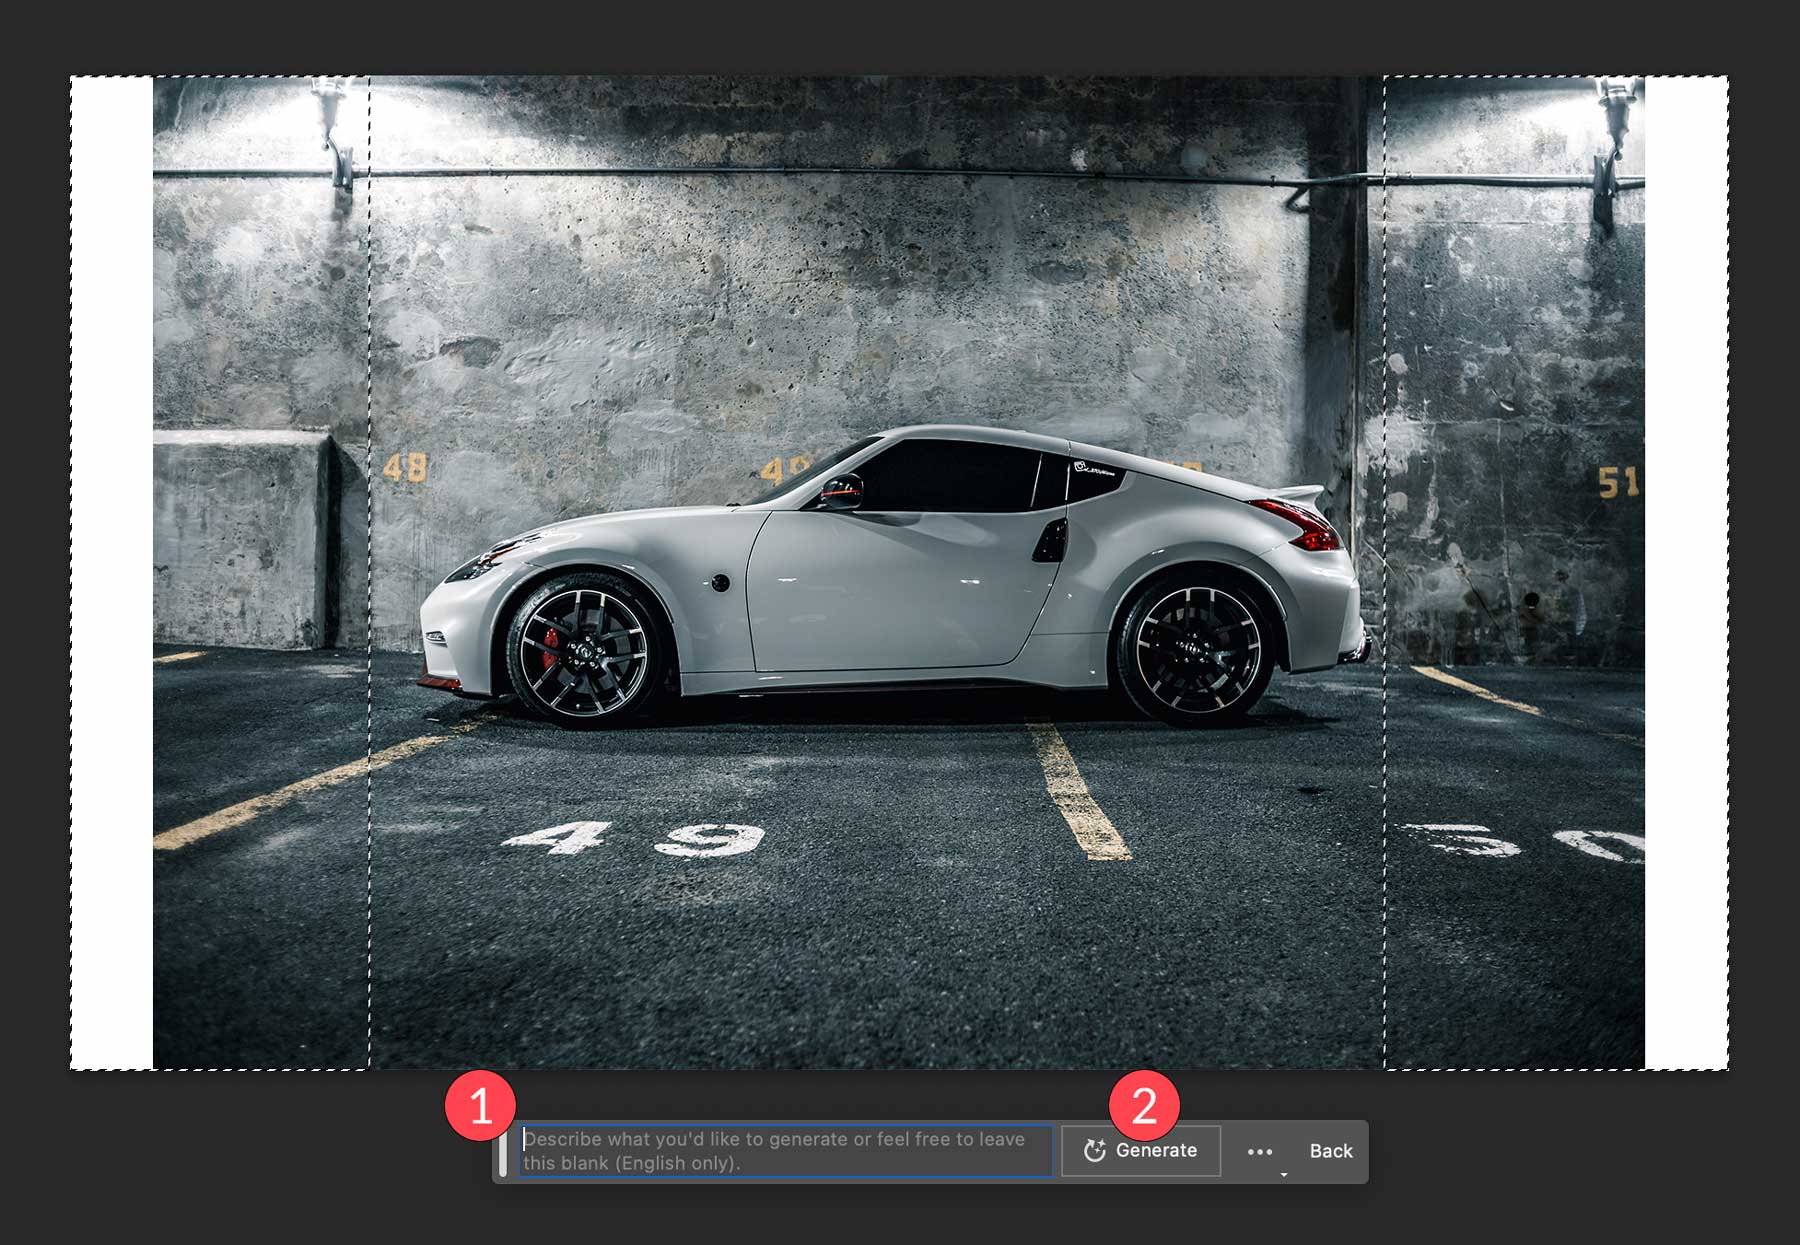
Using the photo from the previous section, we will fill the white areas of our canvas. To do this, select the rectangular marquee tool to form a selection around the edges of our canvas. Hold shift to make more than one selection, then drag the selection over the white areas of the image. Be sure to extend the selection to include some of the pixels from the original image. Finally, click the generative fill button.
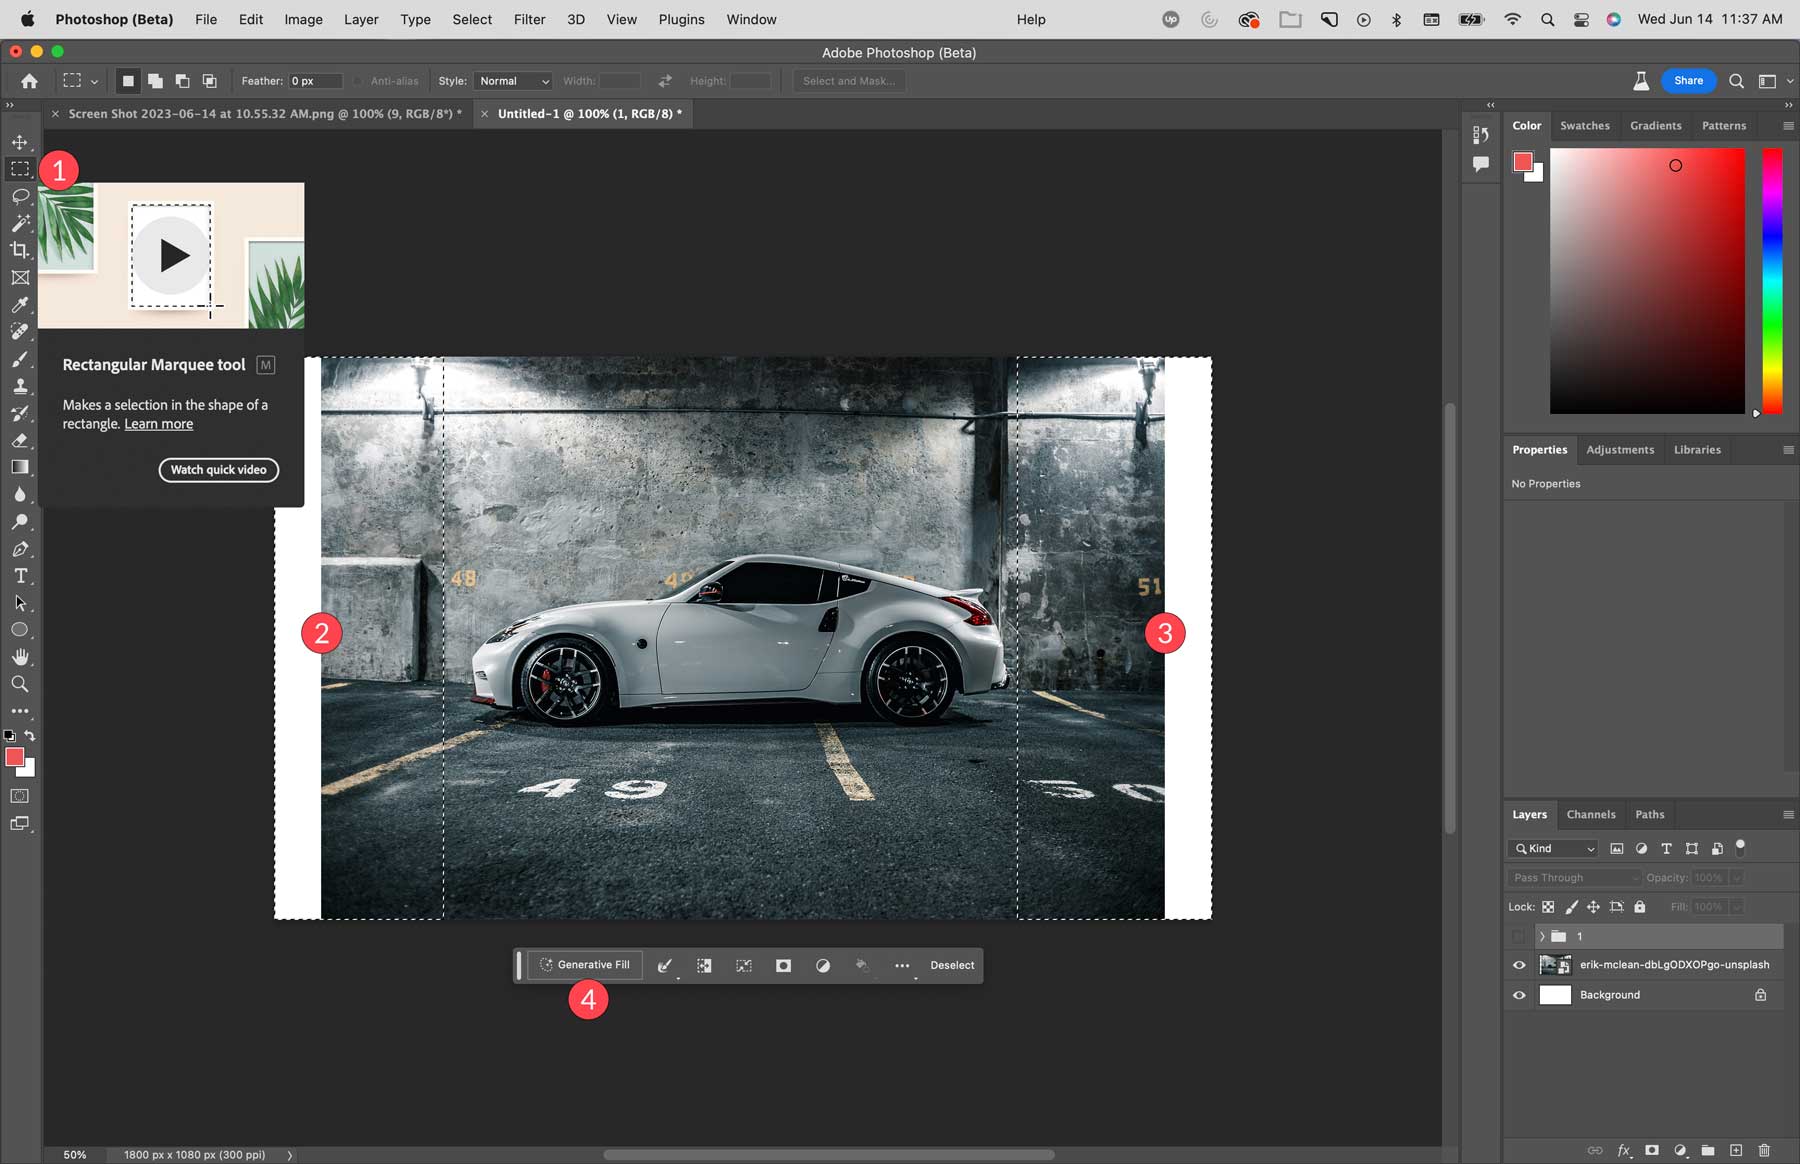
You’ll notice that the generative fill taskbar reveals a text prompt input box. For this instance, we aren’t going to enter any text. By leaving it blank, Photoshop AI examines the pixels in the image and extends them within your selected area. Click the generate button to process the fill.
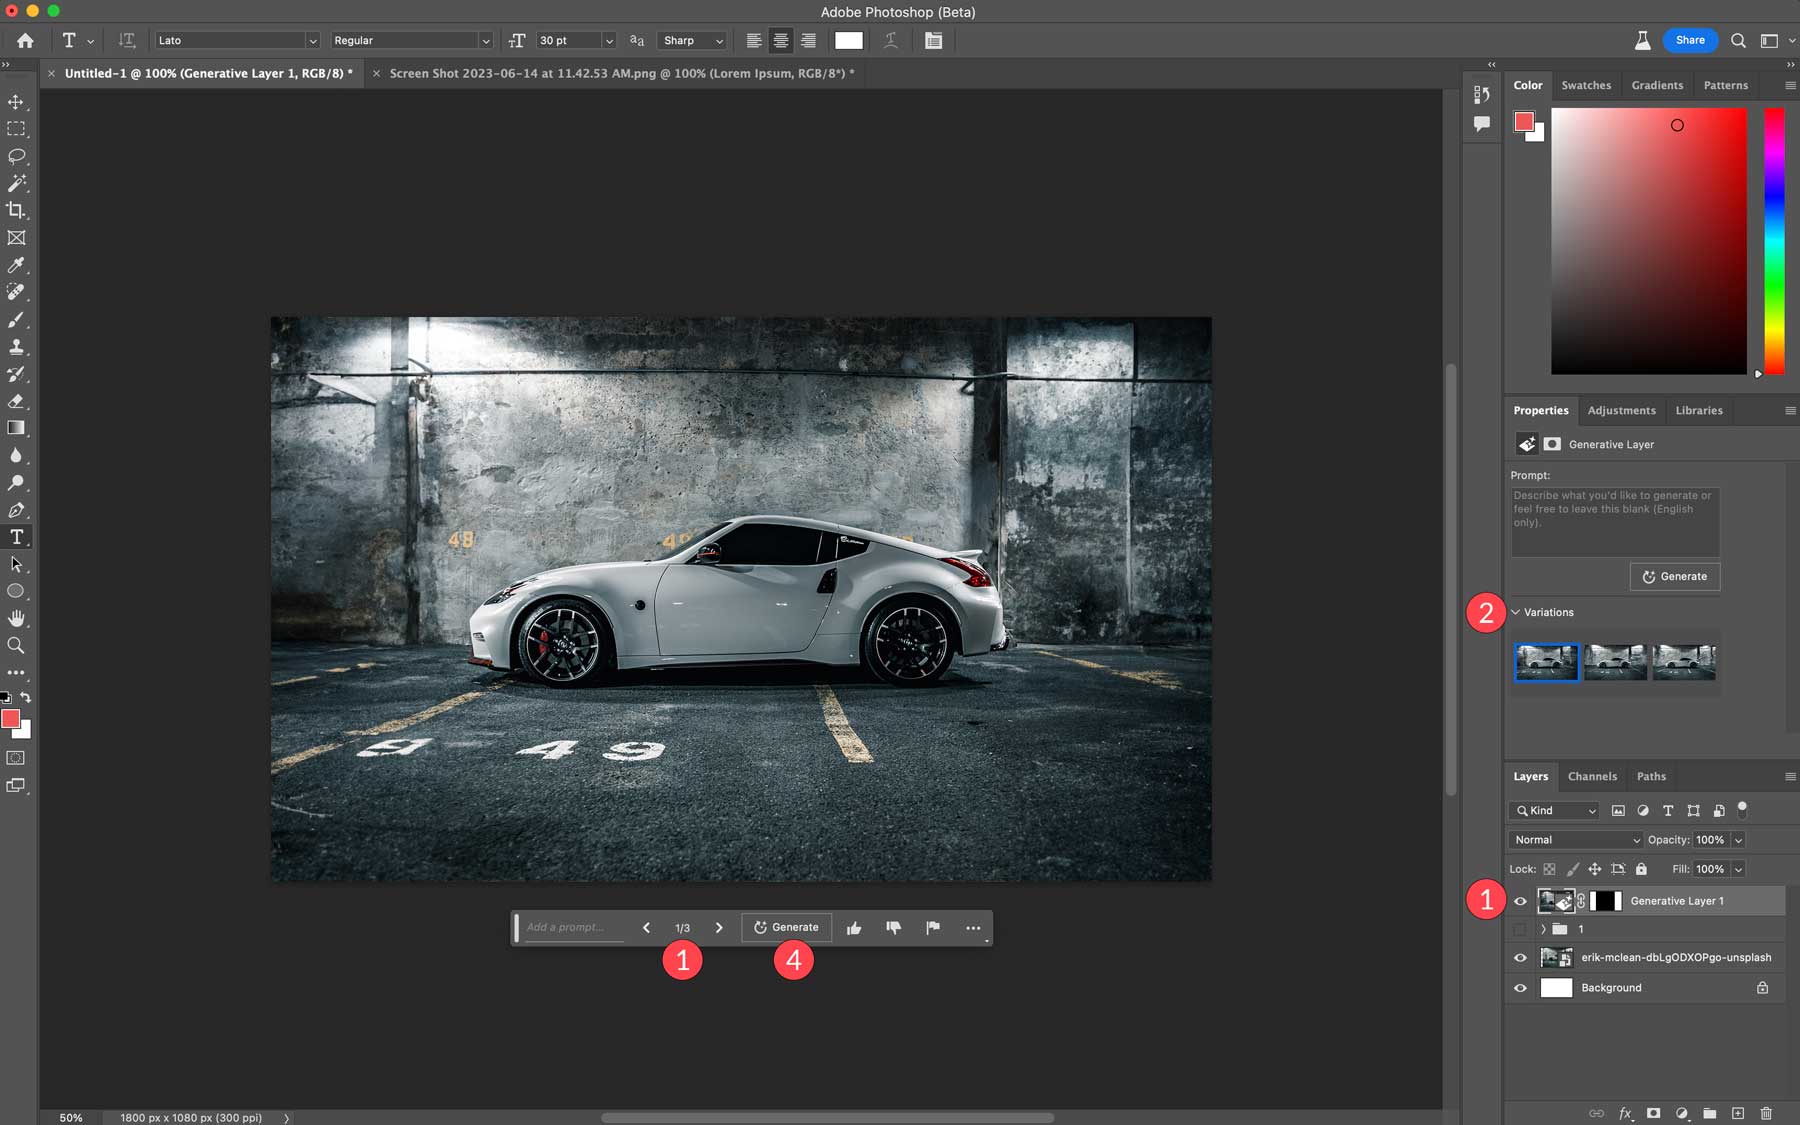
Here’s what our image looks like after Photoshop fills in the blank areas of our canvas. After using generative fill, you’ll have three variations to choose from which can be found in the generative layer properties. As previously mentioned, Photoshop generates a new layer, complete with a mask, so your original image remains untouched. If you aren’t satisfied with the results, you can click the generate button, which provides you with three new variations. You can repeat that process as many times as you like to get the results you’re looking for. Delete any variations you rule out to keep the file size down.
Generate Backgrounds with Photoshop AI
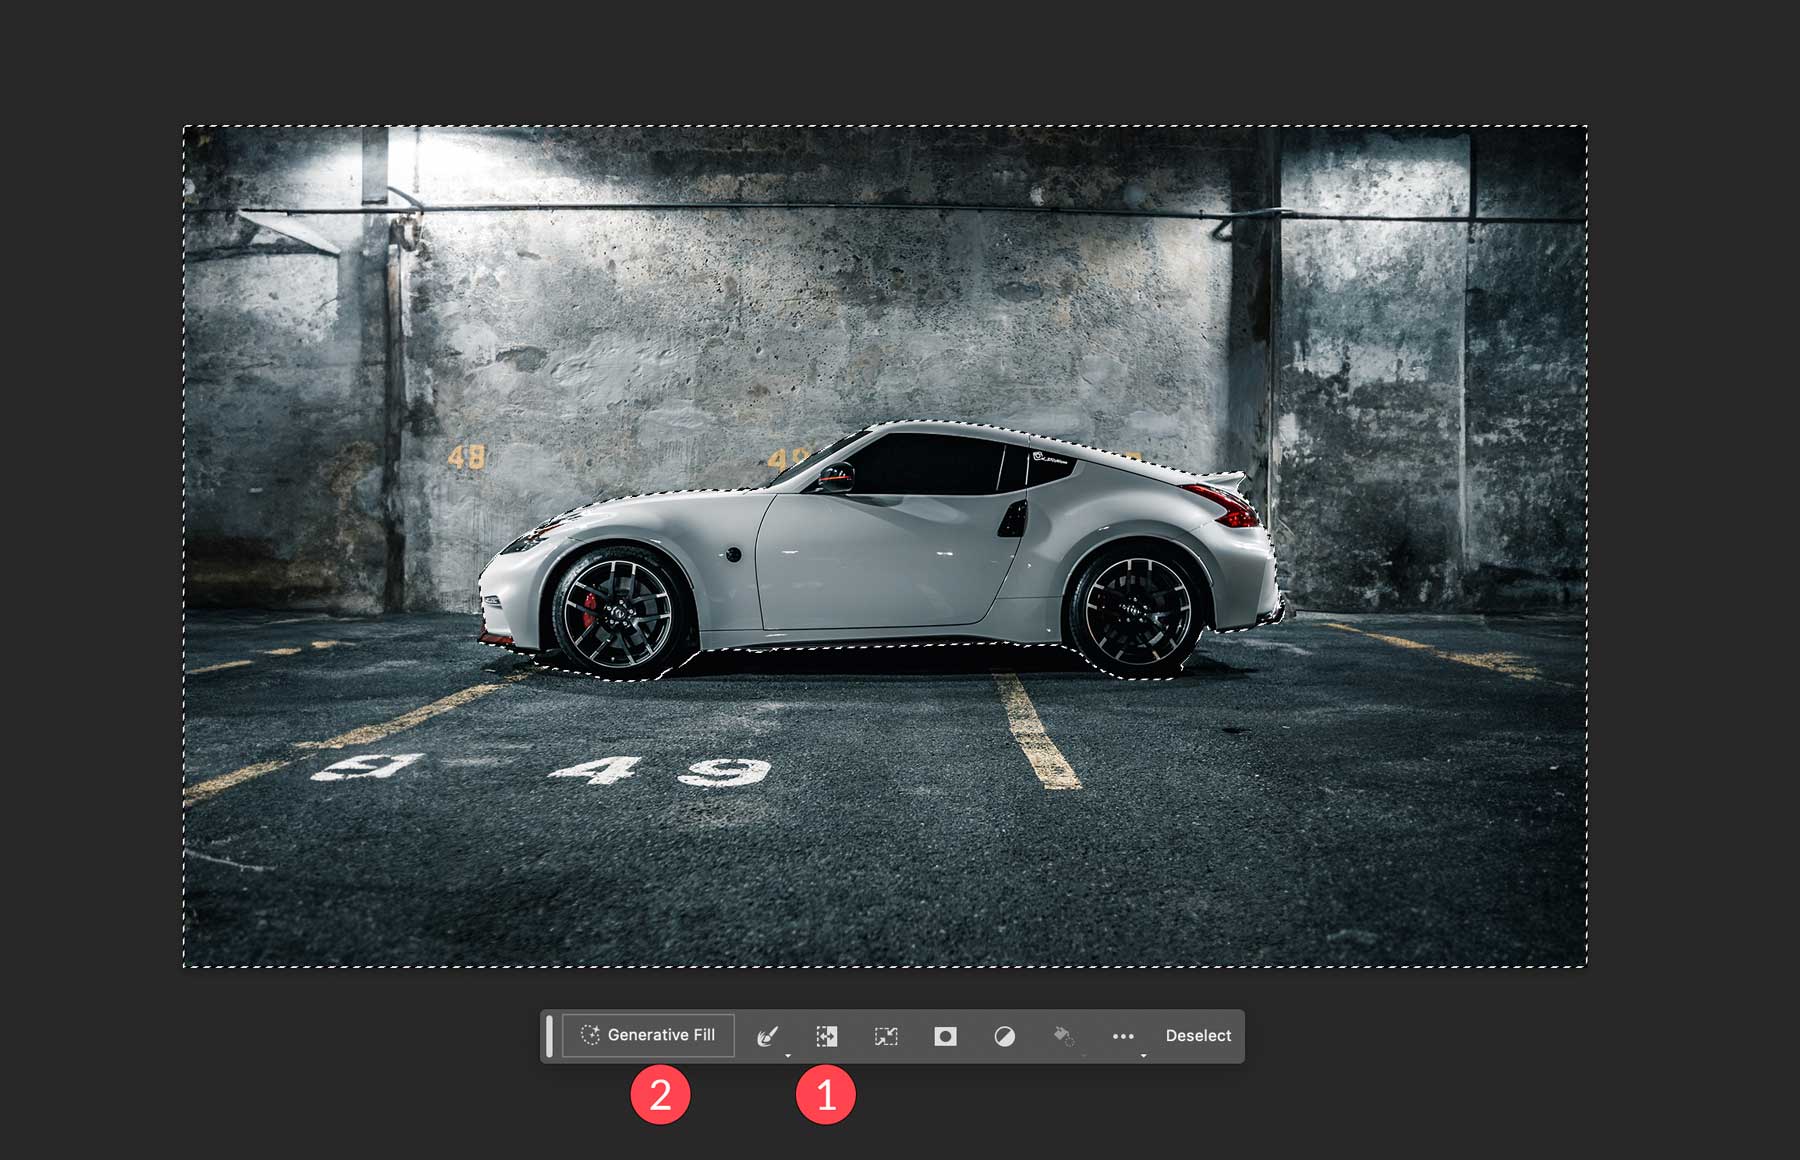
In addition to extending the image area of your canvas, you can use generative fill to replace backgrounds in your images. For this step, we’ll eliminate the background of our car image and replace it with a depiction of the salt flats in Utah. First, you want to ensure nothing is selected. We can use the select subject button for our image, but other selection tools may produce a better result depending on the image you decide to use.
With your subject selected, click the invert selection tool. Make any necessary adjustments to your selected area, then click the generative fill button.
When the text prompt appears, type in the background you wish to see. We used Utah salt flats for this example. Next, click the generate button.

Generate Realistic Objects With Photoshop AI
Now that we have the background in place, let’s use generative fill to add a lake to our photo. Using the lasso tool, we’ll draw a selection beneath the car. Be careful not to include the car itself, as Photoshop will overwrite any selected pixels with the information in the text prompt. Once the marching ants are in place, click the generative fill button, then enter the prompt: reflective lake. Then, click generate.
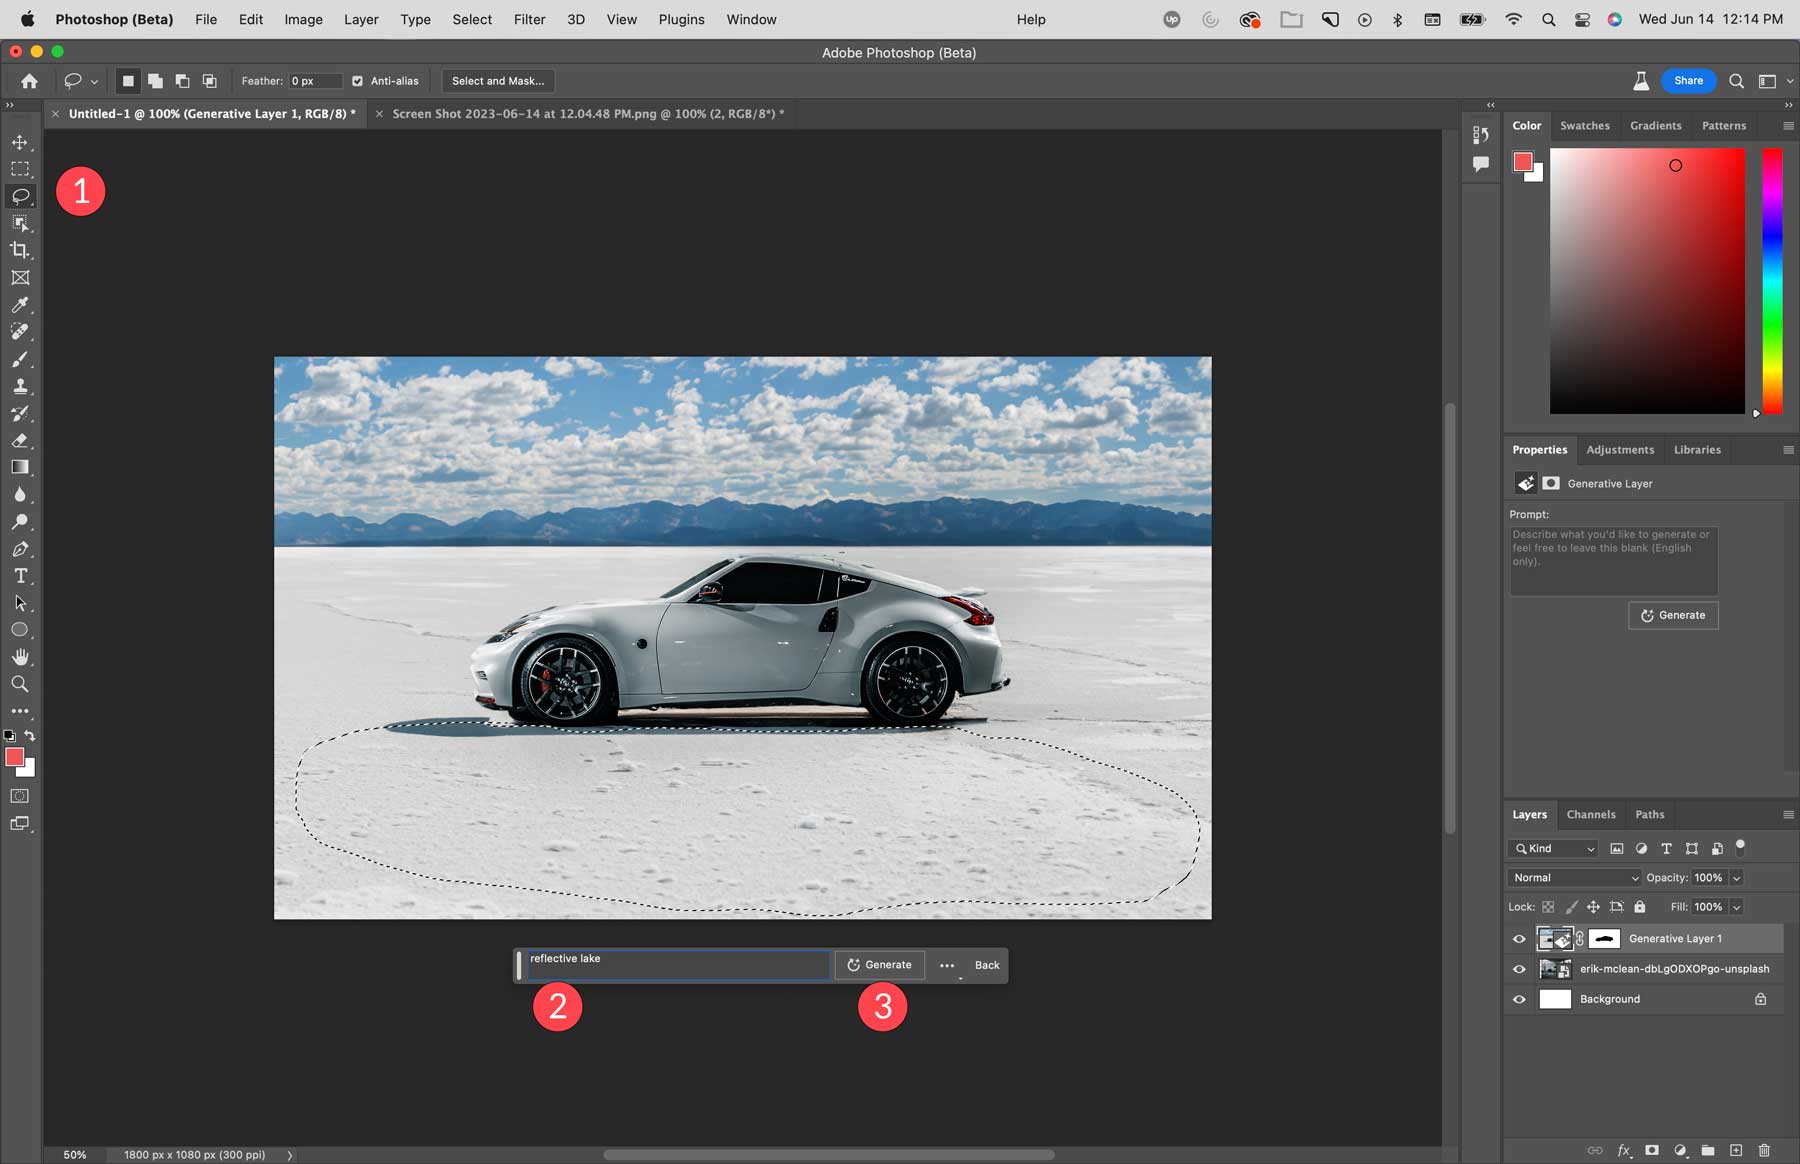
As you can see, Photoshop generated a small pond in the foreground of our image, complete with the car’s reflection.

Remove Objects With Photoshop AI
Another cool feature of Photoshop AI’s generative fill is the ability to remove objects in your photos. Let’s say you have a perfect image minus a few blemishes. Using AI, Photoshop will remove aspects of your image and fill it with surrounding pixels in the image. This may sound similar to the content-aware tool, but it goes way beyond that. Rather than getting a muddy, odd appearance, the replaced portions of your image are so seamless it’s nearly impossible to tell the difference.
For example, we’d like to replace the bird in this photo, so we’ll need to remove the one currently there. Using the lasso tool, form a selection around the bird, click generative fill, then generate. This will tell Photoshop to replace what’s in the selection with surrounding pixels in the image. Be sure to leave the text prompt empty unless you want to add something in its place.
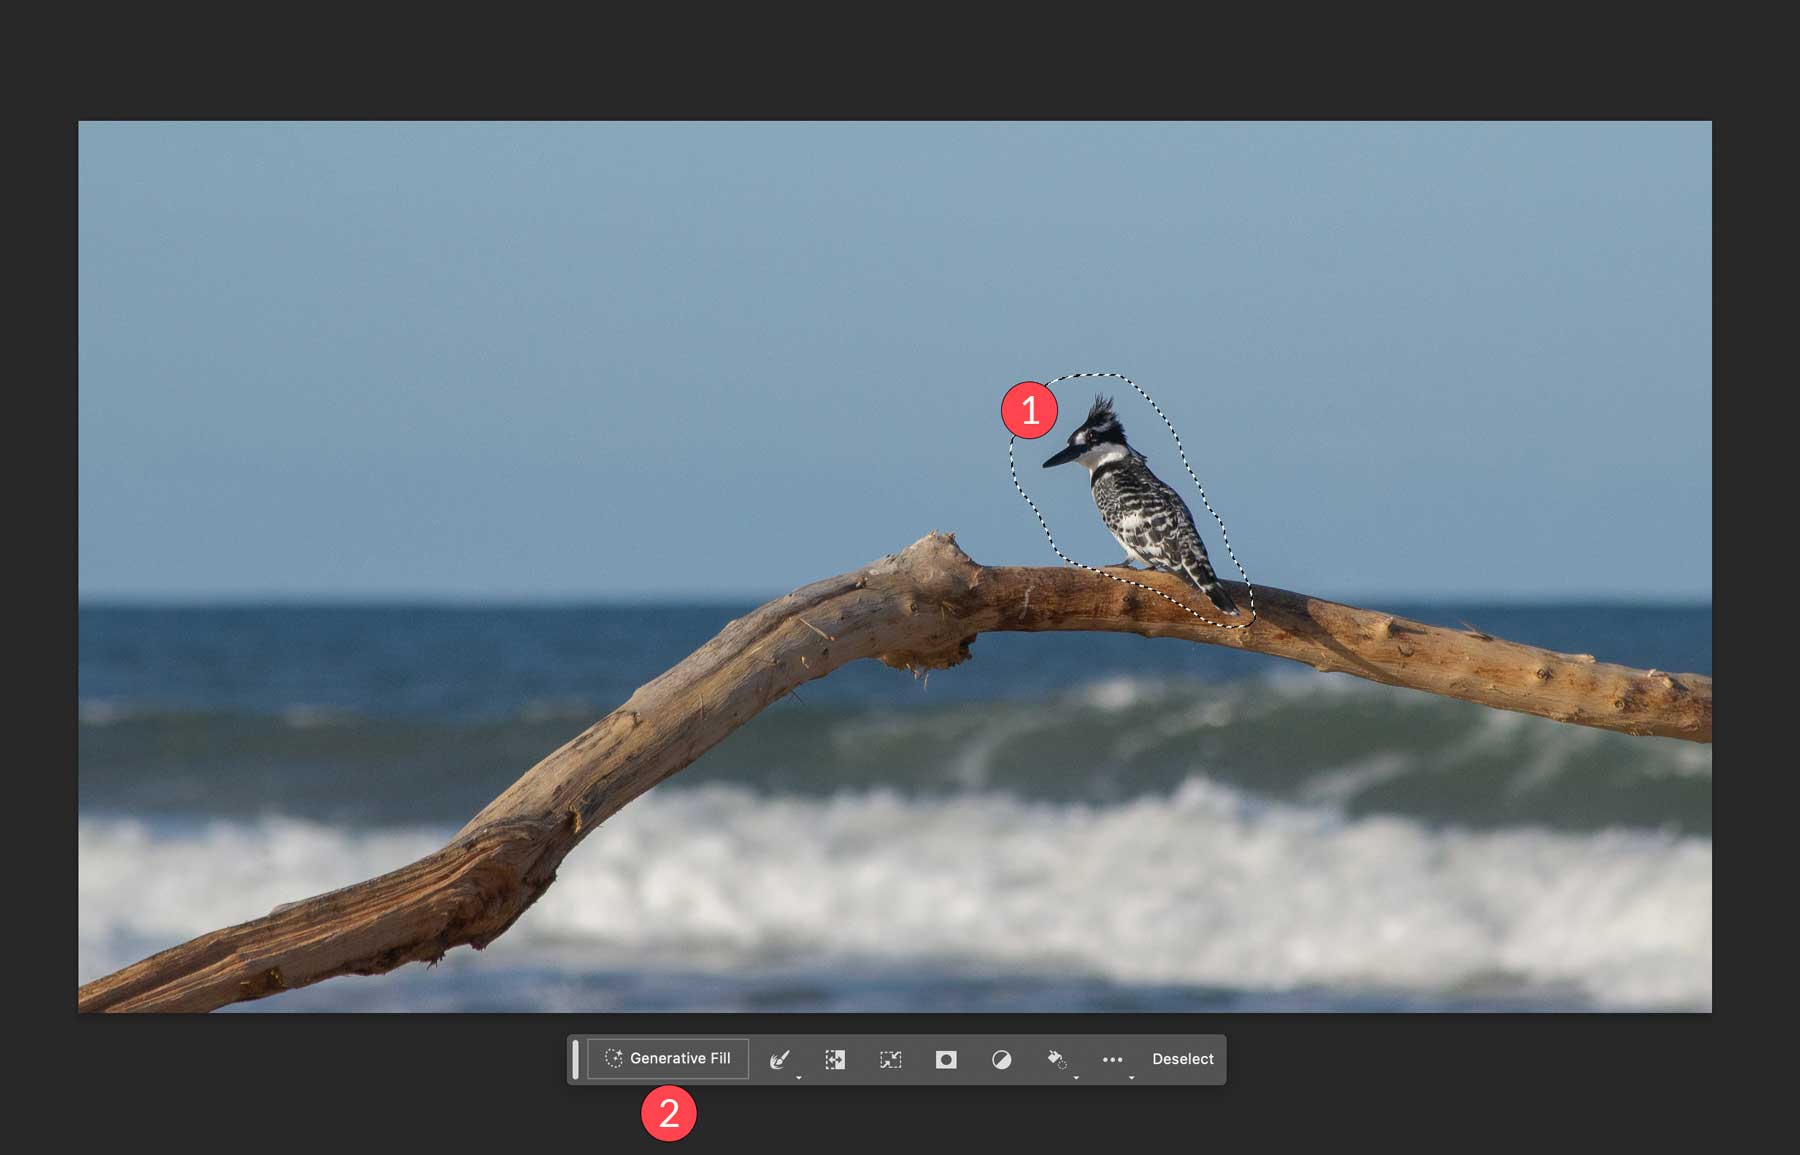
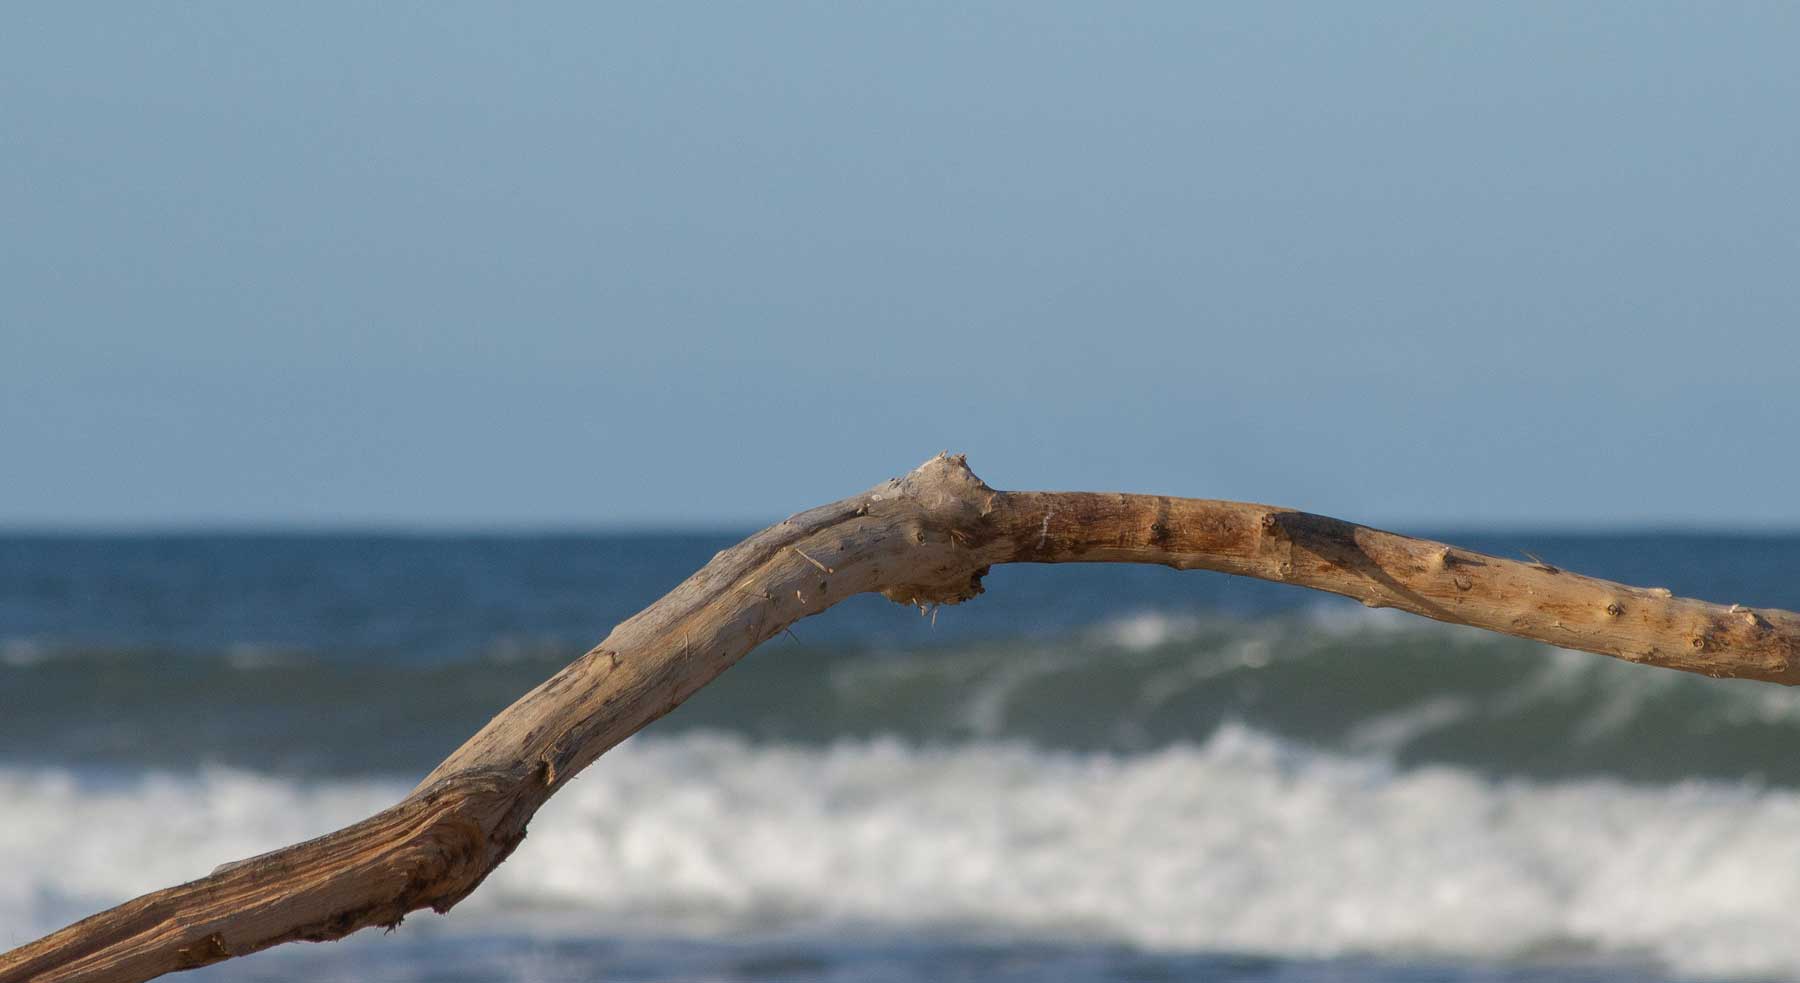
Photoshop does an excellent job of removing the bird as if it were never there.
Create Unique Composite Images
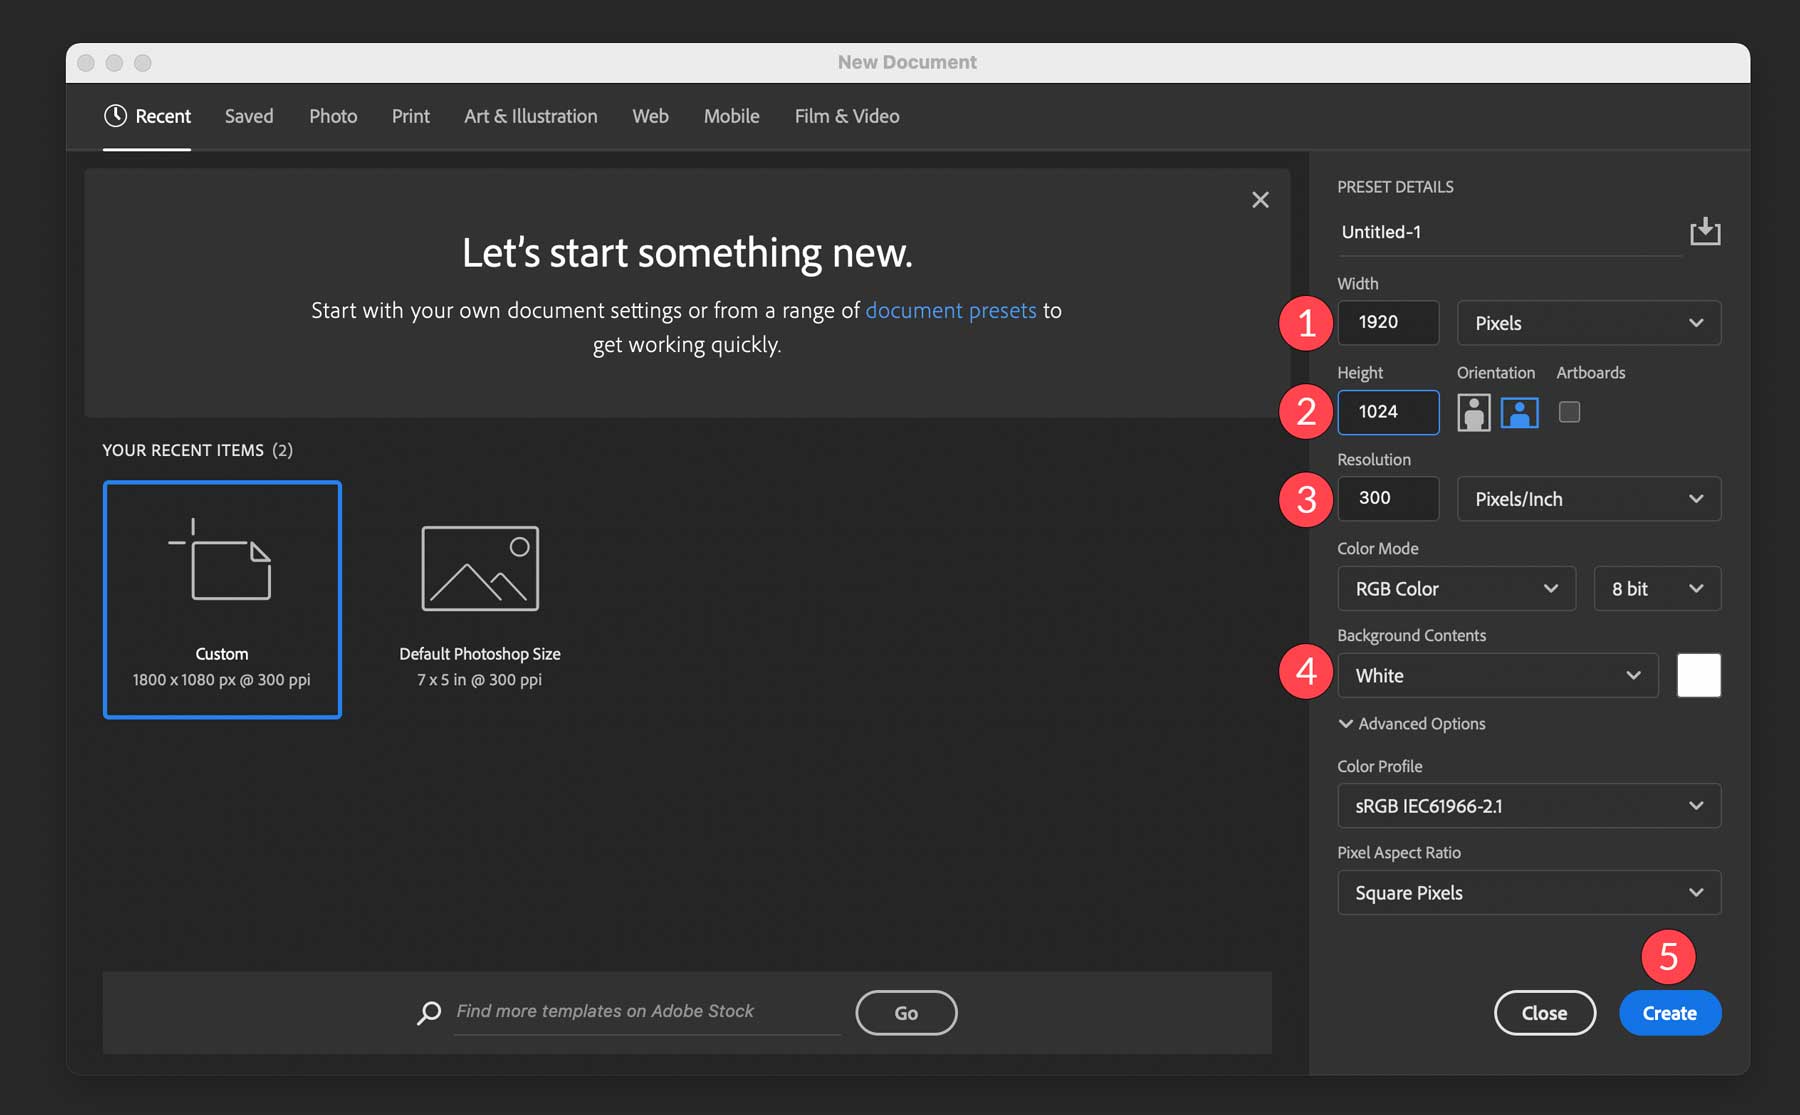
In addition to altering existing images, Photoshop’s AI generative fill can create images too. However, we should note that Photoshop struggles with images larger than 1024 pixels, often resulting in lower-quality images. So, with that in mind, when creating new images, you’ll either need to create a canvas no larger than 1024 pixels (w x h) or generate your composite image in sections.
Start with a blank canvas measuring 1920 pixels wide by 1024 pixels tall. We’ll set the resolution to 300 pixels, select RGB as the color mode, and set the background color to white.
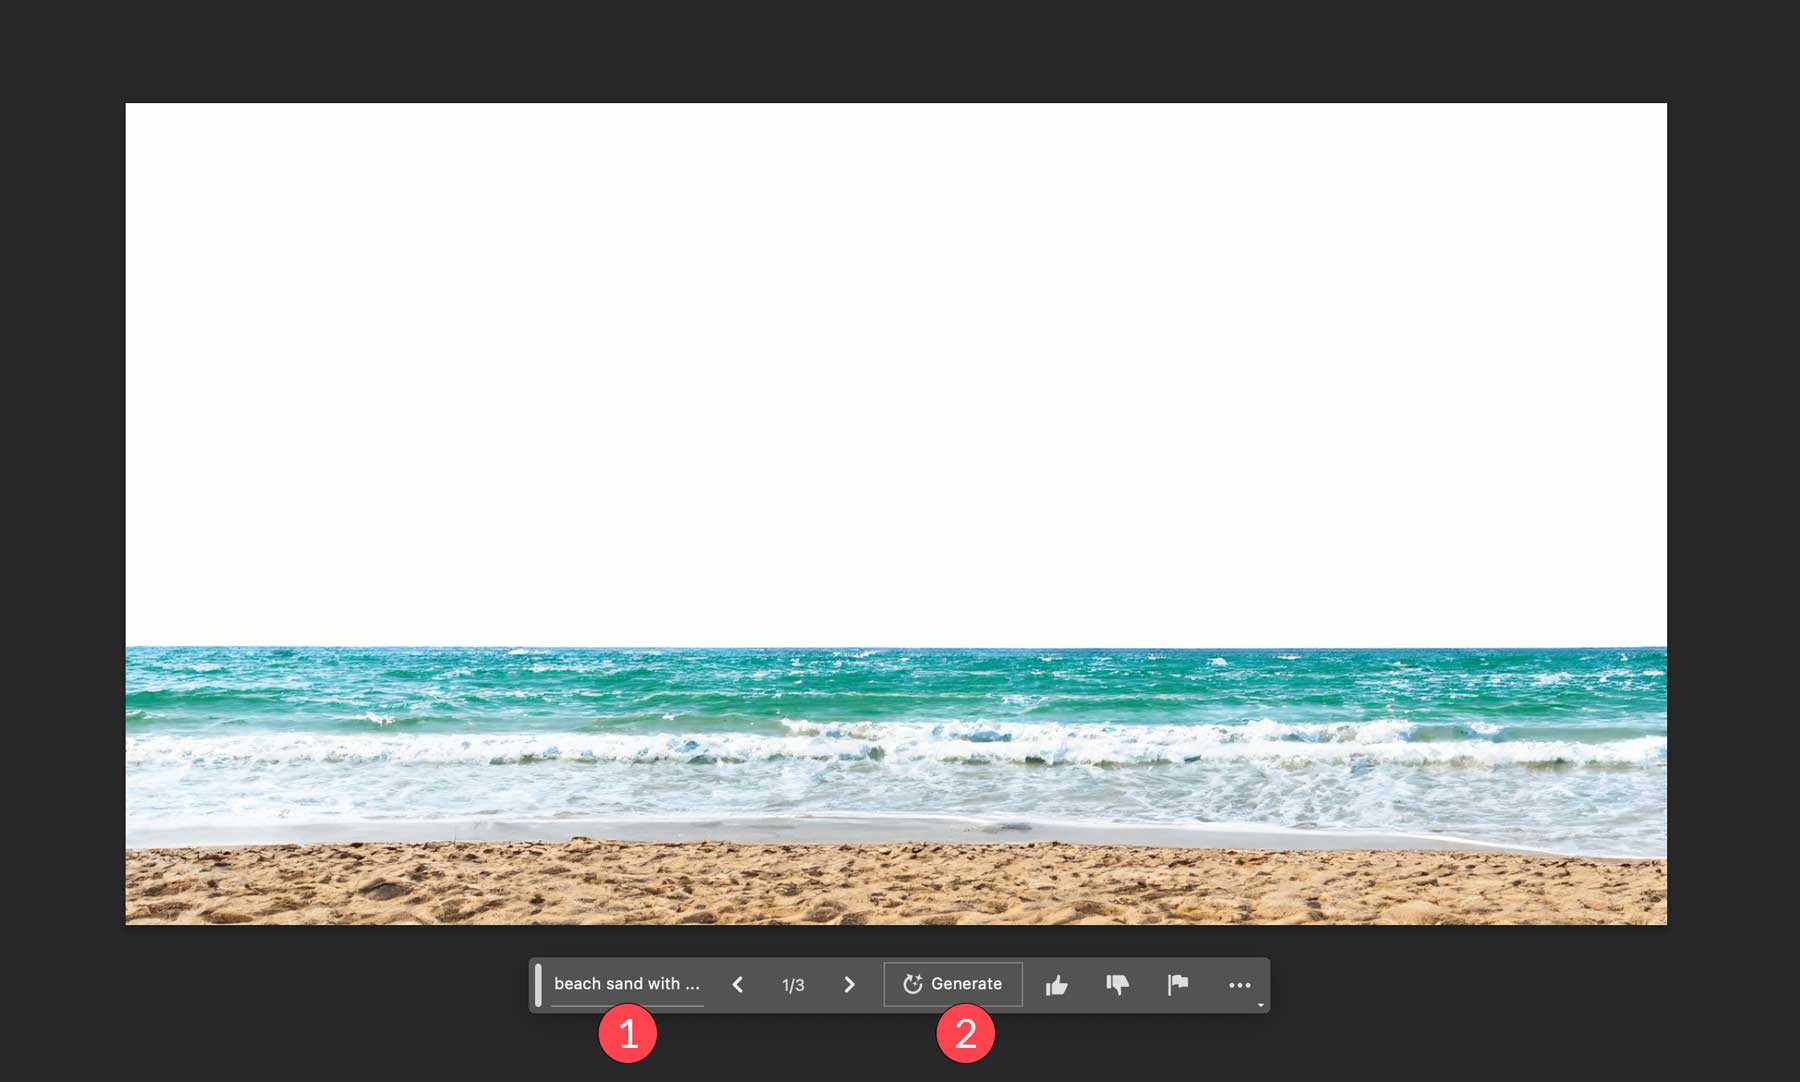
Next, use the rectangular marquee tool to draw a rectangular selection around the lower third of your image.
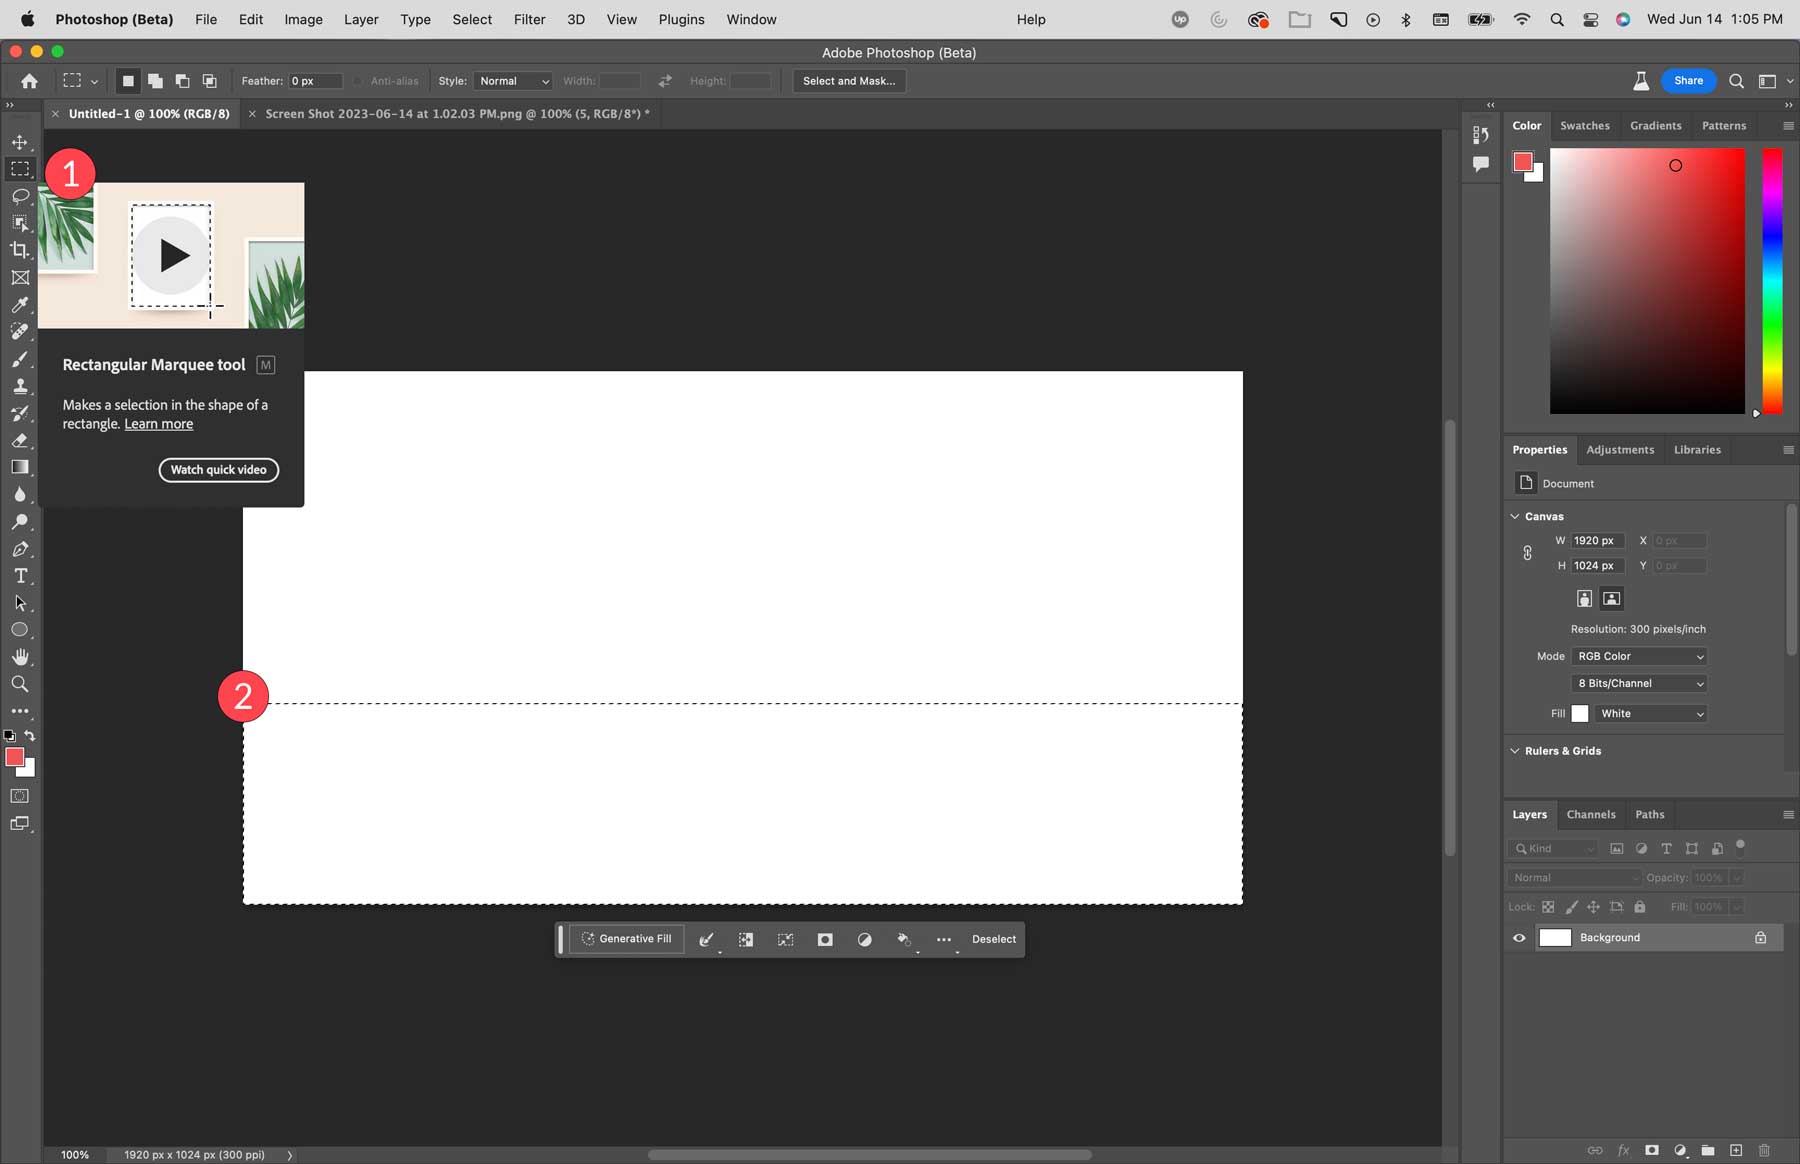
Using the generative fill tool, type in beach sand with ocean waves, then click generate.
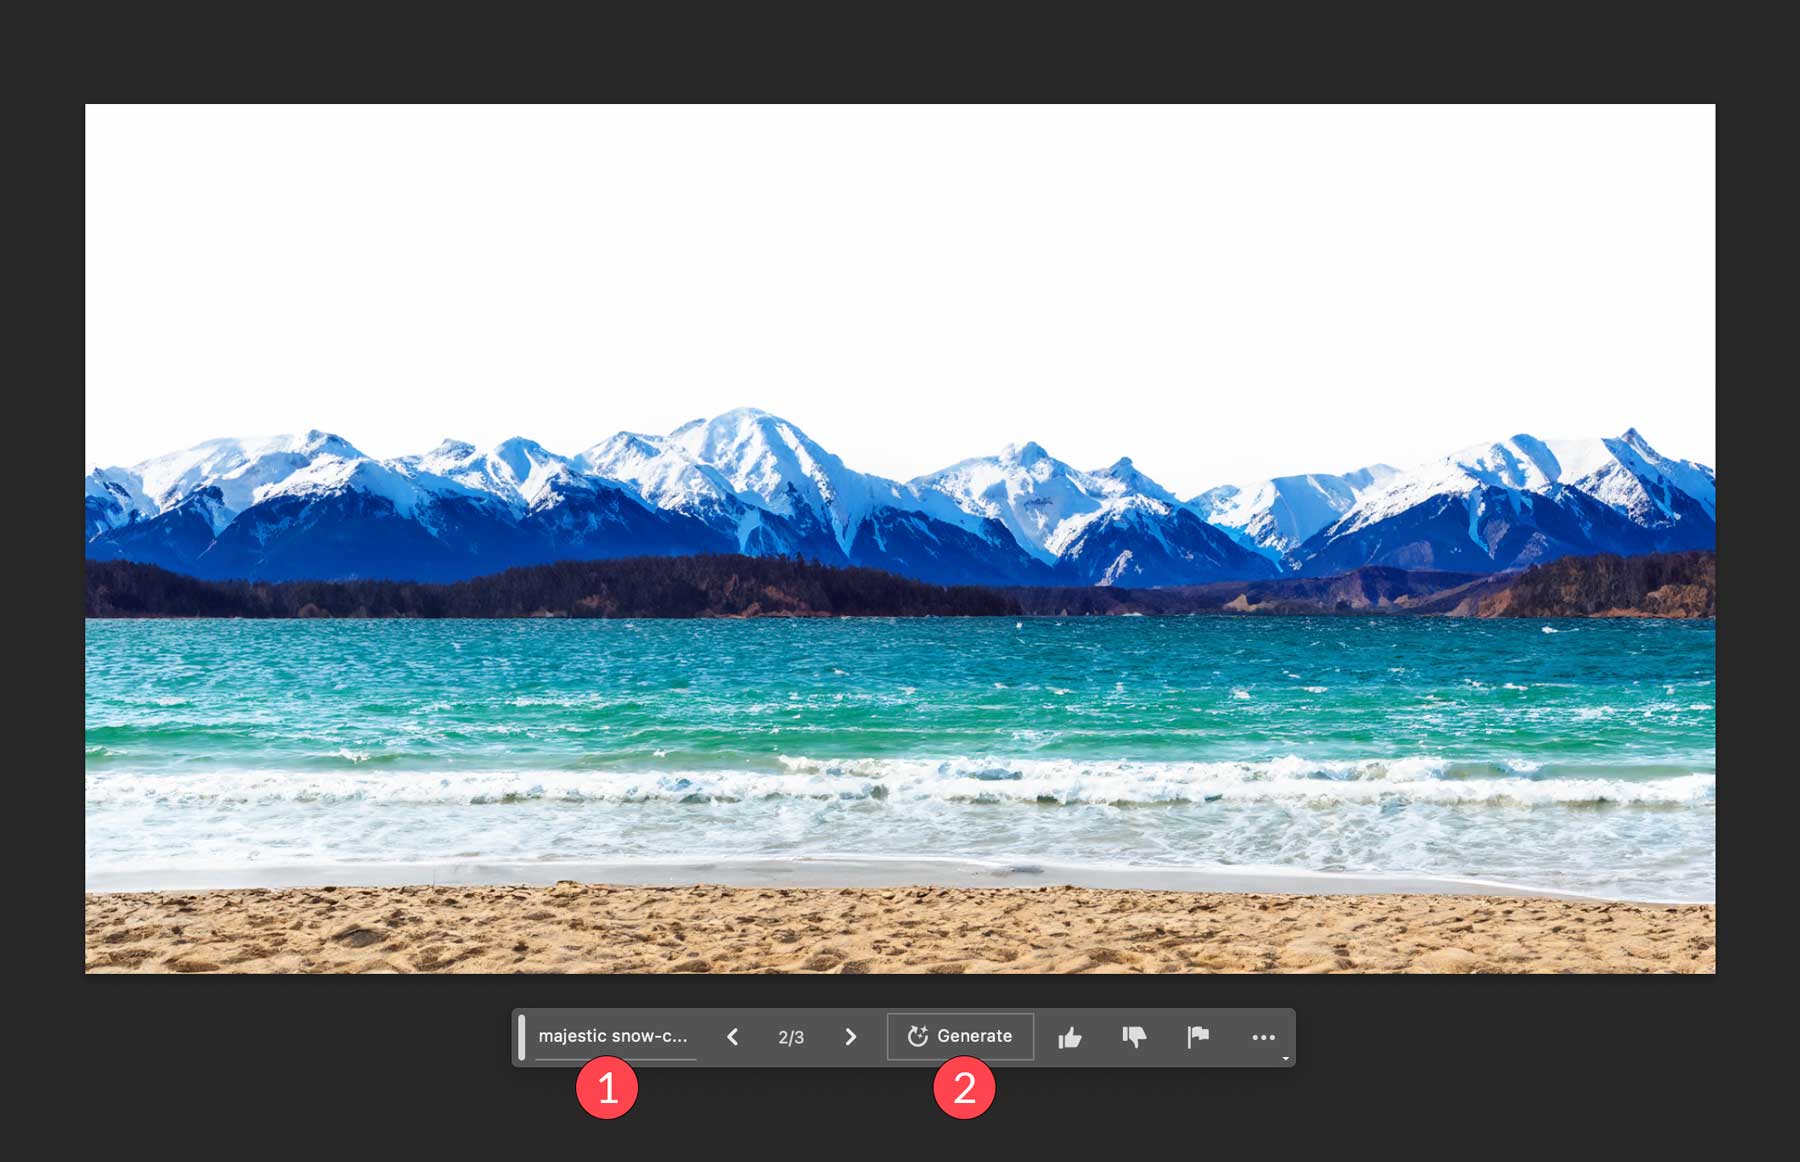
Next, draw a selection around the middle third of your image, click generative fill, and enter the following prompt: majestic snow-capped mountain range. Then click generate to create the section.
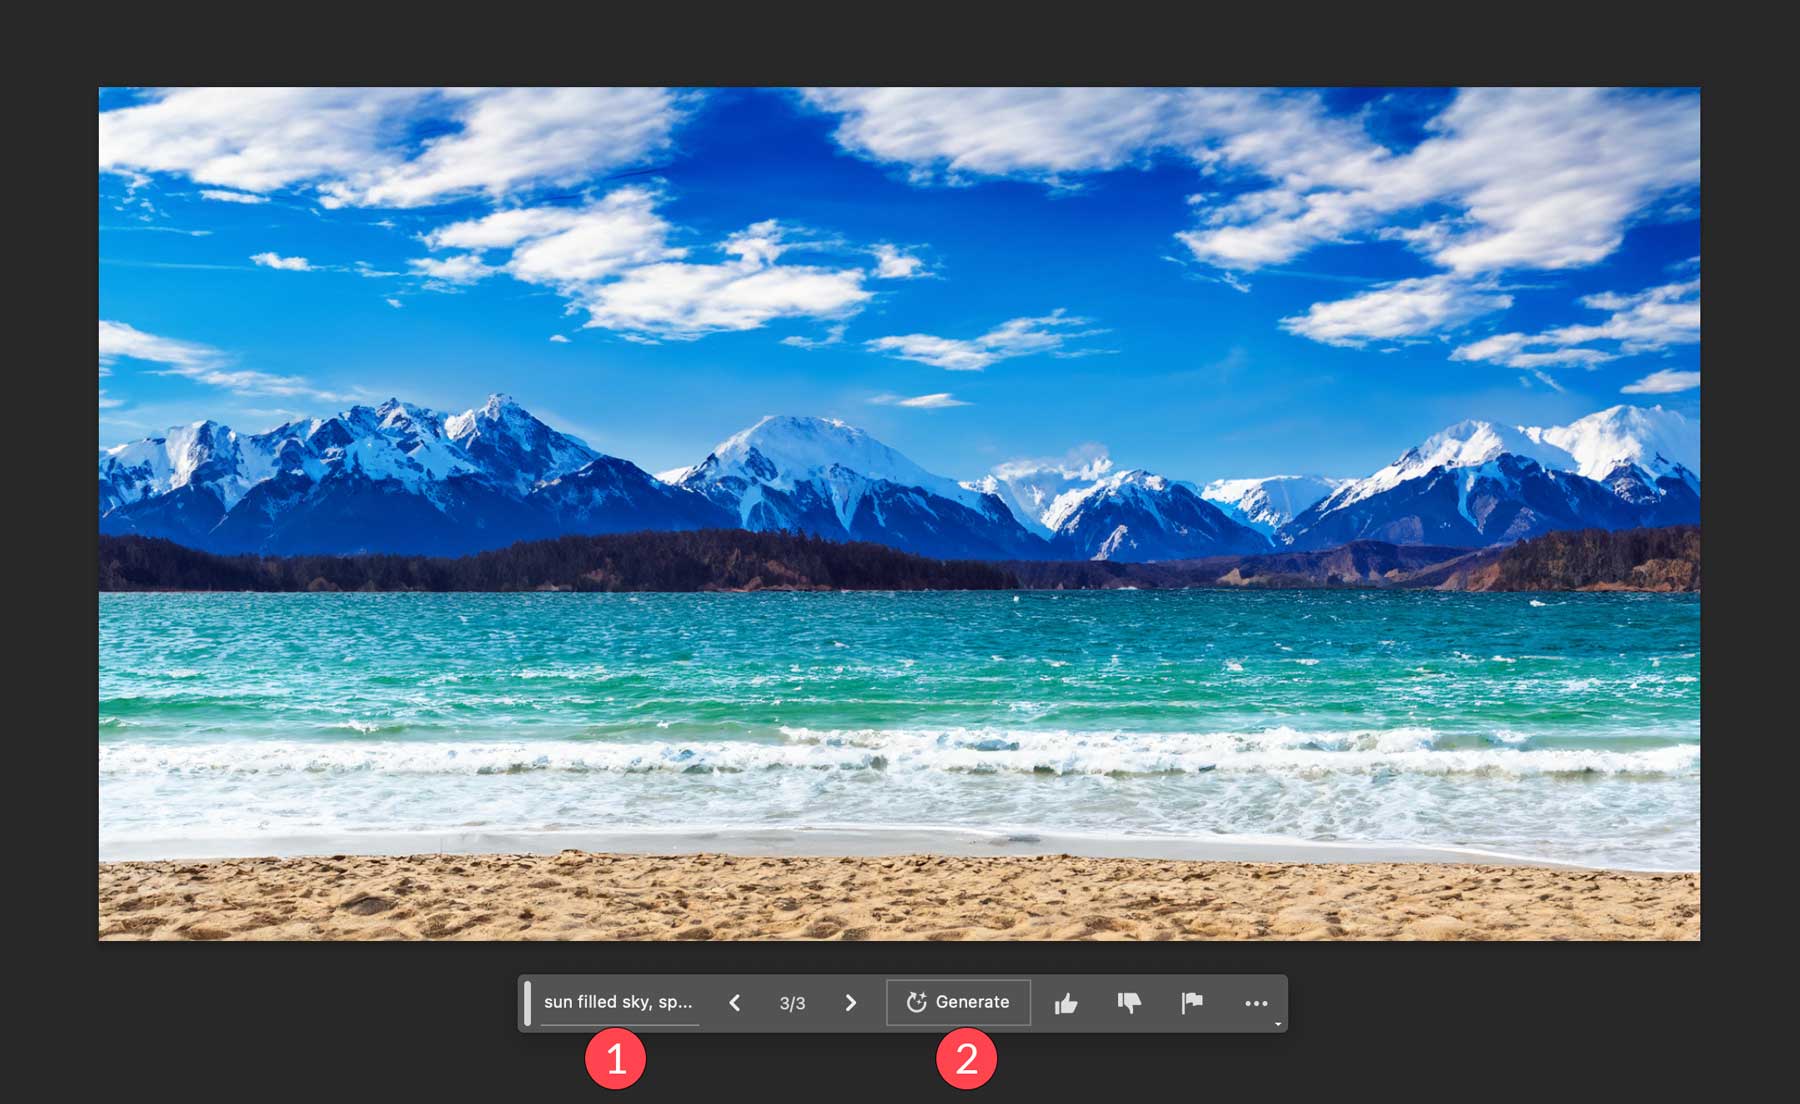
For the third selection, draw a rectangular selection around the upper third of your image. Enter sun-filled sky, sparse clouds as the text prompt, then click generate.
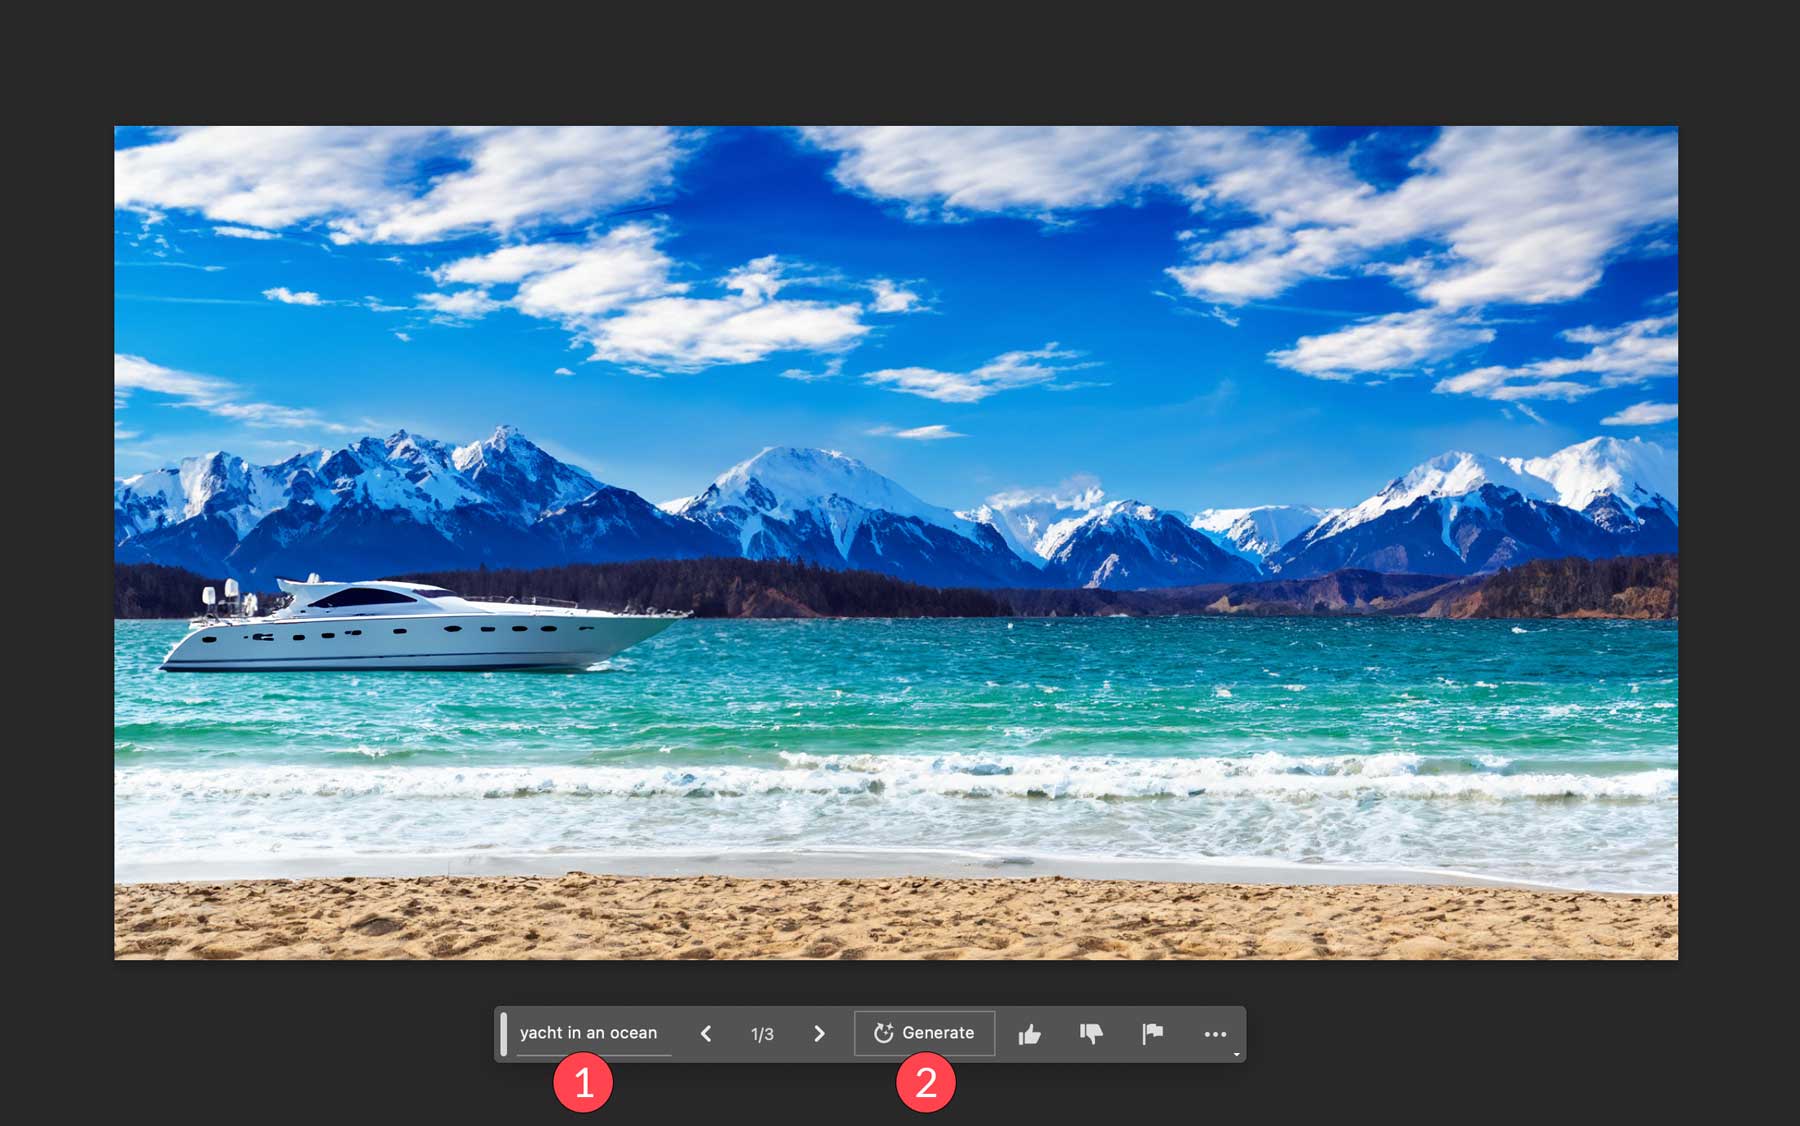
Now that we have our background, let’s add a couple of accents. Start by creating a selection in the water with the lasso tool. Click generative fill, add the text prompt yacht in an ocean, then click generate.
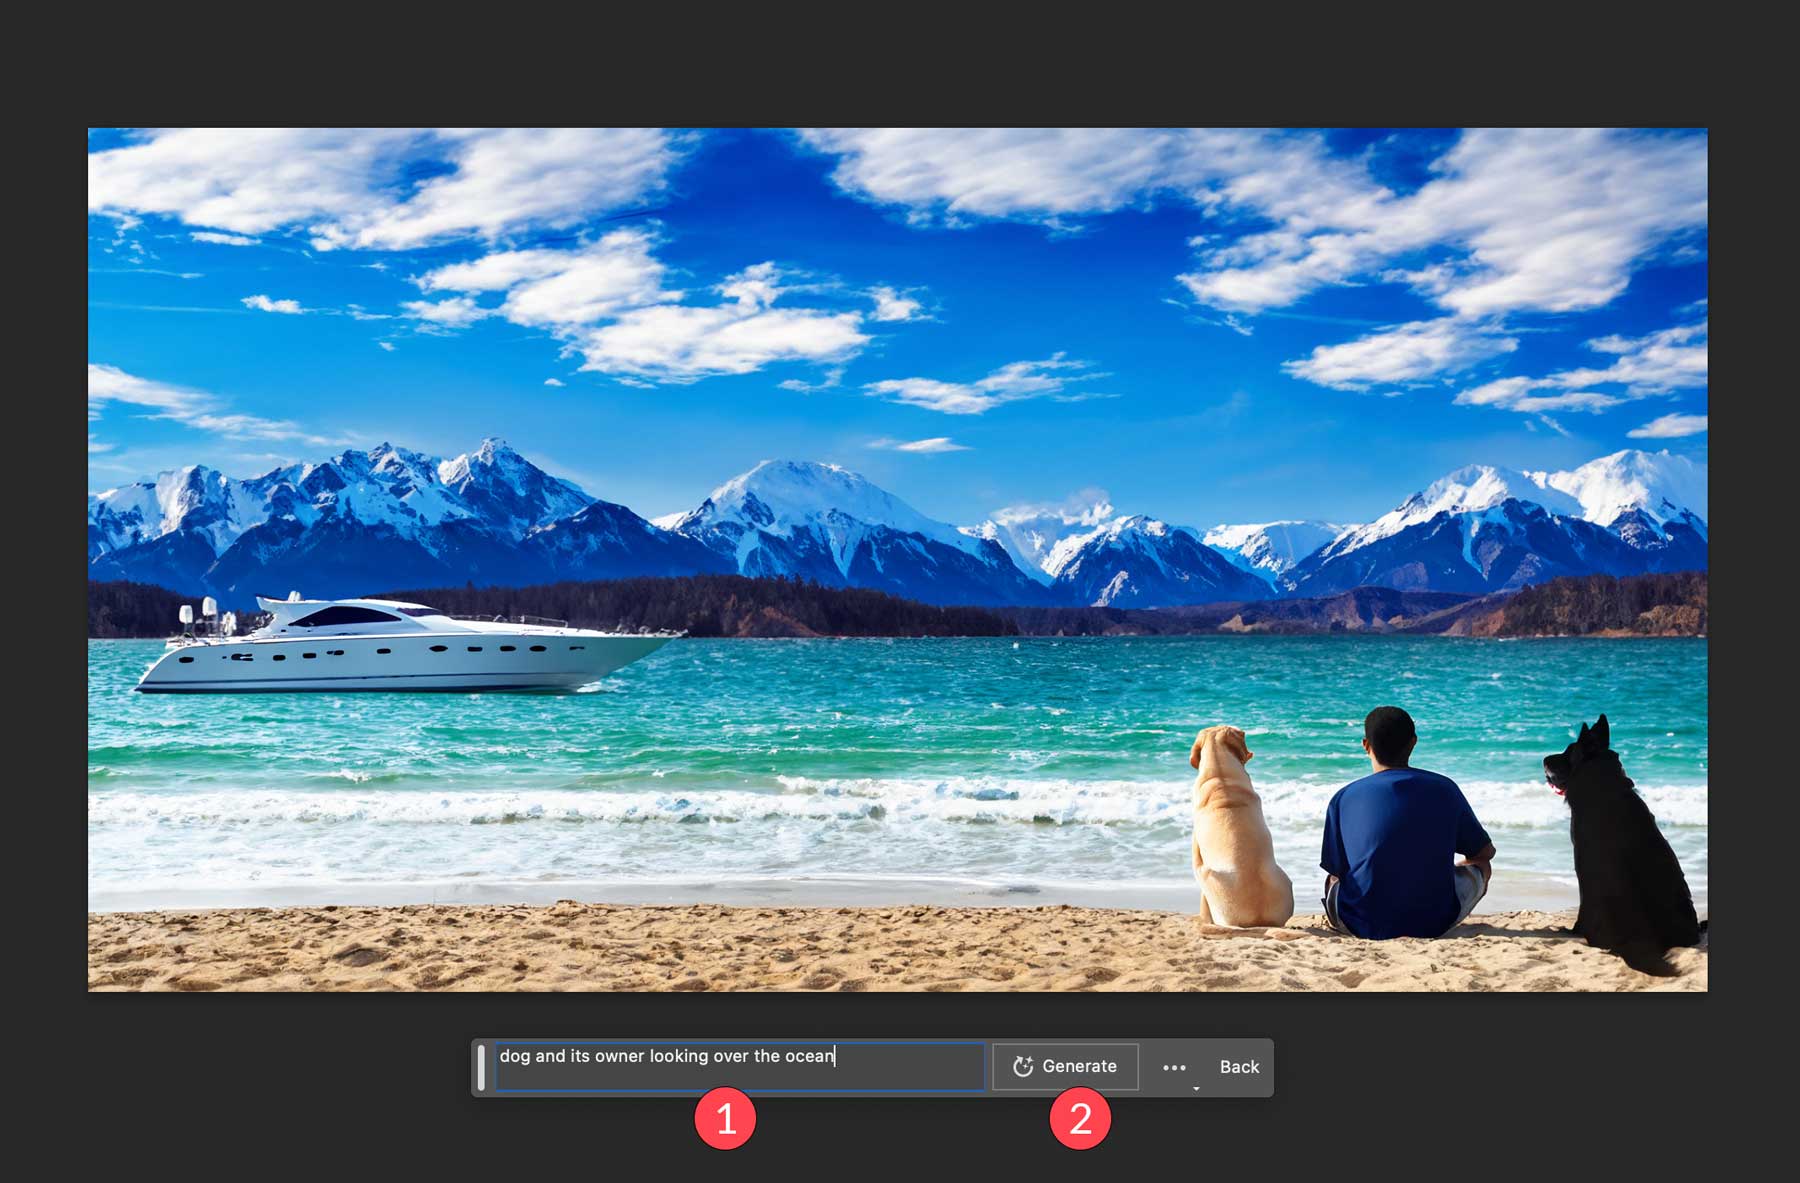
Lastly, we’ll add a man with two dogs looking out at the scenery. Form a selection using the rectangular marquee tool over the lower right corner of the composite image. Use the text prompt dog and its owner looking over the ocean, then click generate.
Photoshop AI Generative Fill Tips
Now that you better understand how generative fill works, we’d like to give you a few tips to help you use it more effectively. While Photoshop’s AI tools work great all on their own, there are a few ways to get better results and combine them with other features in Photoshop.
It’s OK to Leave the Prompt Blank
When you want to remove an element, make a selection over where you want the element removed, click generative fill, then generate without entering a text prompt. This lets Photoshop know that you don’t wish to add anything; you only want to fill the selection with a similar look as the surrounding image pixels. It’s a great way to clean up photos with undesirable elements.
Be Creative With Your Selection
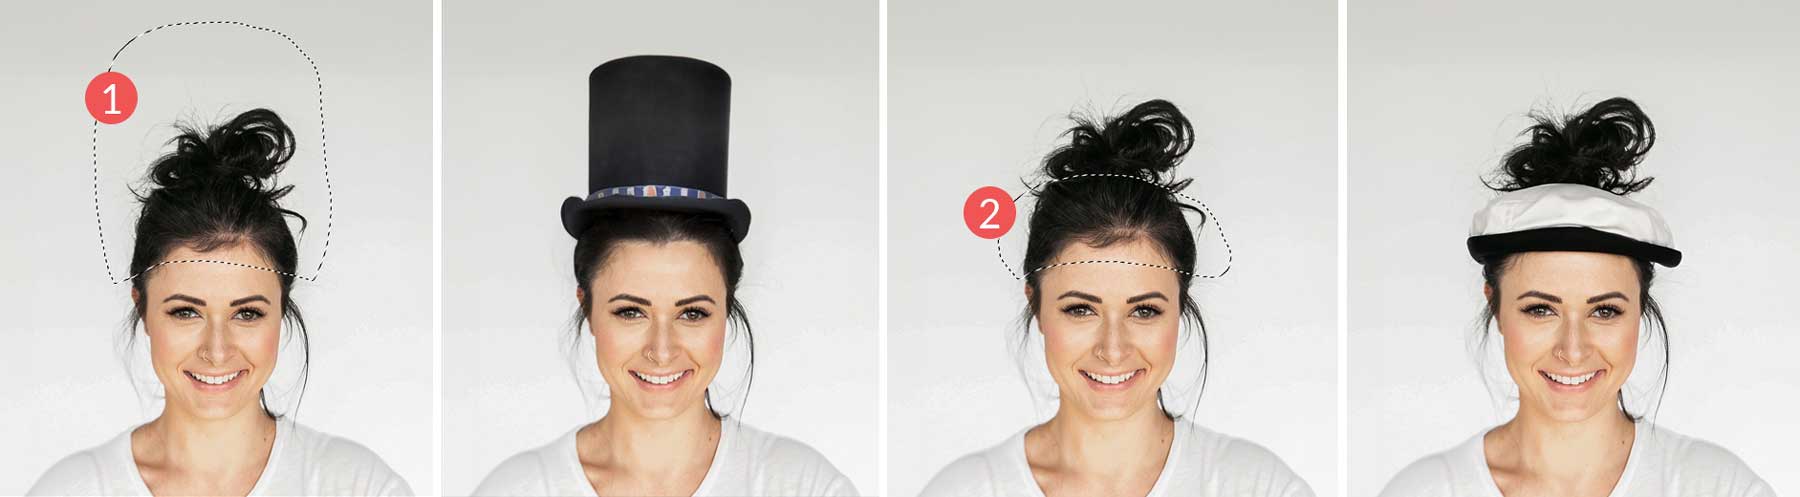
One unique feature of Photoshop AI’s generative fill tool is that the shape and size of the selection matter. For example, if you want to add a hat to a person in your image, be sure to draw your selection as closely as possible regarding the type of hat you’d like. Additionally, note that small selections add a smaller design element, whereas a large selection would result in a larger element. Using the appropriate shape for the item you want to add is an excellent way to give Photoshop more details on what you want, resulting in better output.
Don’t Use Instructional Prompts
One thing that Photoshop AI doesn’t do well is determining instructional prompts. Avoid using words like create, alter, or make when inputting your text prompts. Using descriptive adjectives and nouns will always give you better results. For example, if you generate an image of a dog, select the area around it, then tell Photoshop to make the dog bigger, it will likely result in an entirely different picture of a dog rather than a bigger version of the original one. Unlike other AI design tools, less is more. Photoshop’s AI doesn’t require descriptive styling words like highly detailed or cinematic photography because it will match the style of the photo you’re editing.
Utilize the Object Selection Tool
Some users might not love the marching ants (selection) when working in Photoshop. After all, they can sometimes be hard to see. A better way to make your selections stand out is by using Photoshop’s object selection tool. It’s excellent for highlighting individual areas for heightened visibility and gives you a more visual representation of the area you’re working with.
Use it to Blend Photos Together
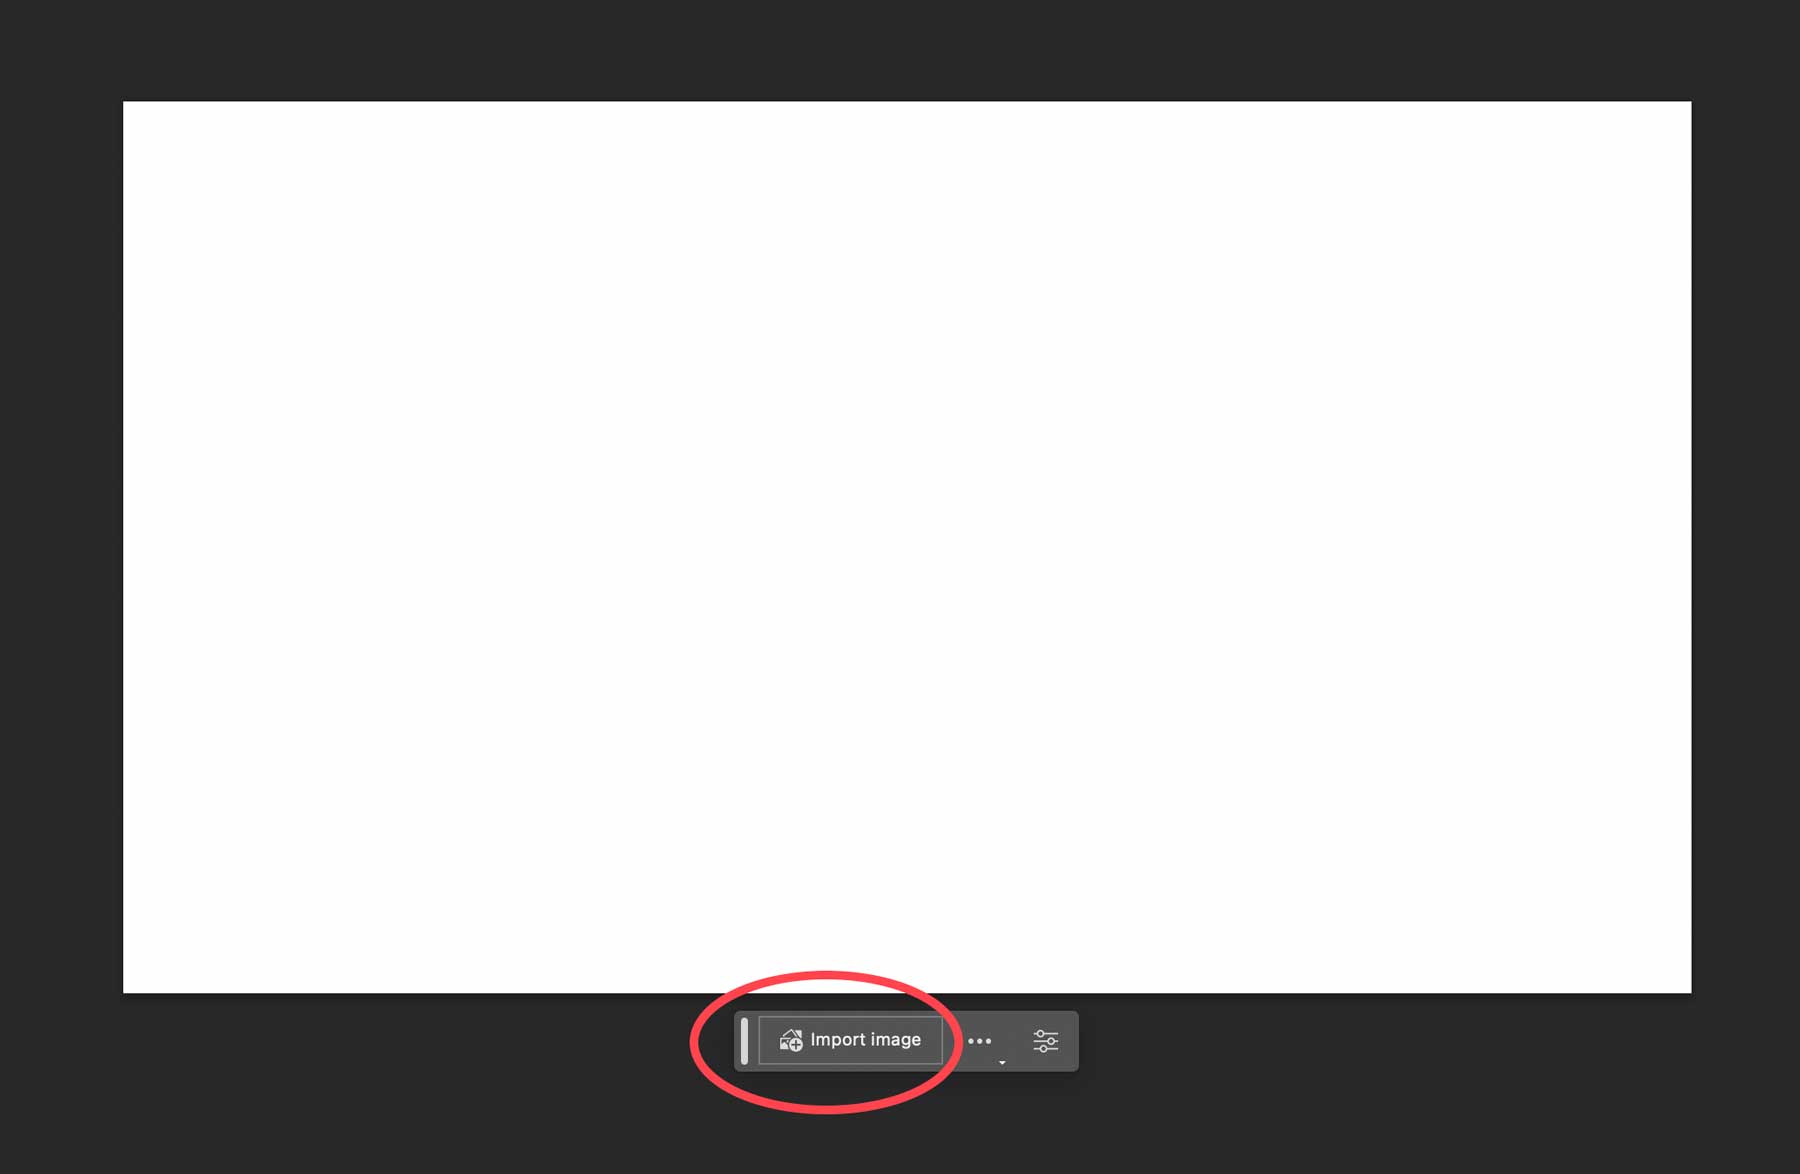
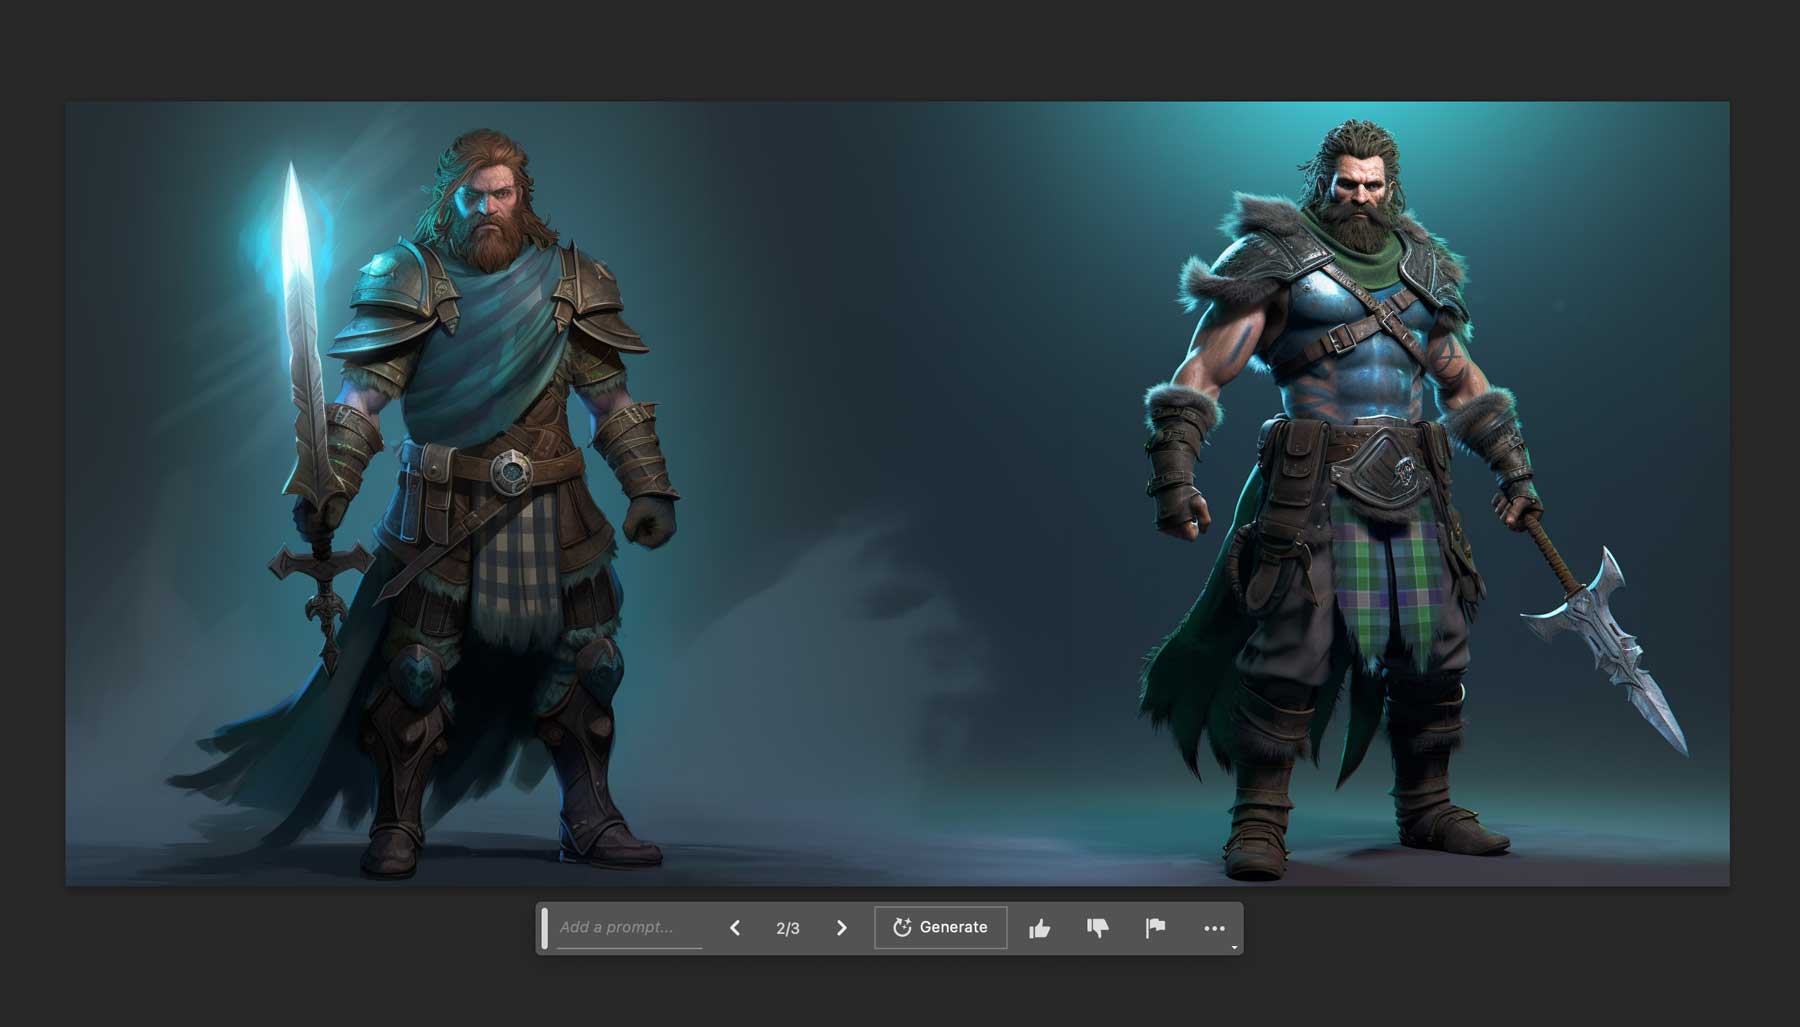
Combining photos is another great way to use Photoshop AI’s generative fill feature. We’ll show you an example with two video game character images created in Midjourney. We’ll start by creating a blank canvas measuring 1800px by 1024px. Then we’ll import the first image into your canvas by clicking the import button on the contextual taskbar.
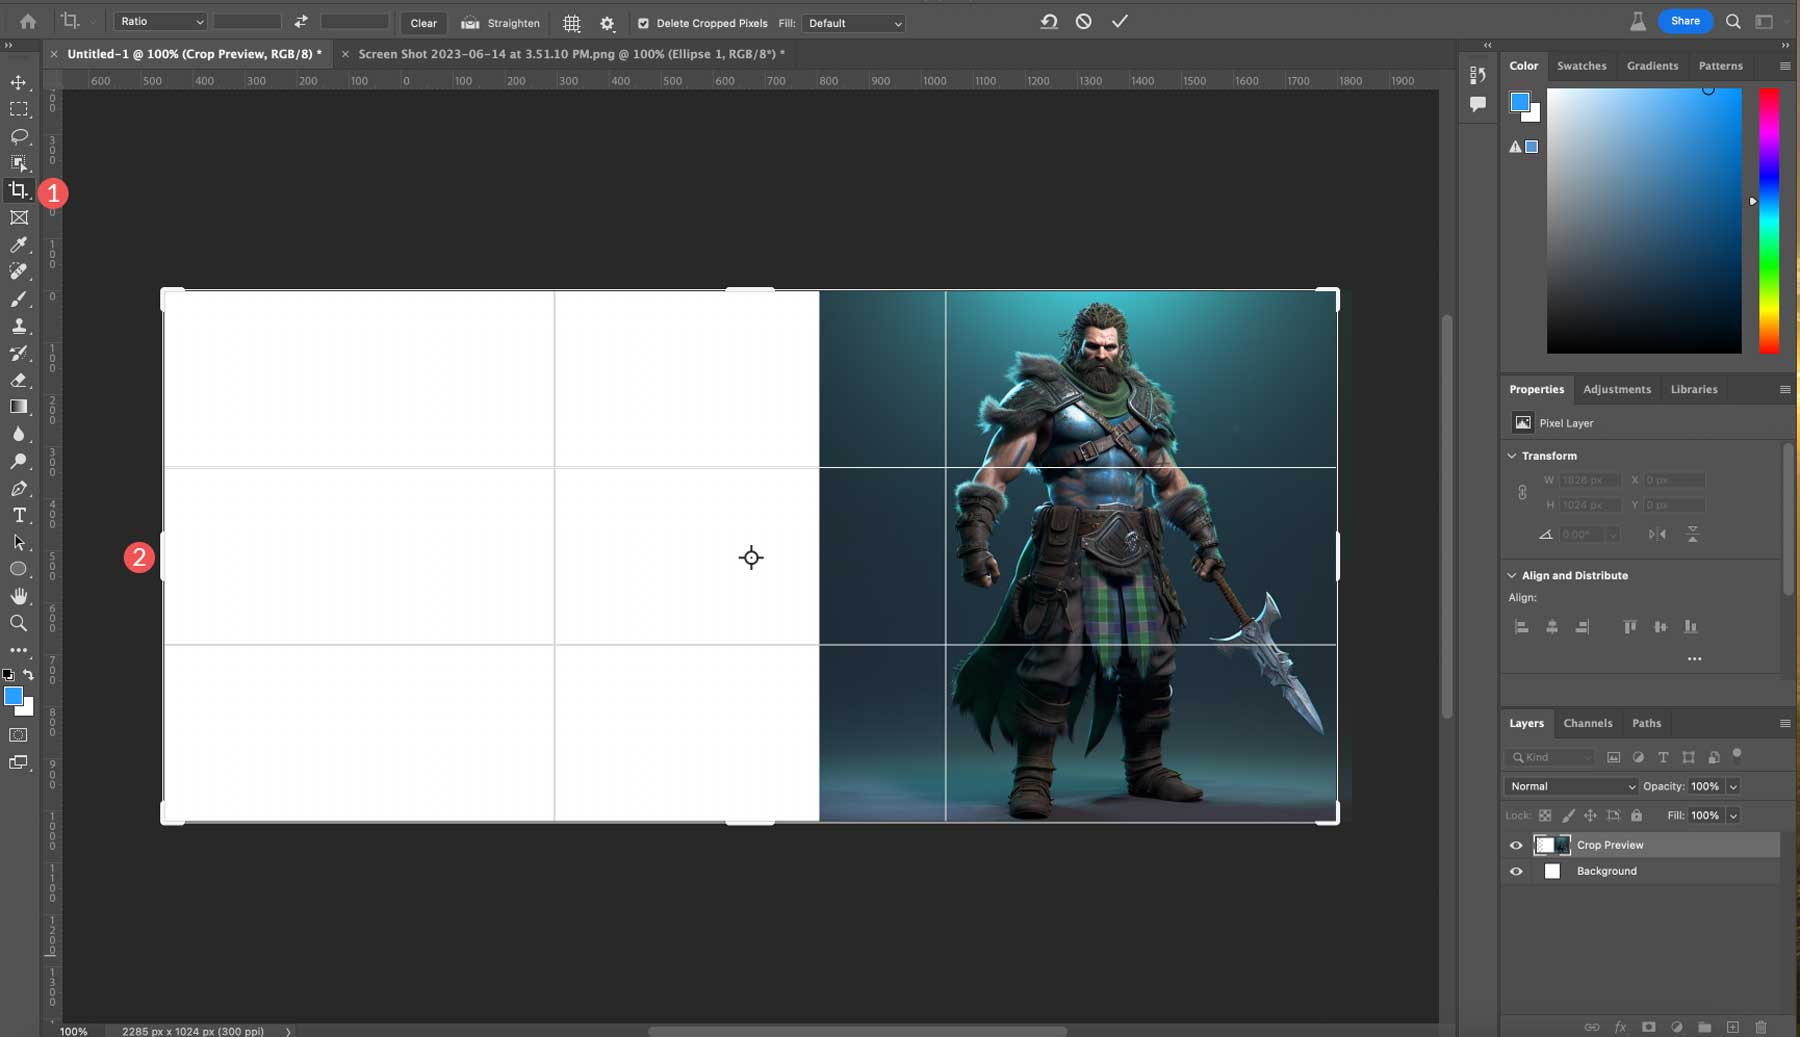
Next, we’ll use the crop tool to extend our canvas to provide more room for blending our images.
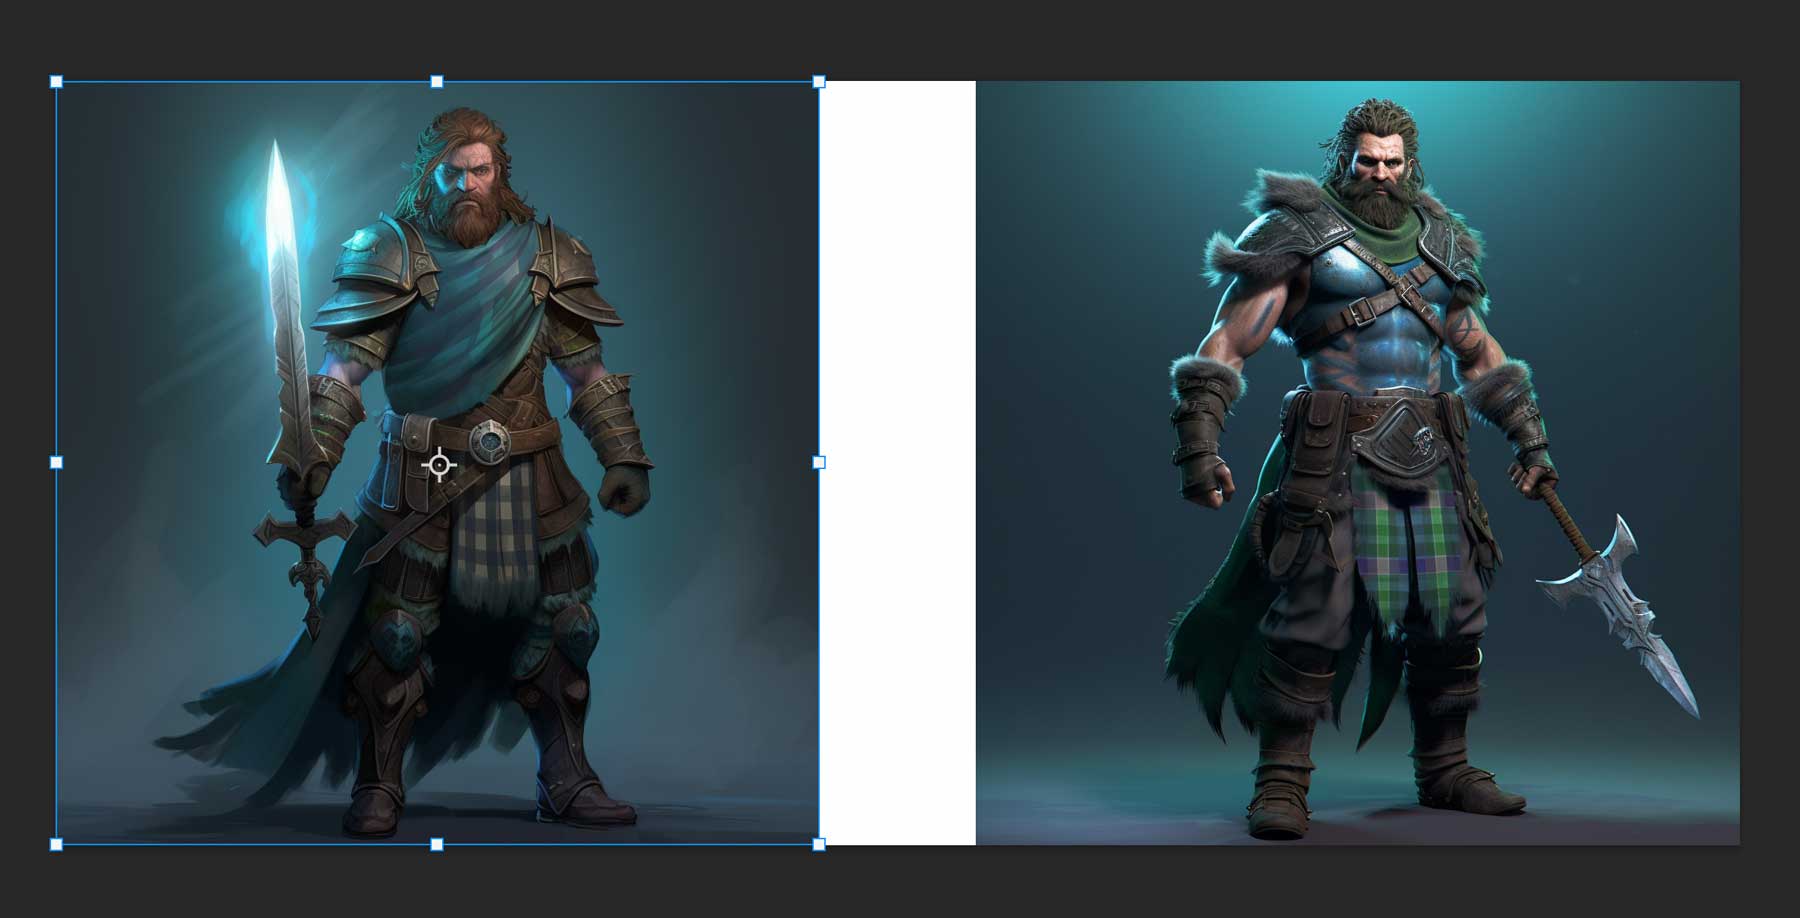
Then we’ll import our other image and add it to the canvas on the left side.
To blend the two photos together, we must ensure that both images are on the same layer. To do this, select the top layer, then hold Control + Shift + Alt + E (Windows) or Command + Shift + Alt + E (Mac) to tell Photoshop to create a new layer containing all other visible layers.
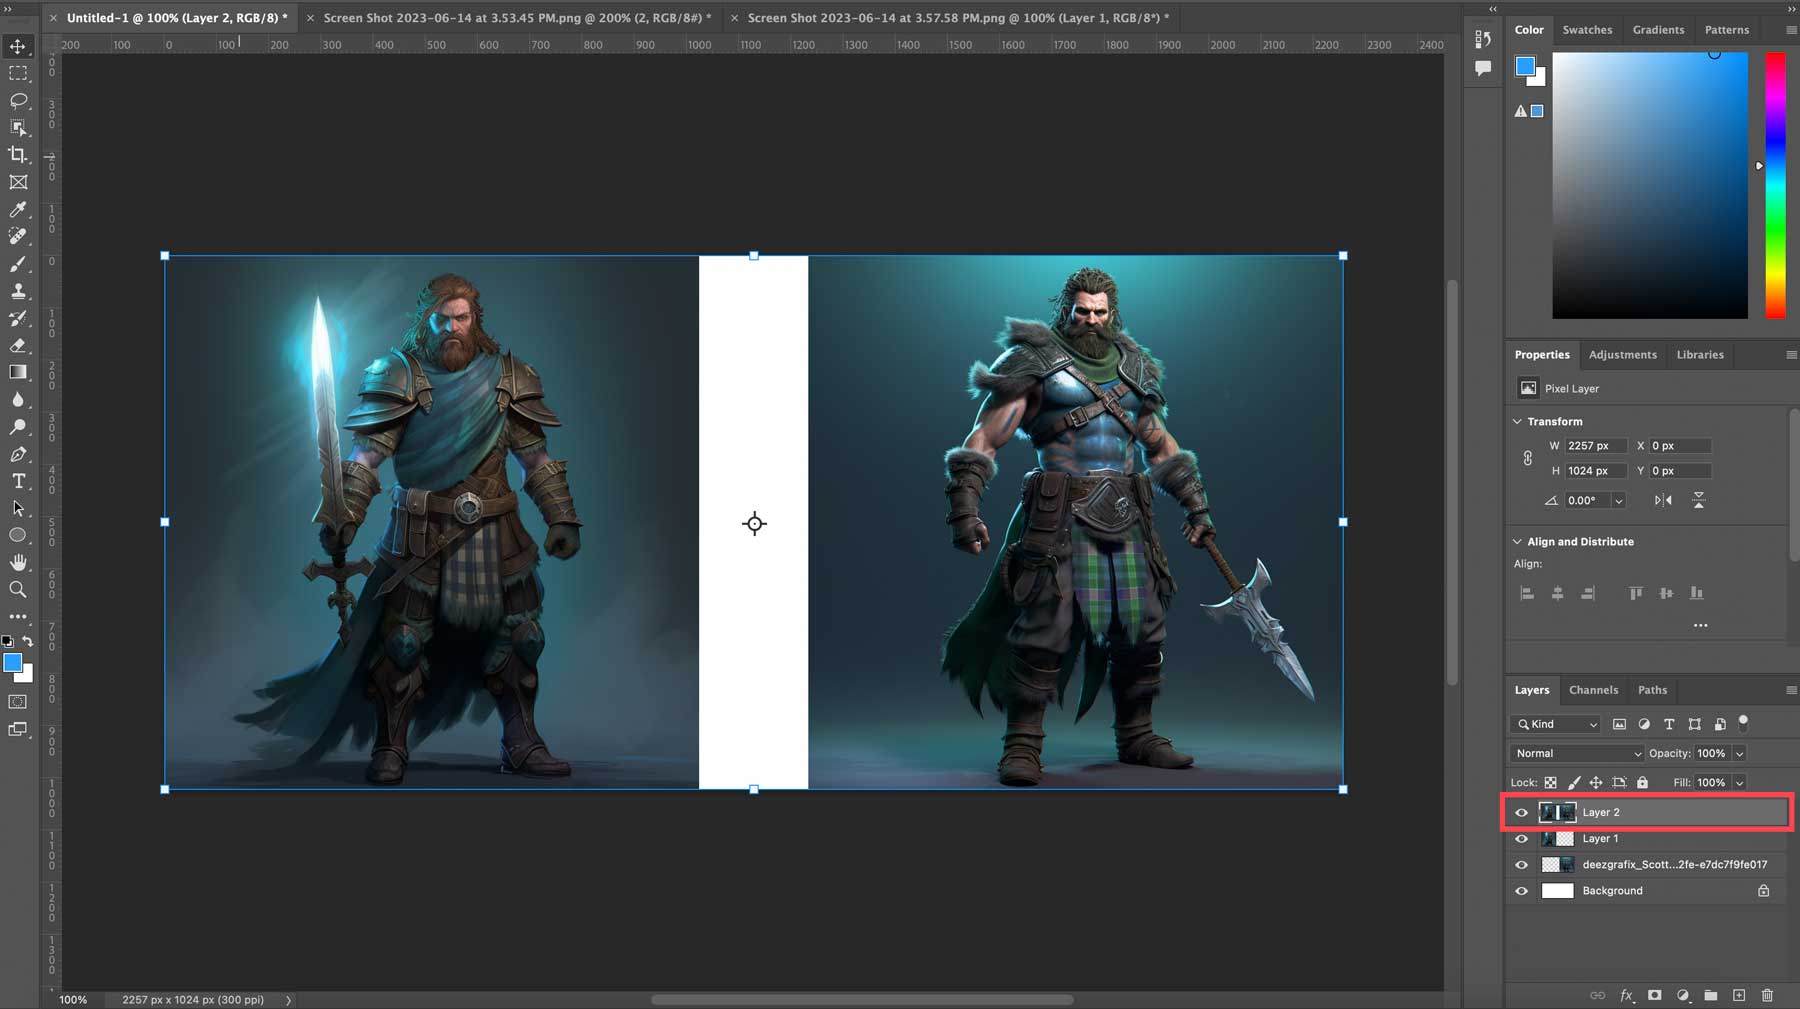
With the new layer selected, we’ll add a selection between the two photos, ensuring to include pixels from both images in the selection. Finally, click generative fill, then generate without adding a text prompt. The result is a blended photo that took seconds to create.
Before and After Examples Using Photoshop AI
We thought it might be fun to share a few of our creations as we researched this article, as it shows some of the things you can do with Photoshop’s AI generative fill tool. Its AI tools are impressive, whether you need to make small adjustments to an existing image or do a complete overhaul.
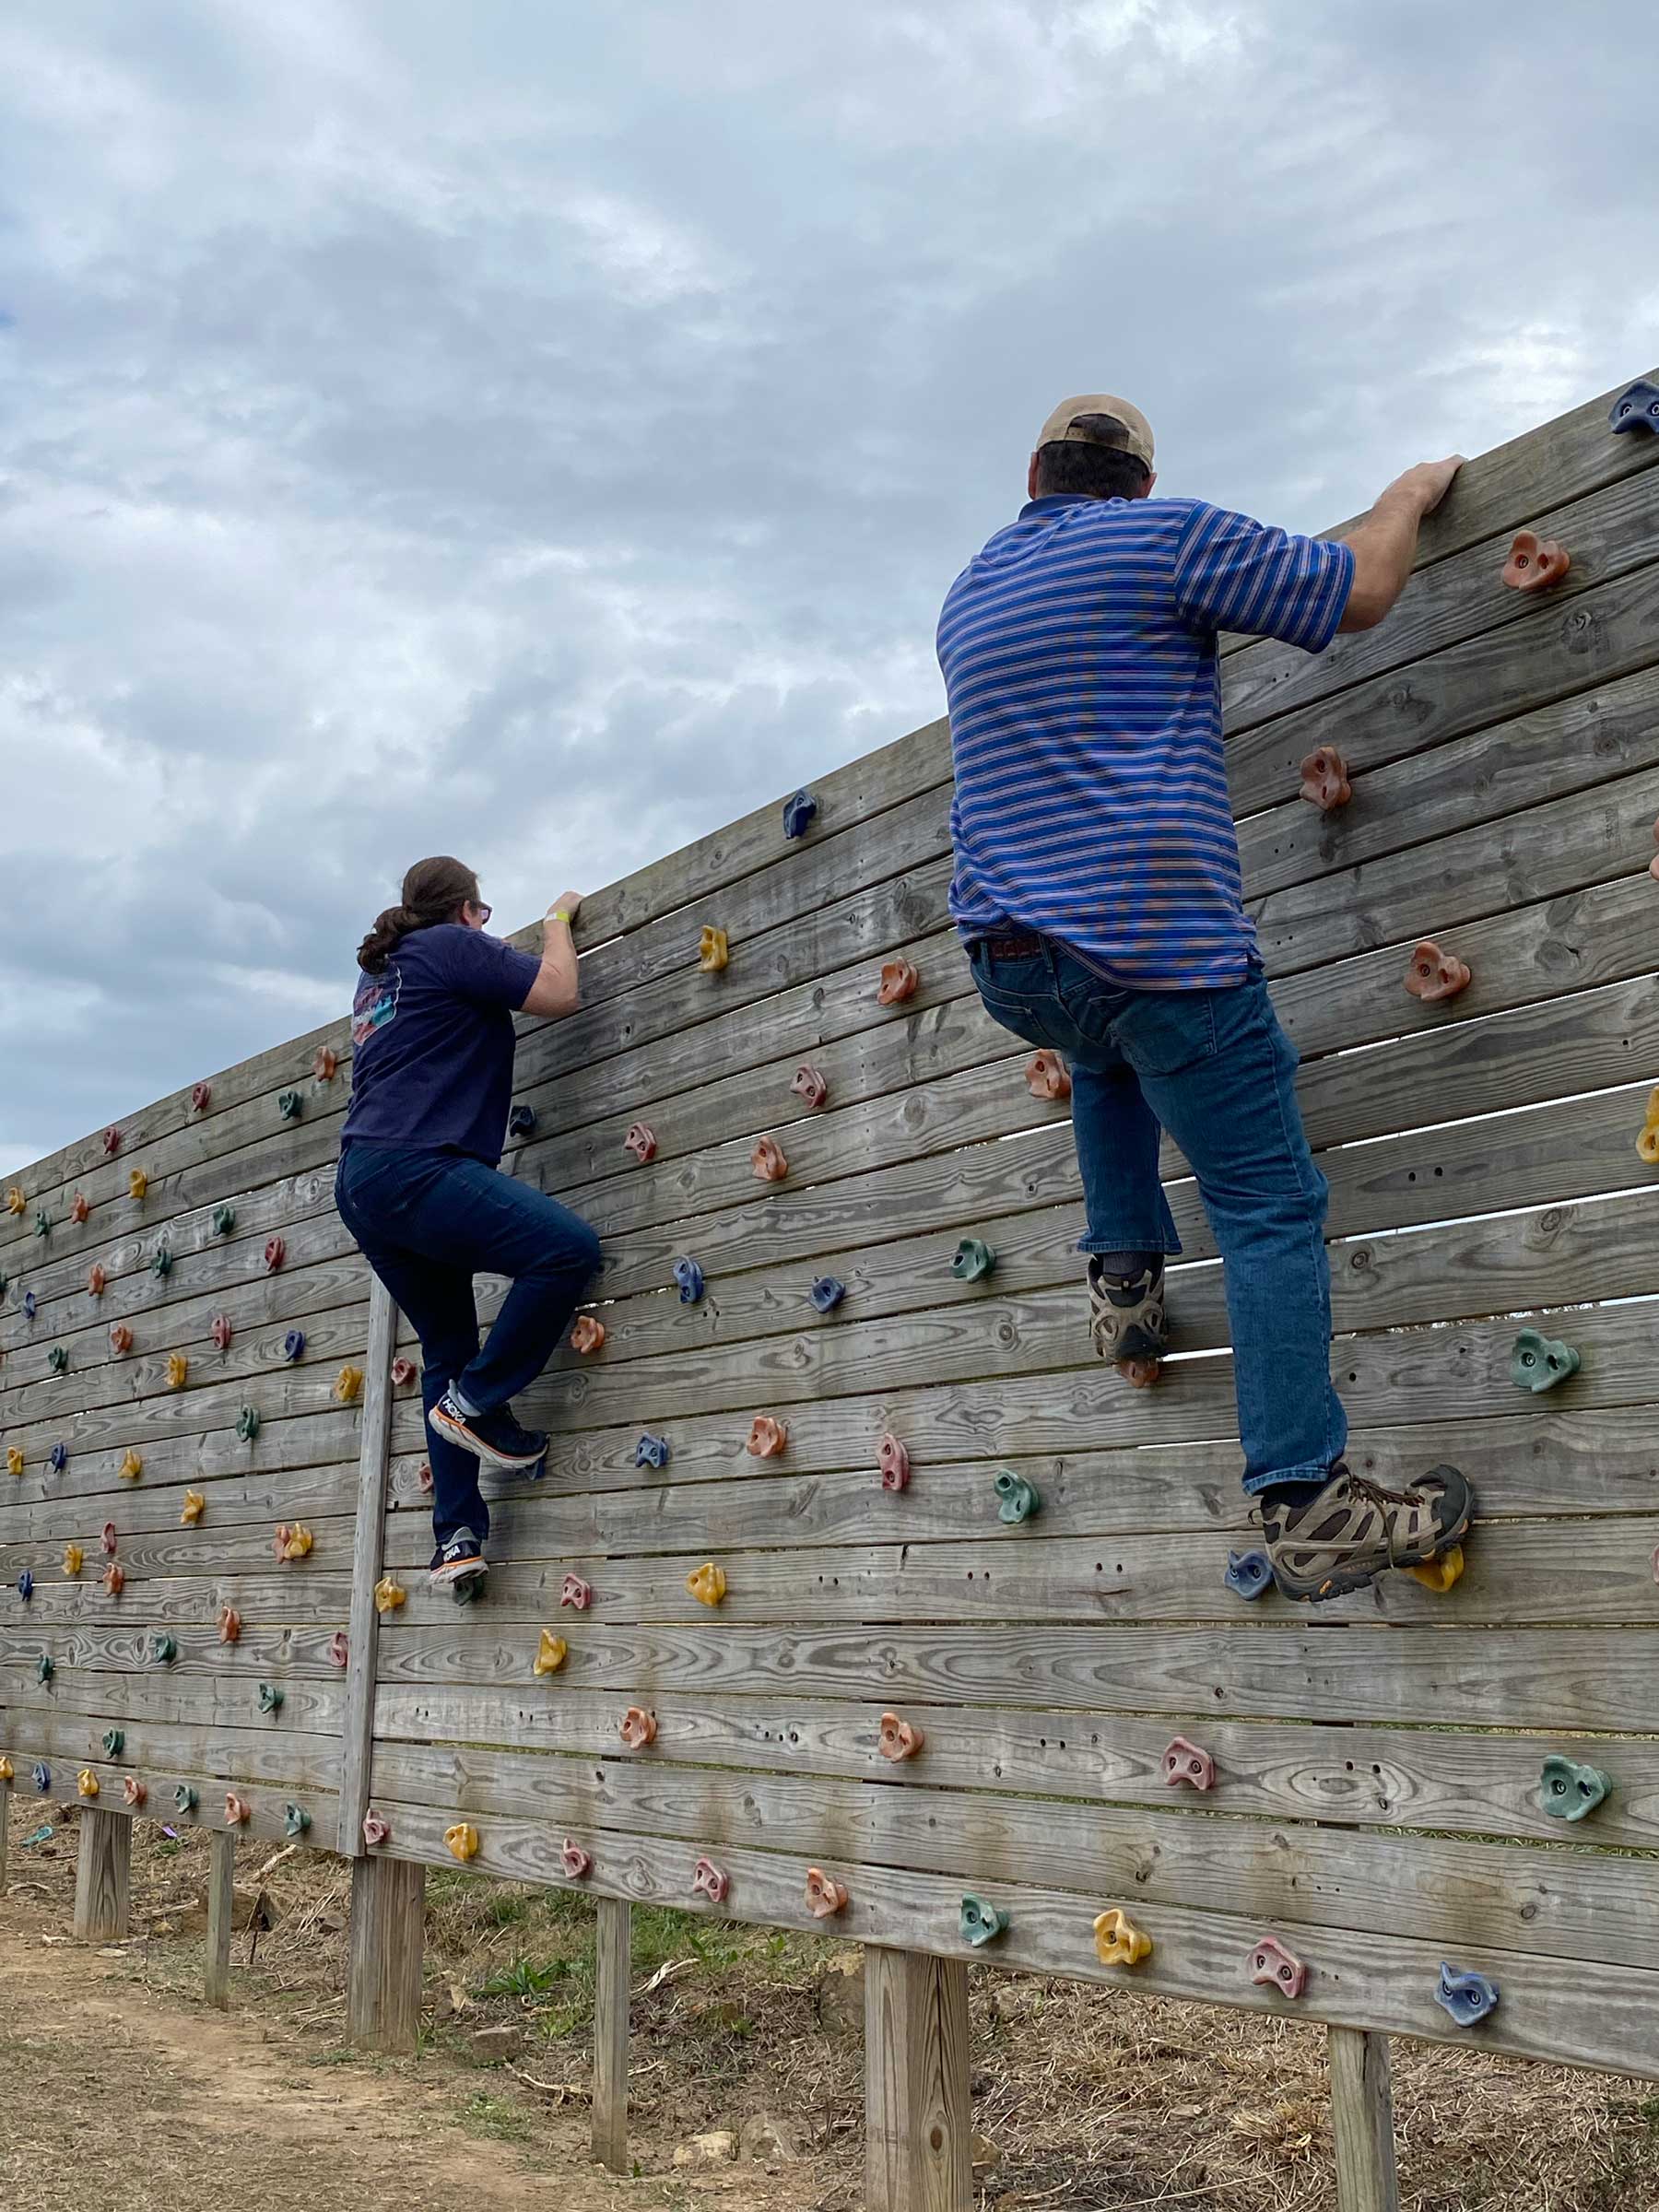
Before: An image of two people climbing a rock wall.
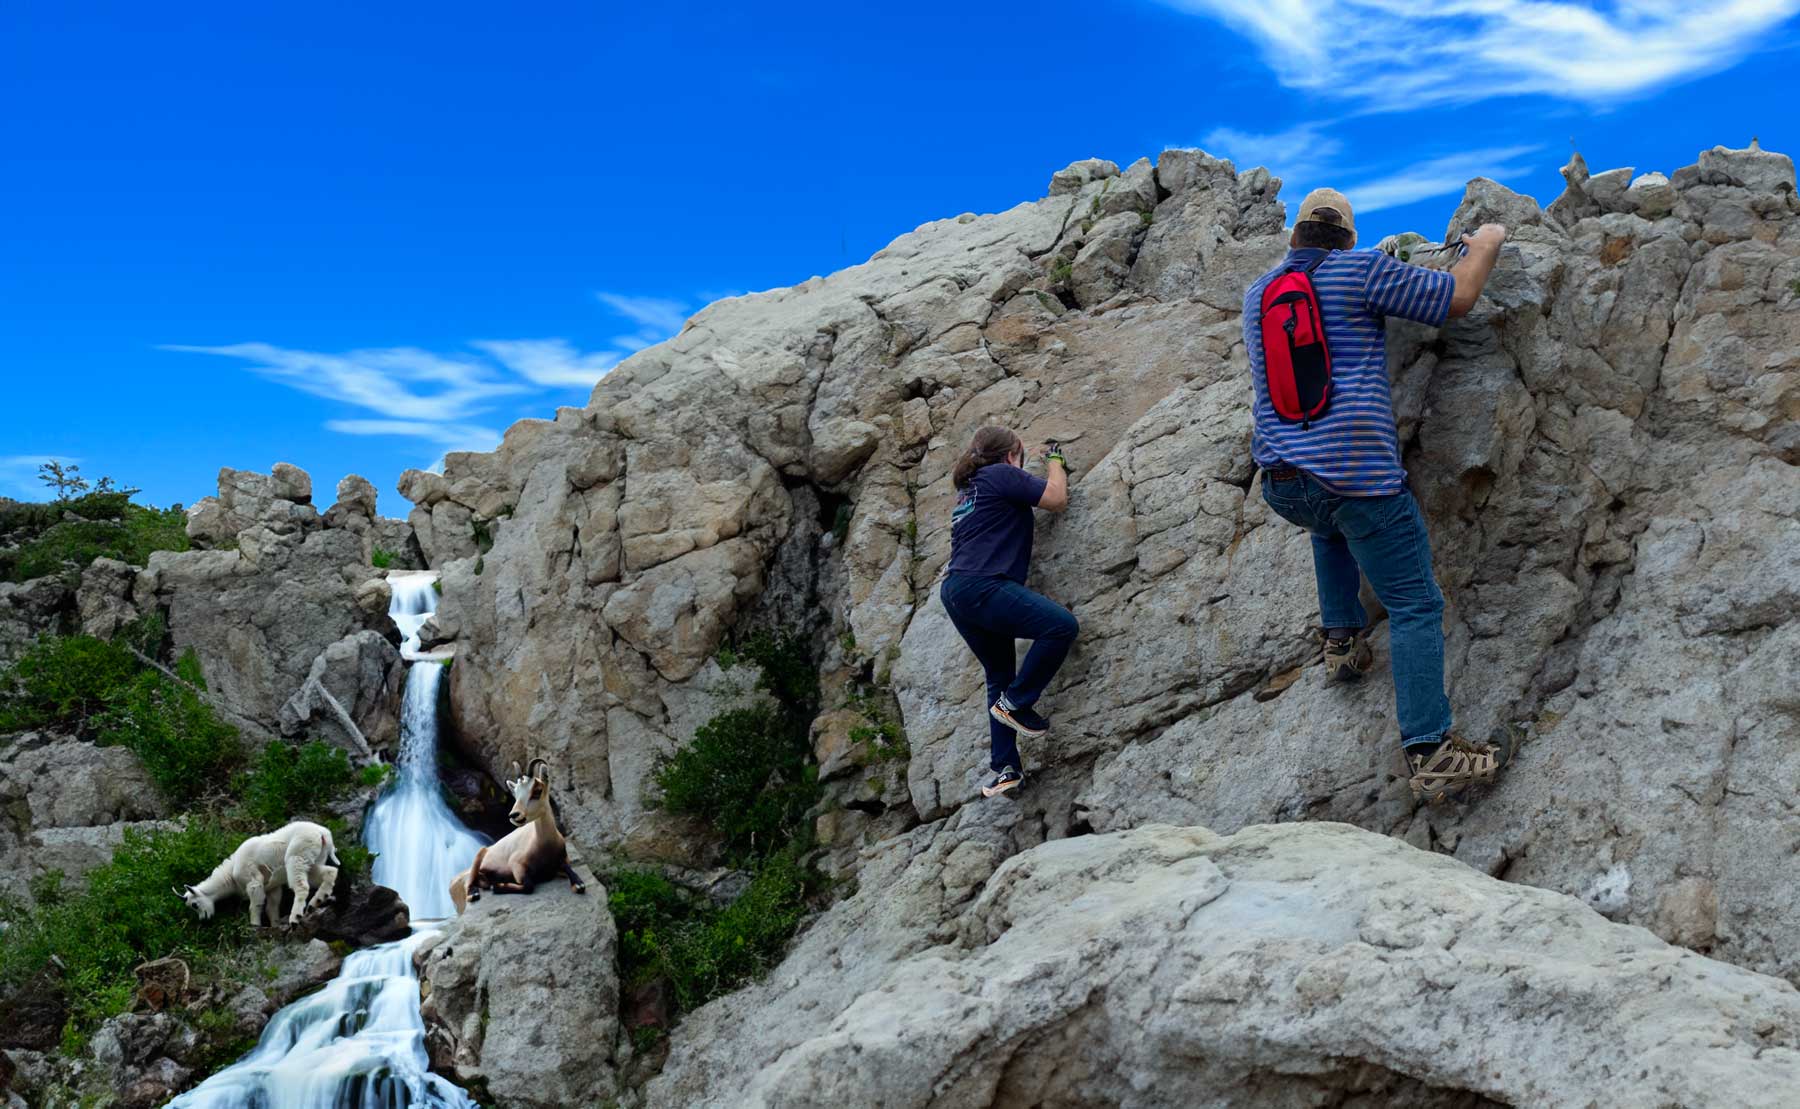
After: Those two people climb steep mountains while animals graze nearby. Cheesy, we know.
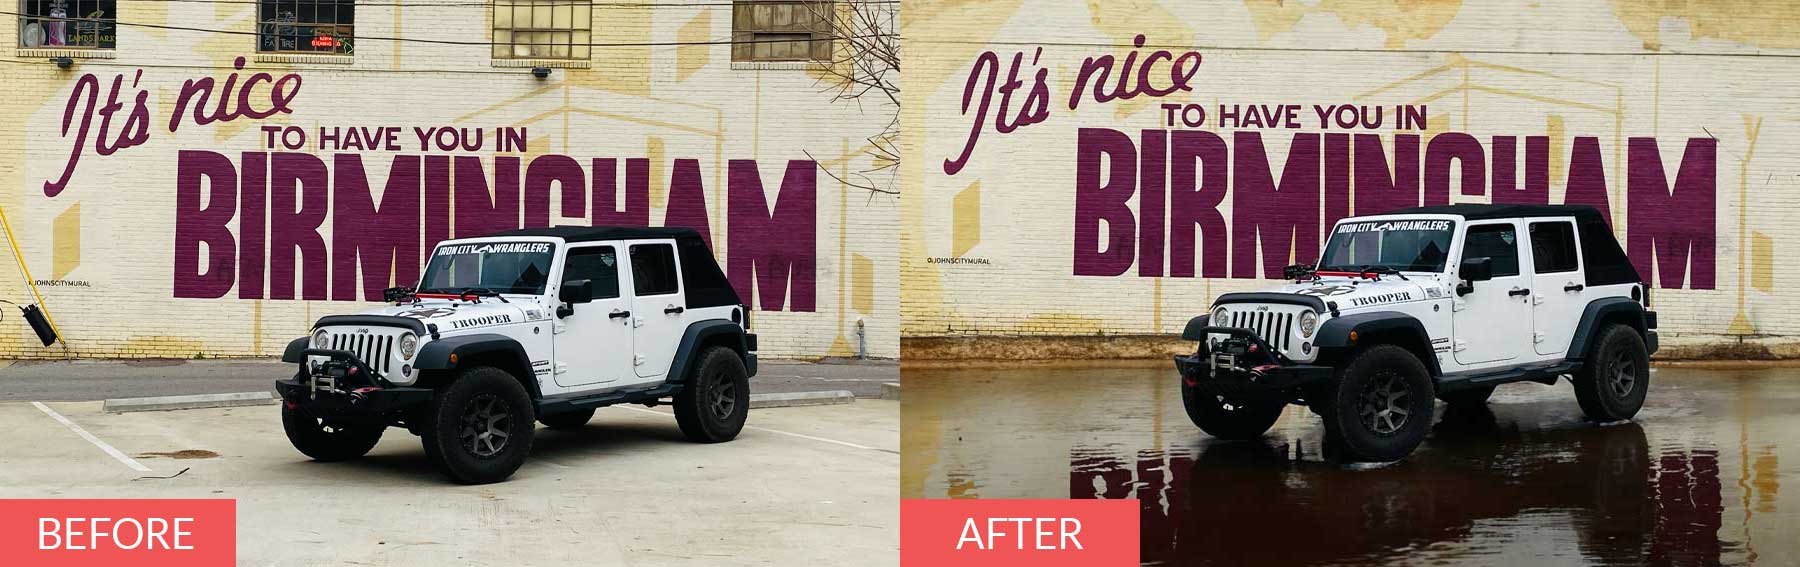
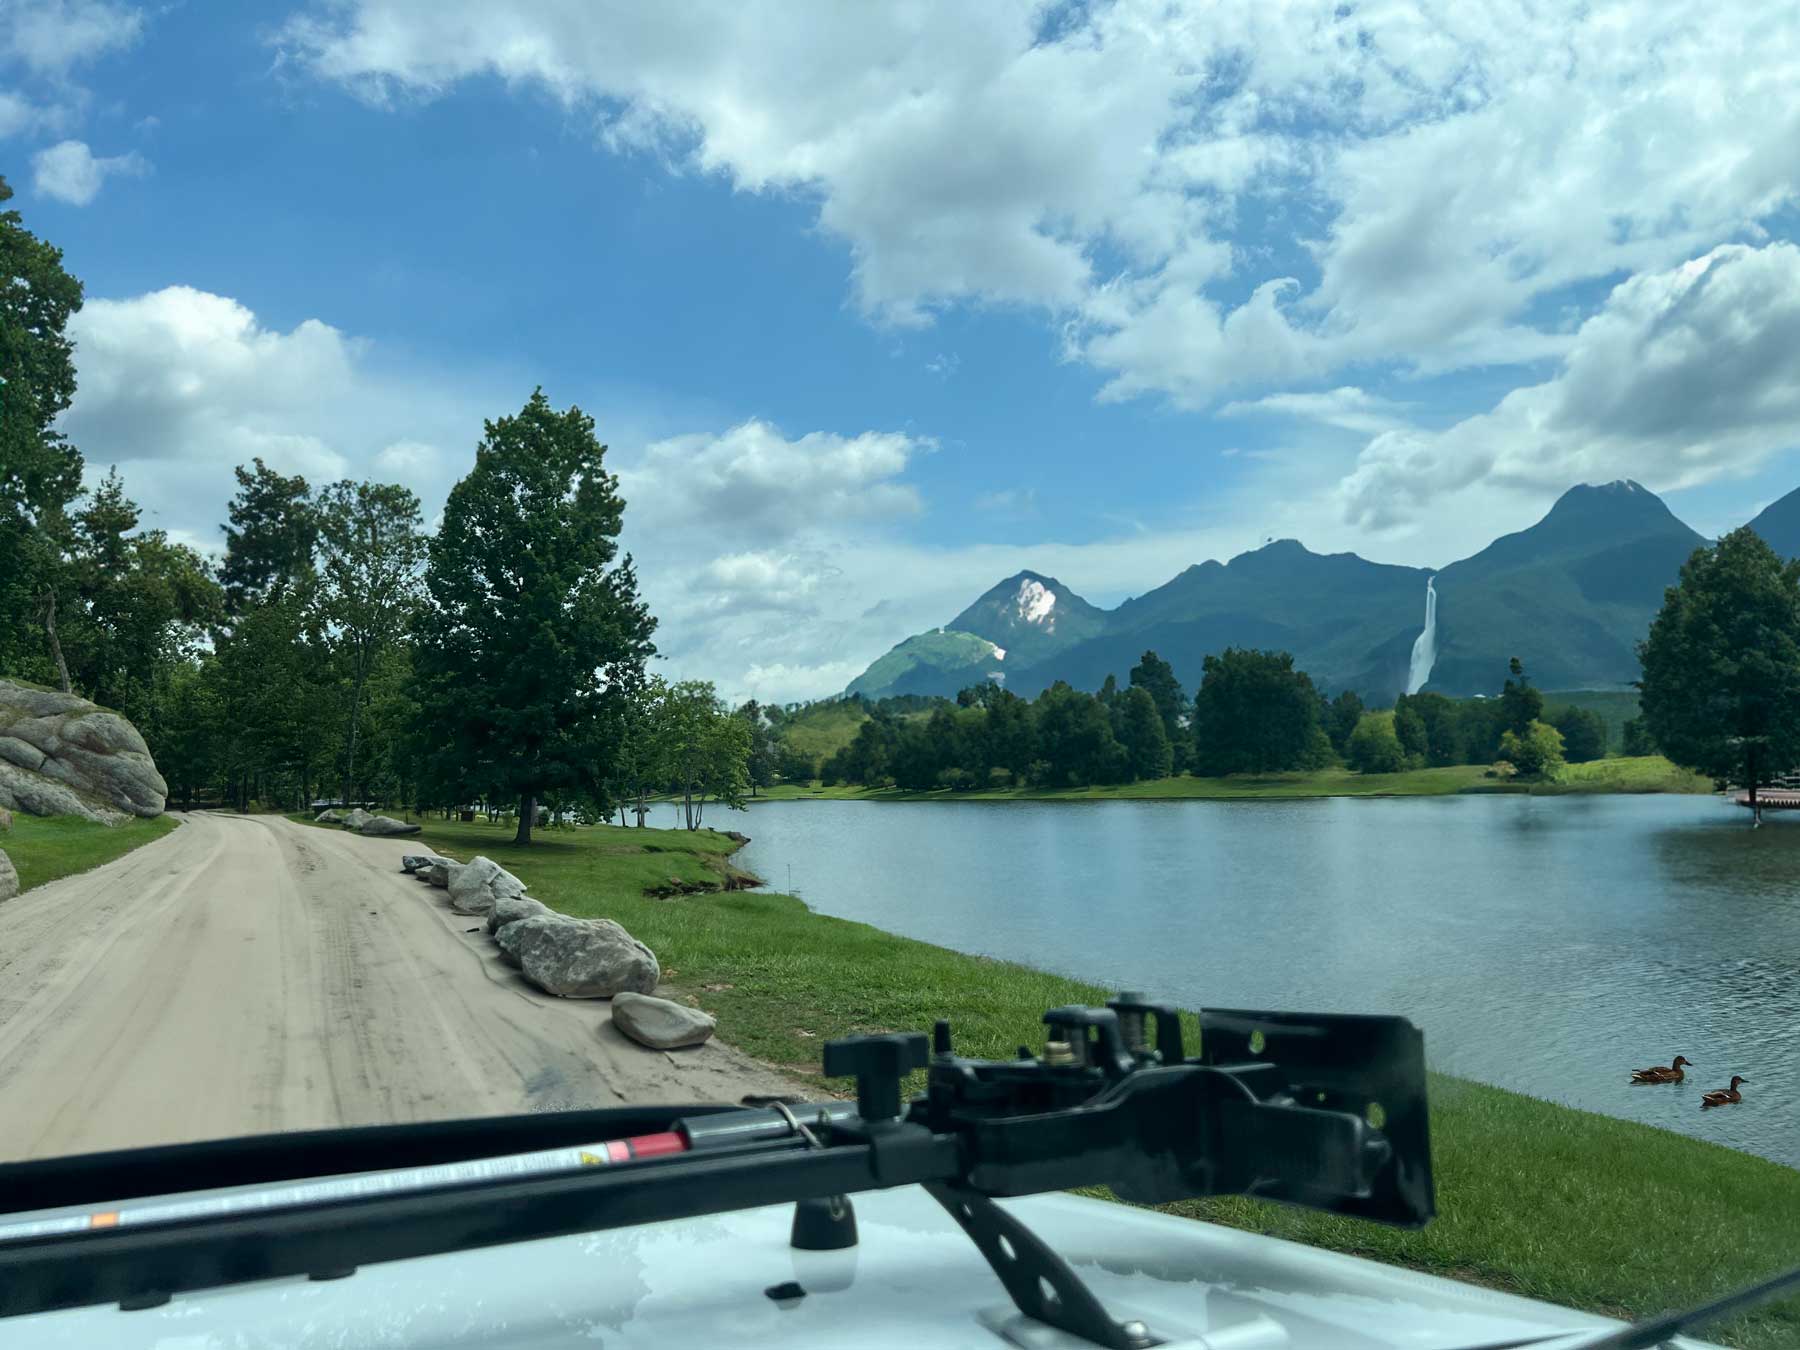
Before: Photo of a Jeep driving through a residential neighborhood.

After: A much more fitting image of a Jeep in a mountainous lake scene, driving down a dirt road. Now we’re getting somewhere.
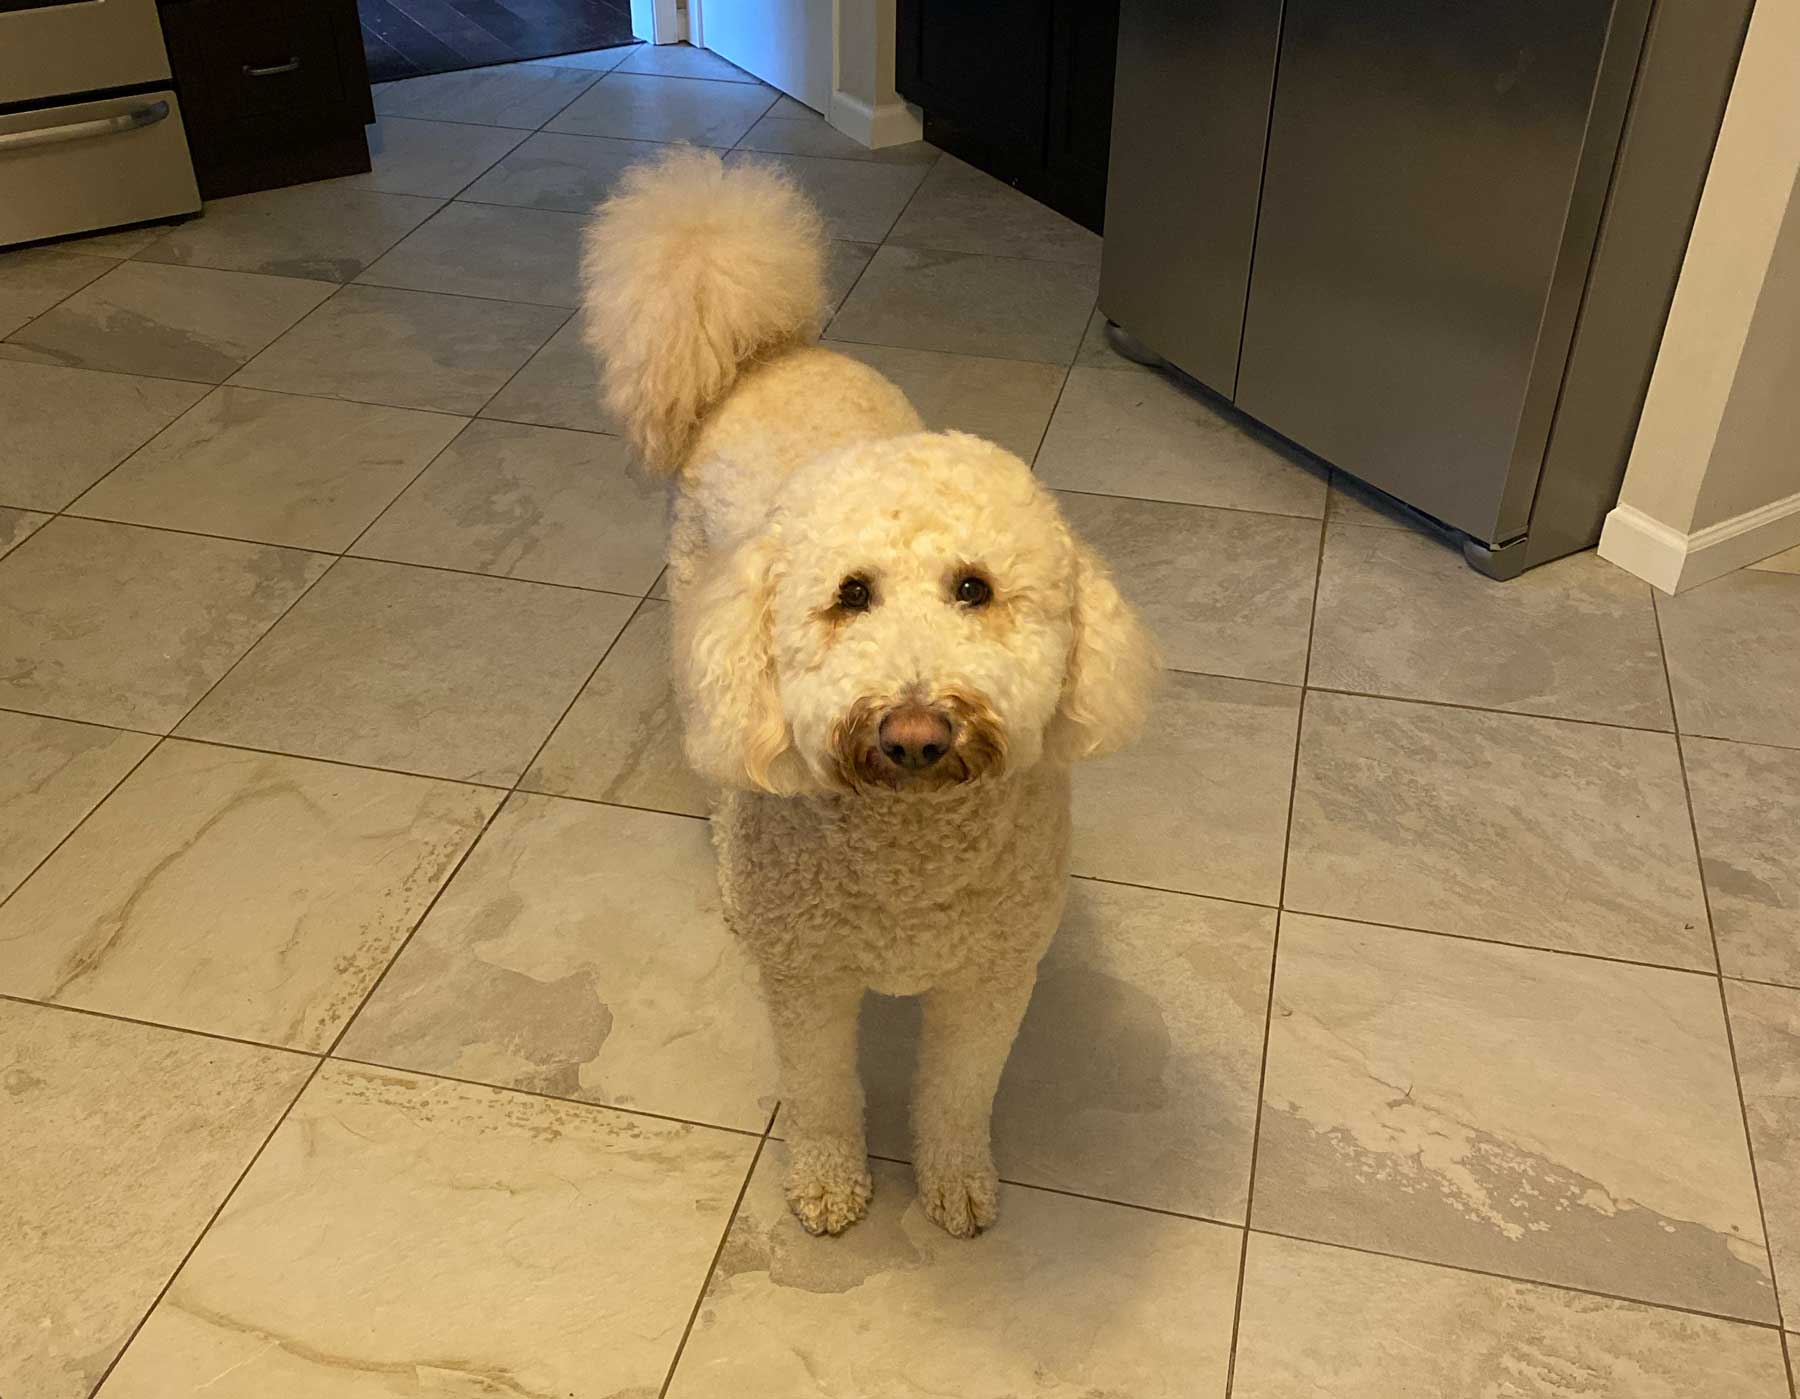
Before: Photo of a Goldendoodle standing in a kitchen.
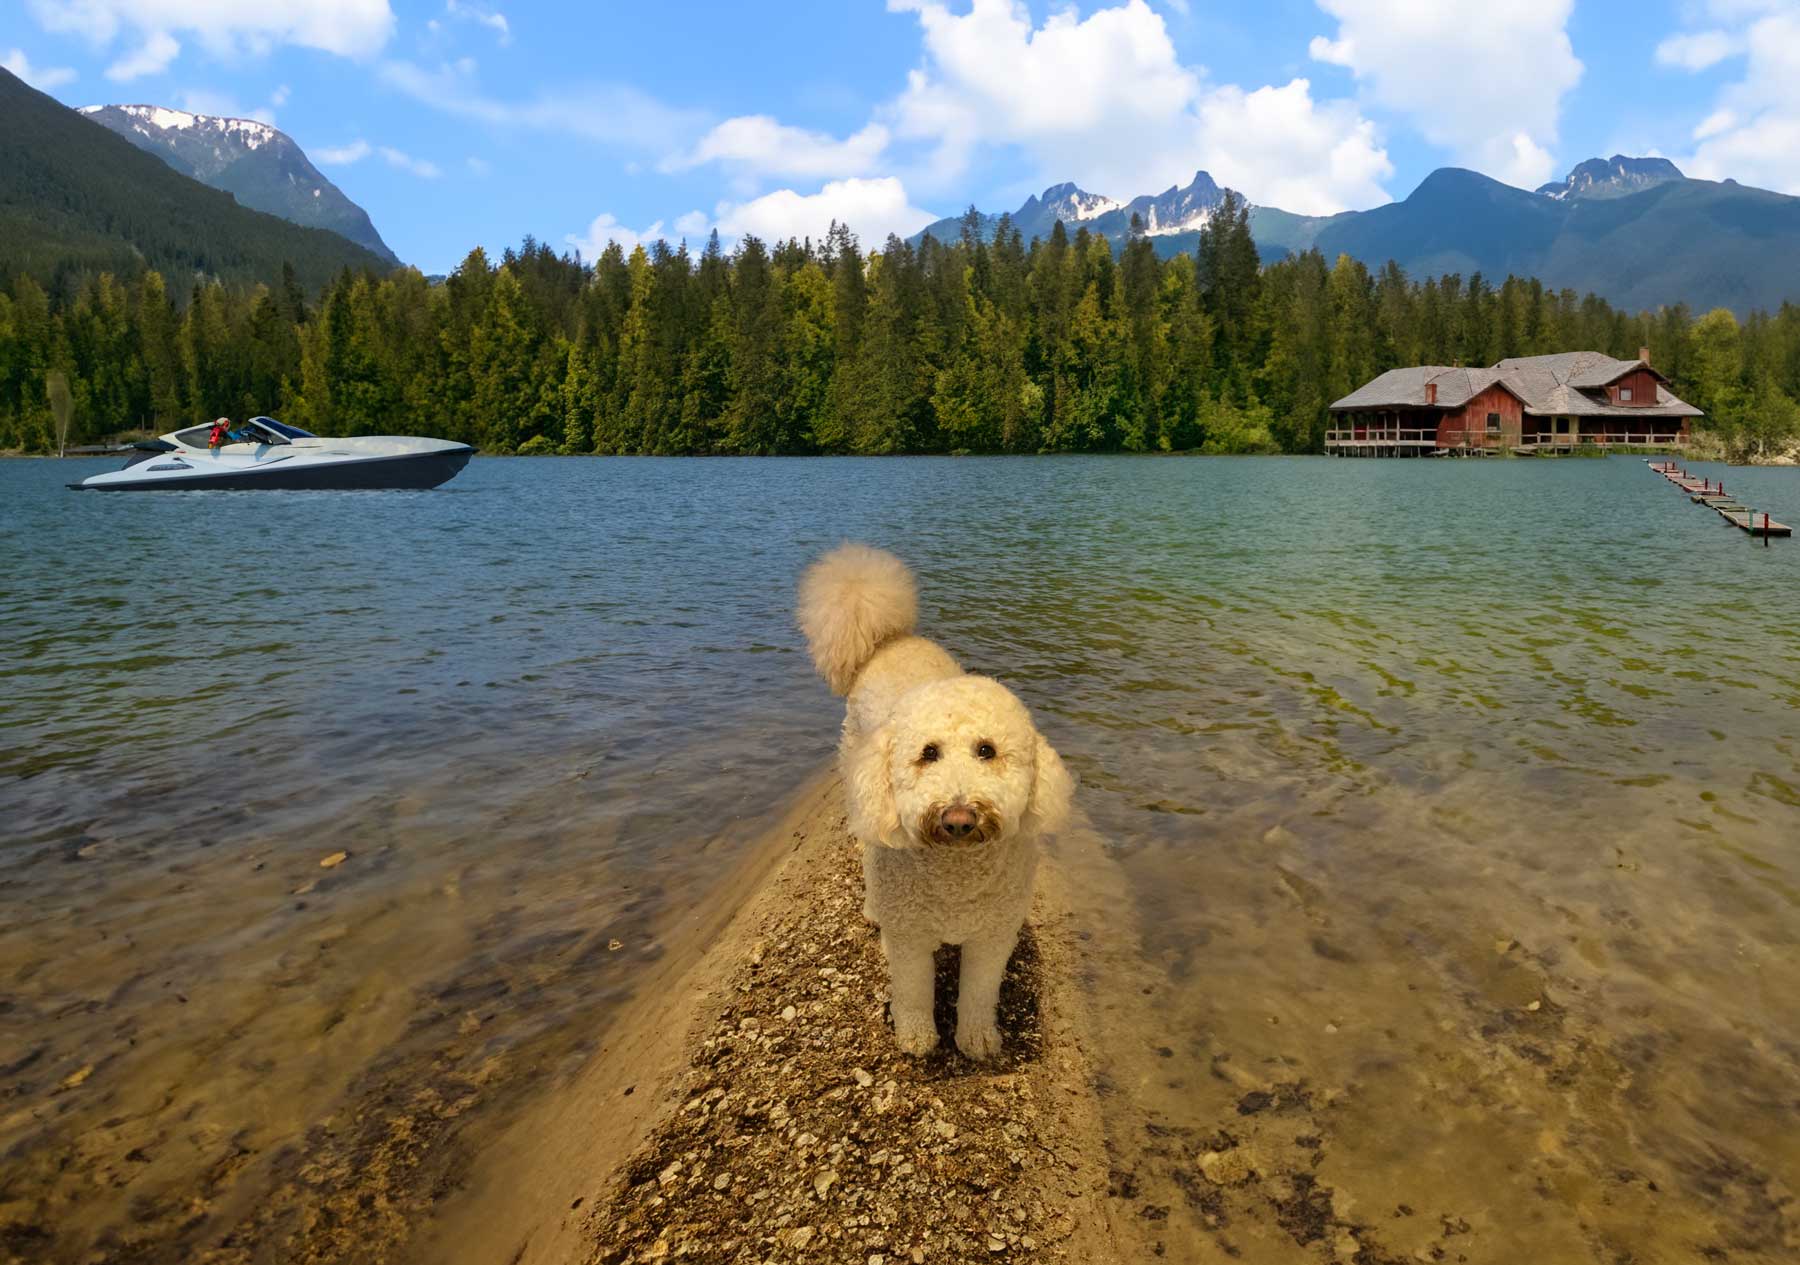
After: A Goldendoodle, standing in a picturesque lake, surrounded by boats, trees, and gorgeous lake homes. This one’s not bad, but the lighting is a little off. But for straight-out-of-the-box AI, it’s pretty good.
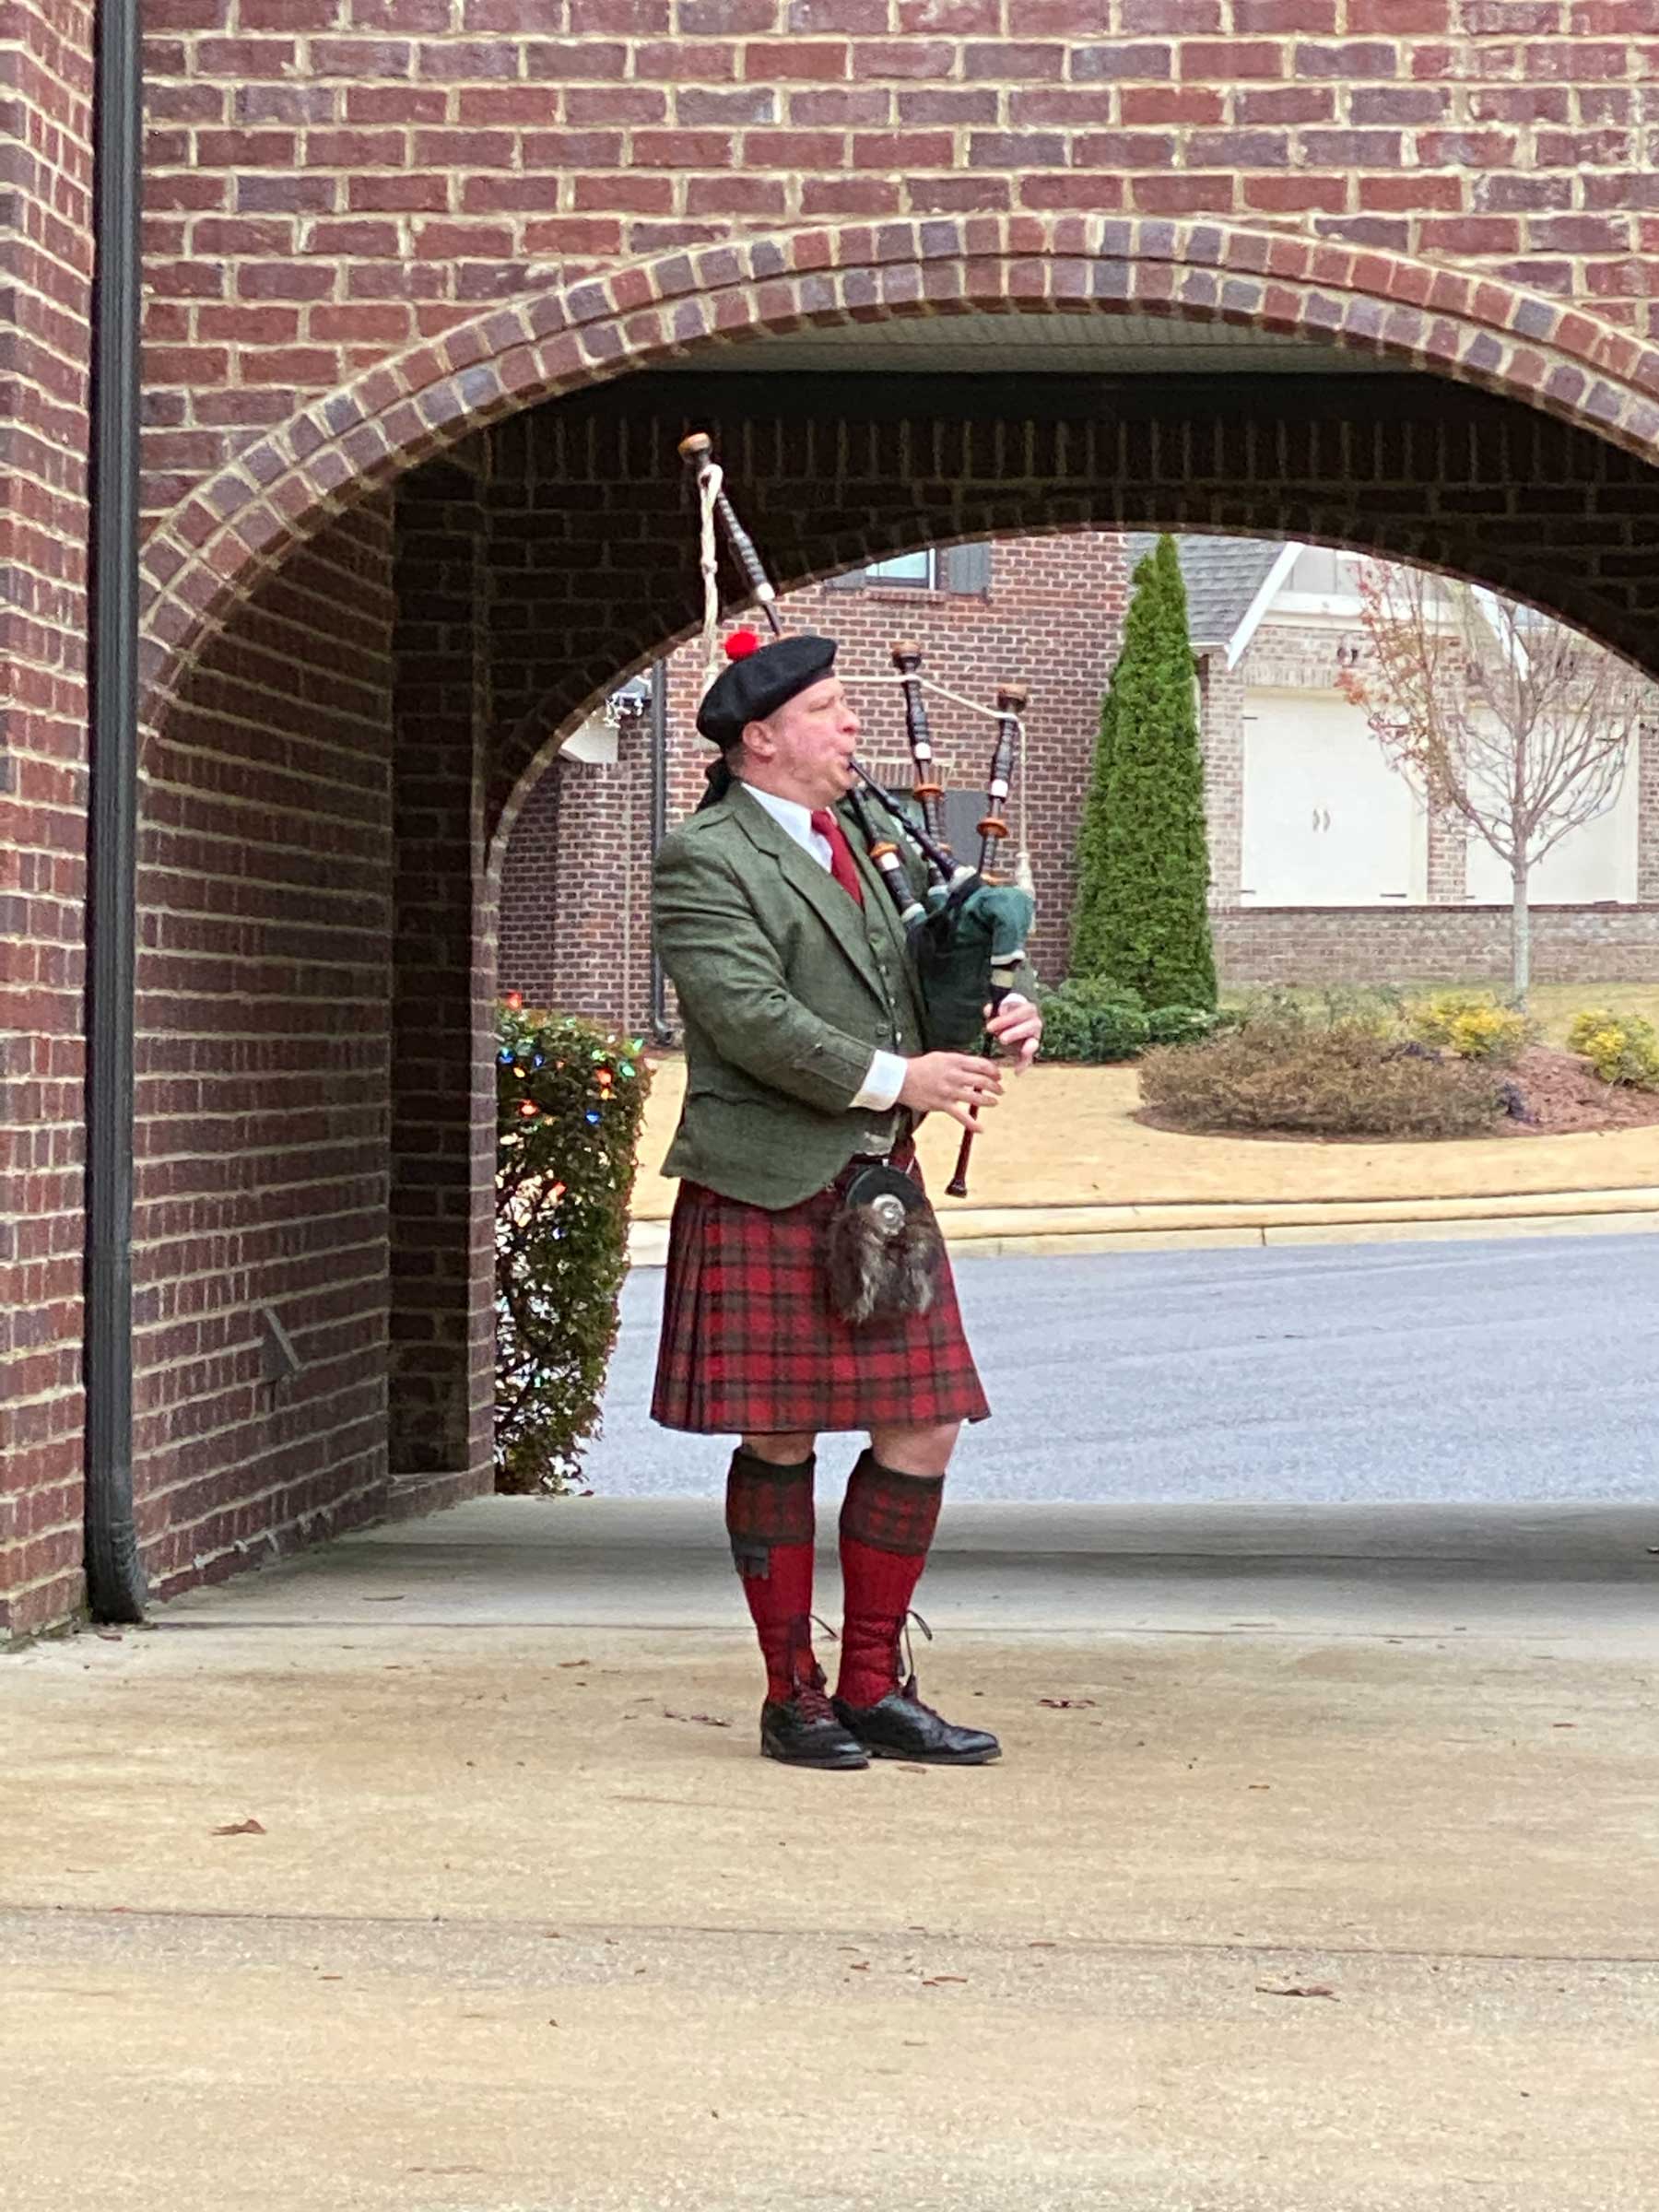
Before: A bagpiper standing in a residential driveway.
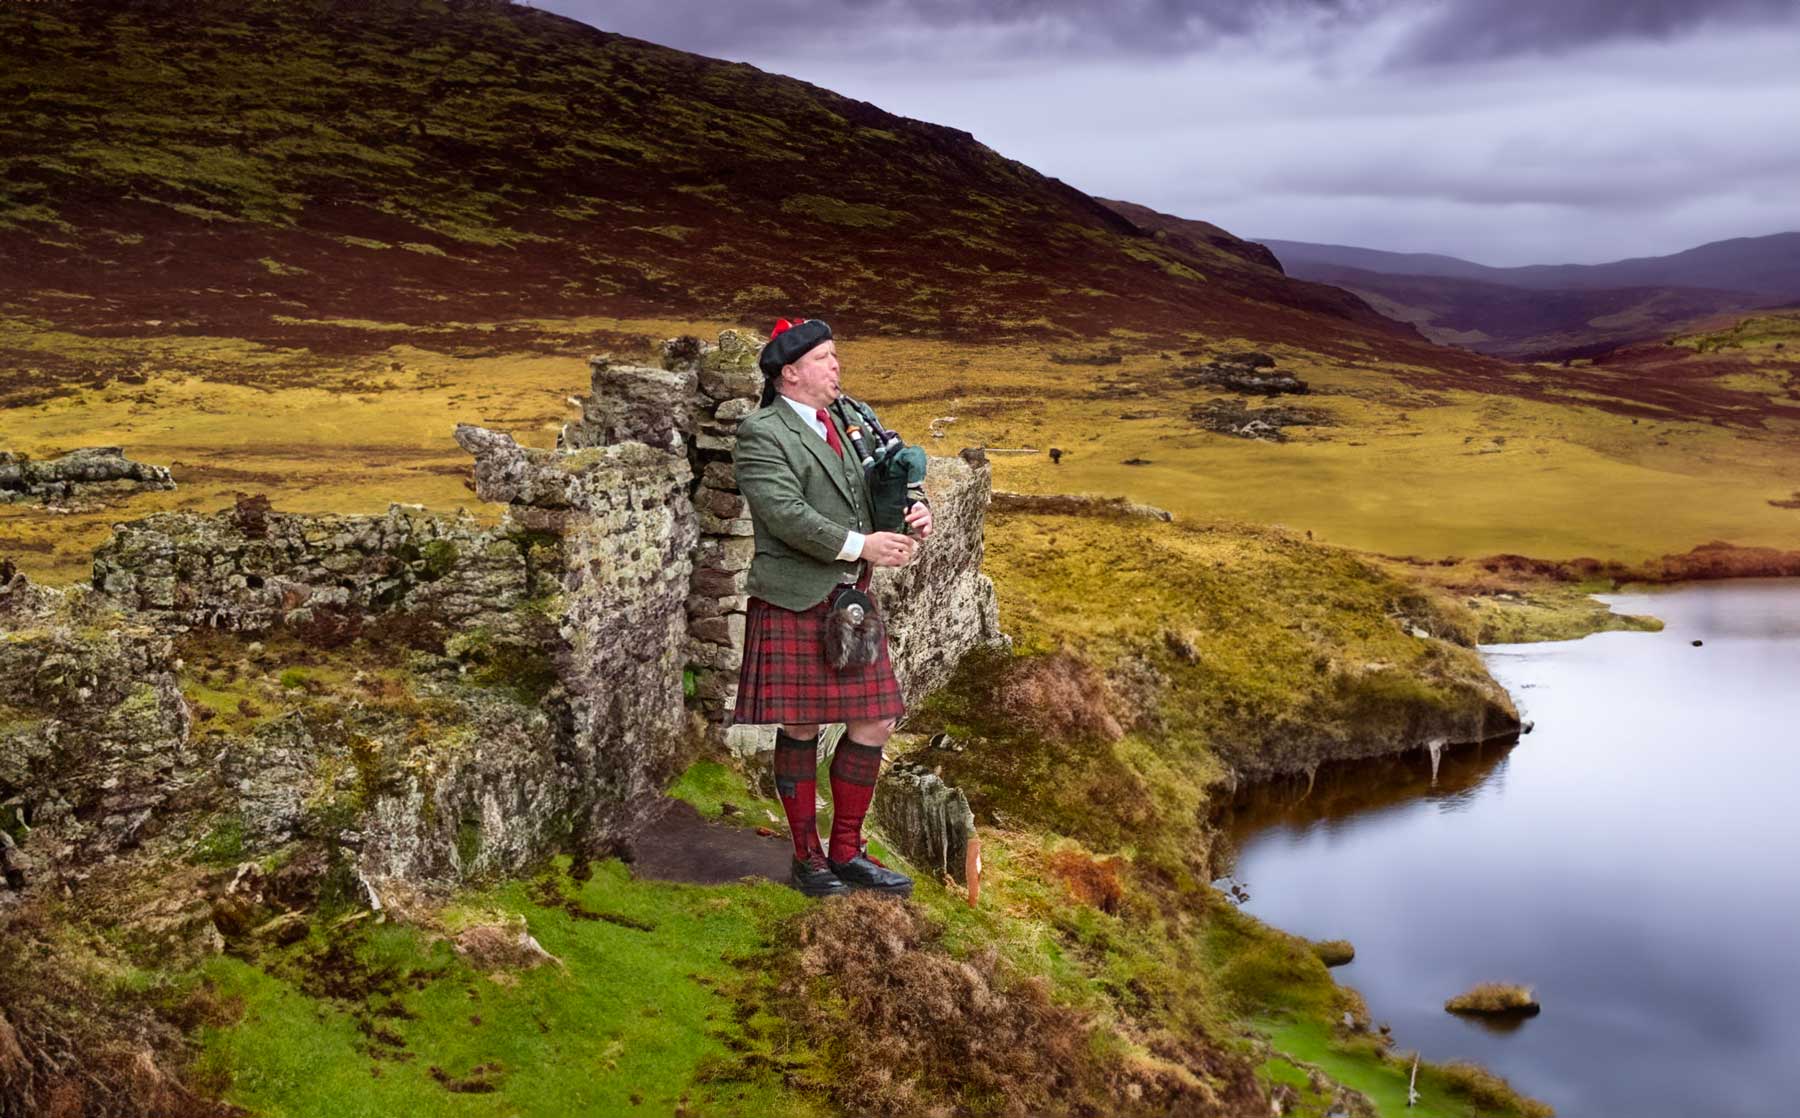
After: A bagpiper standing in the Scottish highlands on an overcast day. Ok, that’s pretty cool.
Composite image: We generated this from a blank canvas using only the rectangle selection tool and generative fill. Although pretty rough, it serves as a good starting point.

Photoshop AI Image Usage Rights
We could only end our article by mentioning the subject of generative fill and the usage rights of the photos it creates. Adobe has made it clear from the beginning that anything created with their AI programs is prohibited from using any images produced commercially. Now, this could be because they are currently in Beta. Adobe announced its plans to provide Firefly commercially, which may become more widely available soon. Regardless, you can create images to share with your friends on social media platforms or enjoy them for what they are as long as you aren’t profiting from them.
Final Thoughts on Photoshop AI Generative Fill
Photoshop AI is already an amazing tool, even in its beta form. Using the impressive AI-powered generative fill, you can alter images in nearly any way you imagine. While it does a good job of adding elements and removing backgrounds, it still has a long way to go. There are limitations, such as a maximum image size of 1024px, the lack of commercial image usage, and the need for better results for faces, hands, and animals. Undoubtedly, Adobe will continue to make improvements as the technology evolves.
We look forward to seeing how it develops while in beta. In the meantime, we can all have a little fun with it. Happy creating!
Want to learn more about AI? Check out some of our amazing tutorials to help you become an AI art superstar:
- How to Generate Beautiful AI Images with Stable Diffusion
- How to Use AI to Create Amazing Web Design with Divi (Using ChatGPT & MidJourney)
Featured Image via roilir / Shutterstock.com
The post How to Use Photoshop AI Generative Fill in 2023 (Detailed Tutorial) appeared first on Elegant Themes Blog.
The Tech Zone


Comments
Post a Comment